I can still smell the warm butter and buffalo spice the moment I open the oven door, and that smell always takes me back to a Saturday when the kids were small and the whole house hummed with chatter and plates clinking. I first made these Buffalo Chicken Bombs on an afternoon when the rain kept us in, and they turned a simple dinner into a memory we kept talking about for weeks. If you love little bites with big flavor, you might enjoy the same cozy thrill I felt the first time I pulled them hot from the pan and handed one to my husband. For a sibling idea with a different shape, I sometimes make a saucy slider version that my family also loves, and you can see how I turn big flavors into small sandwiches at my buffalo chicken sliders post.
Why This Buffalo Chicken Bombs Means So Much
This recipe feels like home because it brings people close in a small, simple way. Each little bomb is a pocket of warm filling that makes eating feel like an event. I think food has a way of doing that; a few good ingredients, a bit of heat, and everyone leans in. The first time I served these, my kids were sticky-fingered and full of stories from their day at school. We sat on mismatched chairs and still felt like we were at a tiny celebration.
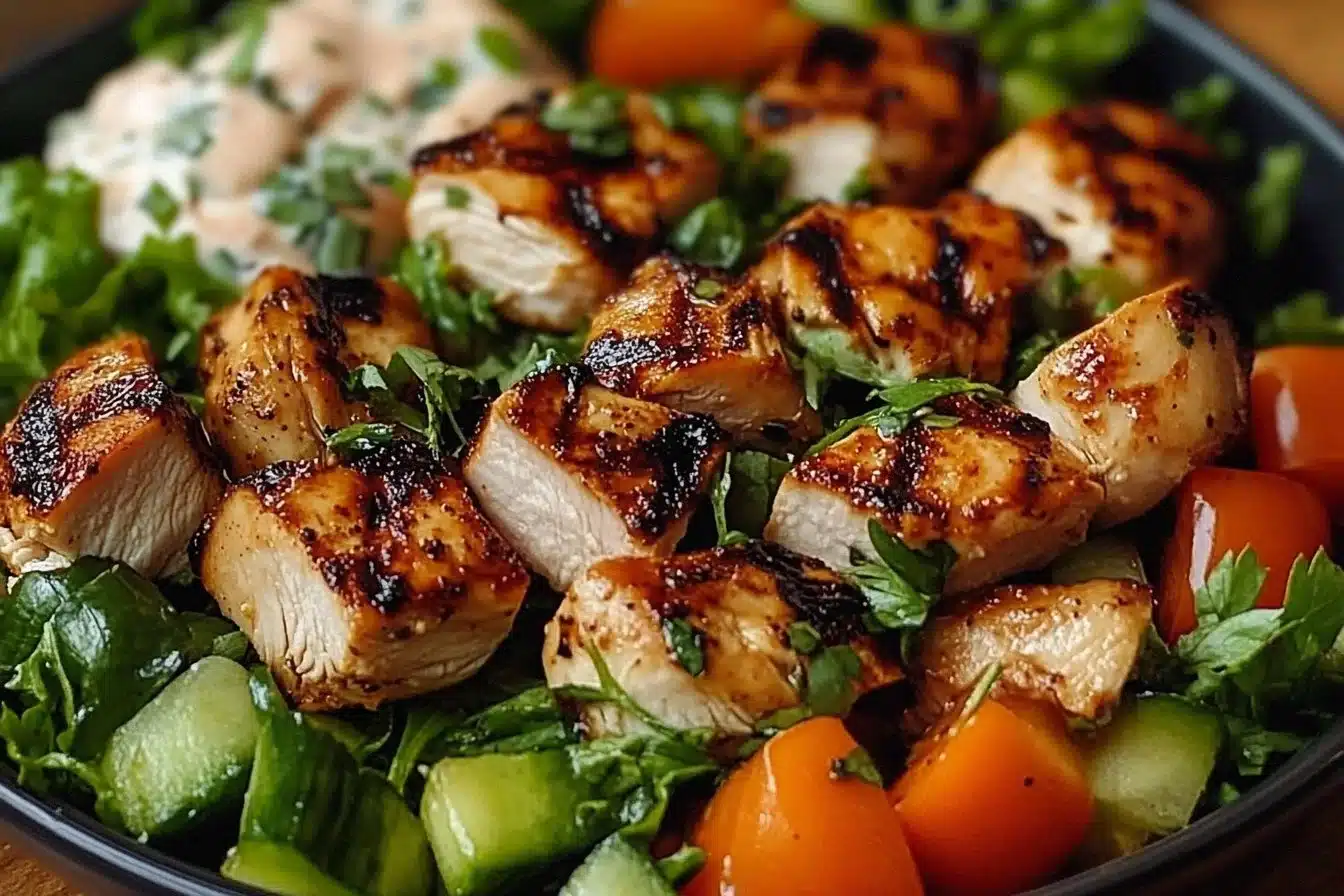
Buffalo Chicken Bombs also fit into those family rhythms where food is both fast and thoughtful. When my mornings run long, I rely on simple steps to make dinner feel like a gift. The crunchy edges, the soft cheese, and the bright snap of green onions make each bite lively. If you ever worry a recipe will be too hard for a weeknight, try swapping the chicken for something lightly charred from the oven for extra depth. For times when I want a crisp, roasted chicken note, I turn to techniques I learned while cooking other cuts, such as those I describe in this post about getting extra-crisp skin on thighs at air chilled chicken thighs with crispy skin.
There is also something playful about the name Buffalo Chicken Bombs. It promises a little drama, but it delivers pure comfort. You can serve these at a game night, a slow Sunday lunch, or a sudden visit from friends. They are small enough for sharing and satisfying enough to make a family feel fed and cared for. I like to think of them as edible hugs that happen to be wrapped in flaky dough.
The Story Behind Our Favorite Buffalo Chicken Bombs
My kitchen is full of recipes that got better with time because each version carried a tweak or two from someone I love. These bombs began as a way to use leftover rotisserie chicken. I wanted something warm, cheesy, and easy to hold. I opened a can of crescent dough one afternoon and thought, why not fill these like little parcels? The first batch was a hit, and I kept making them with small changes until they felt just right.
Each time I make them, I remember my mother folding dough for pies and my father teaching me how to taste as I cook. That idea of tasting as you go is important here. The filling is forgiving, so you can make it spicier for grown-up palates or milder for children. It’s a recipe that welcomes improvisation and tiny experiments. If one version has more buffalo sauce and another leans into extra cheese, both feel like home.
There is also a practical side to this recipe that I love. It stretches a little chicken into a plateful of joy. On days when the budget is tight or time is short, these bombs help me give my family a warm meal without fuss. They also travel well, so I sometimes bring them to a neighbor who needs an easy dinner and watch faces light up.
Bringing Buffalo Chicken Bombs Together
“Every time I stir this pot, it smells just like Sunday at home.”
Making Buffalo Chicken Bombs is about rhythm. You chop, you mix, you fill, and then the oven does the rest. I like to start by warming the chicken just enough to make it easy to shred. The buffalo sauce adds a lively color that tells you the filling is ready. When the cheese starts to melt in the oven, the whole kitchen hints at what is to come.
As you work, listen for small signs that tell you the dough and filling are ready. The filling should look moist but not soggy. When you pinch the dough, it should seal easily. The oven will do the final magic: puffing the dough and turning the edges golden. You will know they are done by the deep, toasty scent and the sight of bubbles of cheese peeking out to say hello.
If you want to try richer chicken flavors, a little attention to cooking methods can make a difference. I often teach home cooks how small choices, like air-chilling or high heat, change texture. For another approach to working with chicken pieces and getting that deep, savory taste, I describe simple steps in this guide to crisp, roasted thighs at air chilled chicken thighs, crispy skin.
Ingredients You’ll Need
2 cups shredded cooked chicken (a little extra shredded for hungry kids)
1/2 cup buffalo sauce (choose one you like, mild or hot for different moods)
1 cup shredded mozzarella cheese (freshly shredded melts better)
1 cup crescent roll dough (store-bought for speed or homemade for a treat)
1/4 cup green onions, chopped (they add a fresh snap)
1/2 teaspoon garlic powder (a gentle background note)
Salt and pepper to taste (always start light and add more as needed)
Warm side notes: add a small pat of butter brushed on top before baking for a soft, golden finish. For a cozy aroma, a touch of smoked paprika blends well with buffalo flavor and feels like a hug.
Step-by-Step Directions
Preheat your oven to 375°F (190°C).
Set a rack in the middle so the bombs get even heat. Warm air should wrap each one as they bake.In a mixing bowl, combine the shredded chicken, buffalo sauce, mozzarella cheese, green onions, garlic powder, salt, and pepper. Mix well.
Stir until glossy and well coated, and taste one small piece to check the spice. Adjust with more buffalo sauce or a pinch of salt.Unroll the crescent roll dough and separate it into triangles.
Keep the dough cold until you are ready to fill. Cold dough is easier to handle and puffs up nicely.Place a tablespoon of the buffalo chicken mixture on the widest part of each triangle.
Aim for modest mounds so the dough closes easily. The filling will warm and loosen as it bakes.Roll the dough up around the filling, starting from the wide end, and seal the edges.
Pinch the seams gently and tuck the ends under for neat bombs. You will like the little pocket shapes they make.Place the bombs on a baking sheet lined with parchment paper.
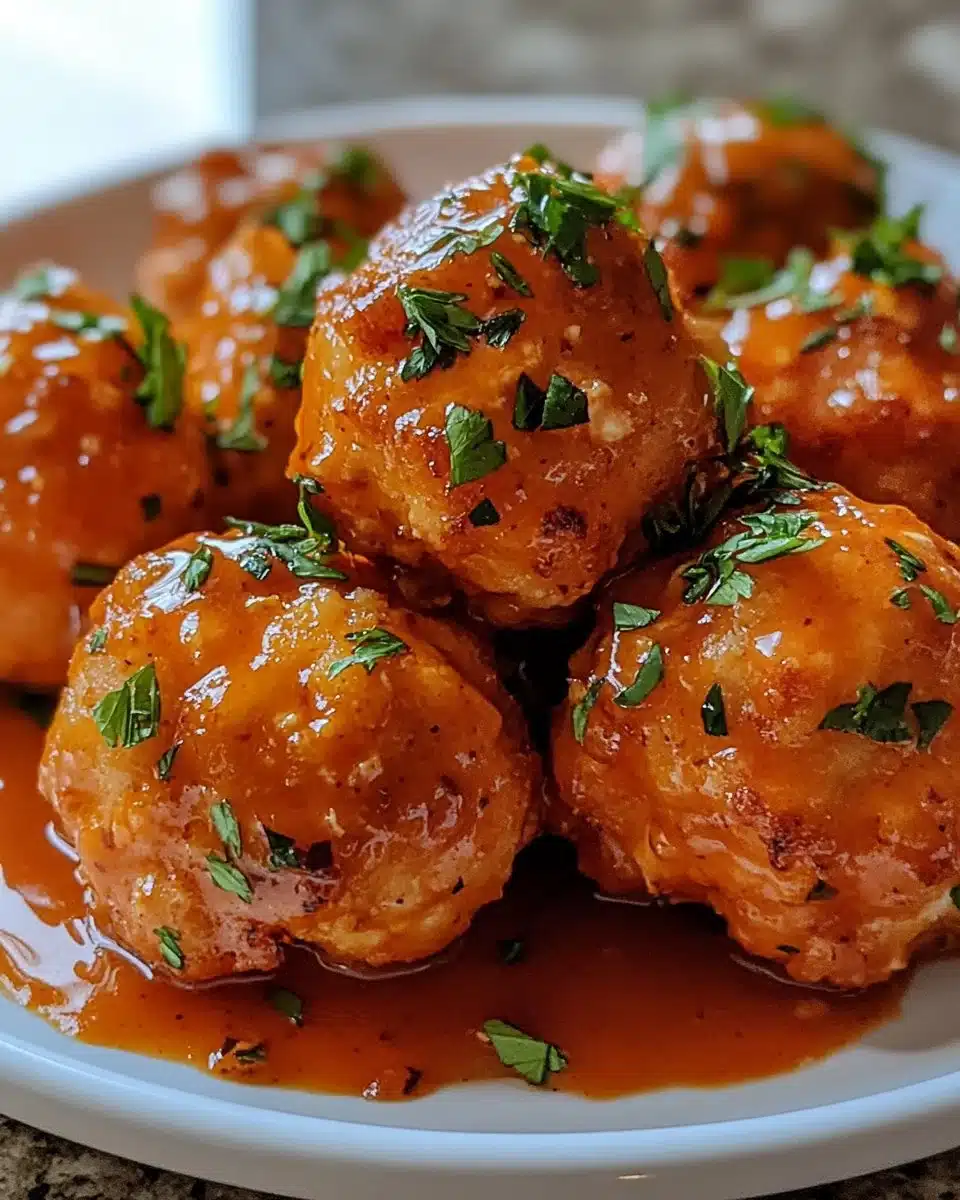
Give each one a little space so the heat moves round them. Brush with melted butter if you like a glossy finish.Bake for 12-15 minutes, or until golden brown.
Watch for the edges to turn golden and the cheese to soften. The kitchen will fill with a warm, tangy smell.Serve warm and enjoy your flavorful Buffalo Chicken Bombs!
Let them rest for a minute or two so the filling settles. Breathe in the aroma and pass around a bowl for dipping.

Serving Buffalo Chicken Bombs With Family Warmth
We serve these on a big board right from the oven so everyone can reach in. I like to arrange them in a loose circle with a small dish of blue cheese or ranch in the middle. That simple presentation makes a meal feel like a small party. The kids always like to pick theirs up and see the soft steam rise when the bombs are split open.
If you want a heartier plate, pair the bombs with crunchy carrot and celery sticks. They give a clean contrast to the rich, spicy filling. For a more grown-up night, a bowl of mixed greens tossed with lemon and olive oil brightens the table and balances the richness. When guests come, I put out a few napkins and a small tray for crumbs so everyone can relax between bites.
These bombs are also great for packed lunches or a picnic. Wrap a few in foil while they are still warm and include a small container of sauce. They travel well and stay tender, especially if you give them a quick reheat in a toaster oven. If you enjoy more saucy or layered chicken dishes, you might like the playful flavors I use in a recipe I call Angel Chicken, which shows another way to keep food simple and special at angel chicken.
Small Traditions and Little Tricks at Our Table
Every family has rituals, and ours became to pass the first bomb to whoever had the funniest story that day. It sounds small, but it made our dinners feel full of warmth. I also keep a small spice jar of extra buffalo sauce on the table for those who want it bold. A sprinkle of chopped fresh parsley on top brightens the look and gives a fresh note to the bite.
I teach my kids to fold the dough with care so the filling stays in. It became a little lesson in patience and pride. Letting them help shape the bombs turned dinner into an activity we all remembered. Small hands enjoy pressing the seams and giving the final brush of butter.
For holiday gatherings, I sometimes make a double batch and keep the extra bombs warm in a low oven. They hold their texture well for a short time, and people love grabbing them between conversations. The ease of these bombs means I spend less time in the kitchen and more time listening to stories.
How to Save the Leftovers
Leftovers are a gift when handled with care. Place any cooled bombs in an airtight container with a paper towel to absorb extra moisture. They will keep well in the fridge for up to three days. When you reheat them, use a toaster oven or a regular oven to help the dough regain crispness.
If you want to freeze them, arrange the cooled bombs on a baking sheet so they do not touch, and freeze until solid. Then move them to a freezer bag with a sheet of parchment between layers. They will keep for up to two months this way. To reheat from frozen, bake at 375°F until heated through, about 20 to 25 minutes, and you will have nearly fresh-baked texture.
These bombs often taste a little more mellow the next day as the buffalo sauce blends with the cheese and chicken. The flavors deepen and become comforting in a way that makes them perfect for a slow Sunday lunch. For a tangy contrast, serve a fresh lemony side or quick salad. If you enjoy saving dishes that taste brighter with time, I sometimes revisit flavor balances in dishes like my lemon and zucchini chicken, which has tips you can borrow at asado chicken with lemon zucchini.
Make-Ahead, Freezing, and Meal Prep Tips
I often make a few batches ahead for busy weeks. If you plan to bake later, assemble the bombs and place them on a tray covered in plastic wrap. Store them in the fridge for up to 24 hours before baking. This makes the final step quick and stress-free. You can also freeze assembled bombs before baking. Bake from frozen, adding a few extra minutes to the bake time.
When I prep, I make the filling in a large bowl and keep it chilled. This lets me shape many bombs quickly when the dough is ready. If you are feeding a crowd, set up a little assembly line: dough, filling, rolling, baking tray. It turns a task into something social and light. Children can help with the simpler steps under supervision.
For the freezer, label your bags with the date and bake time idea. That way, when a busy night arrives, you can pull out a friendly meal that feels homemade. A quick salad and a bowl of cut vegetables make a full plate without much thought.
Variations and Flavor Swaps
This recipe is a perfect canvas for change. Try swapping mozzarella for pepper jack to give the bomb a cheesy kick. Add a spoonful of cream cheese to the filling for extra silkiness. For a smoky turn, mix in a little smoked paprika or a dash of cayenne.
If you want to make these vegetarian, substitute shredded cooked cauliflower or a hearty mix of beans and roasted peppers. The crescent dough works the same and the result is still small and warm. For a Caribbean twist, toss the shredded chicken with a touch of jerk seasoning and swap green onions for fresh cilantro.
For a lighter version, use reduced-fat cheese and whole grain dough. The texture will be slightly different, but the comforting shape and the scent will remain. When I try variations, I keep one batch classic so everyone can compare.
Kid-Friendly Tips and Serving Ideas
Kids often eat with their eyes first. Trim the bombs to bite-sized pieces at the table for younger hands. Serve with small cups of ranch or honey for dipping. I sometimes add a small side of apple slices to give a cool, sweet counterpoint to the spicy filling.
Involve children in sprinkling the cheese or folding the dough. It makes them proud to eat what they helped make. Keep a mild batch with less buffalo sauce for little ones and a hotter batch for adults. This simple split keeps everyone happy.
If you are serving toddlers, cut the bombs into thin slices and check the temperature. The filling stays hot, so a little patience and a careful hand make mealtime safer.
Equipment, Timing, and Little Kitchen Know-How
You do not need fancy tools for these bombs. A sharp knife, a mixing bowl, and a baking sheet are enough. Parchment paper saves cleanup and helps the bottoms brown evenly. A silicone brush helps spread butter or egg wash if you want gloss.
Timing matters more than gear. Keep the dough cool until shaping so it is less sticky. Warm filling will make the dough soft and harder to seal. If the kitchen is warm, chill the bowl of filling for a few minutes. This simple pause helps keep the pockets neat.
Watch the oven in the last few minutes. An oven that runs hot may brown the edges before the cheese softens. If that happens, lower the rack a notch for the next batch. Cooking is about small adjustments and tasting as you go.
Troubleshooting Common Issues
If the dough opens while baking, it usually means the seam was not sealed tightly. Pinch more firmly or tuck the edge under. A little egg wash can help glue seams. If the filling leaks, it was likely overfilled. Use slightly less filling next time and aim for a modest spoonful.
If the bottoms get too dark, move the tray to a higher rack. If they do not brown enough, bake a few minutes longer and check often. For soggy centers, the filling was too wet. Drain excess sauce or add a tablespoon of breadcrumbs to give the mixture more body.
If you find the bombs are not spicy enough, serve extra buffalo sauce on the side. If they are too spicy, a dollop of sour cream or cream cheese helps calm the heat. Small shifts make recipes fit your family’s taste.
A Note on Safety and Feeding the Crowd
When making food for others, keep food safety in mind. Cool cooked chicken quickly and refrigerate it until you use it. If you are hosting a party, keep hot dishes on a warm tray so they stay safe to eat. Do not leave perishable foods out for more than two hours.
If you make a big batch for a crowd, label bowls with the spice level. This little note prevents surprises and keeps guests comfortable. When children or older adults are present, slice one open to check the center temperature and avoid burns.
Conclusion
These Buffalo Chicken Bombs are a small thing that brings big comfort, and they stay true to how I cook for my family: with heart, a bit of play, and a respect for simple ingredients. If you want to see another take on this idea from a family-friendly kitchen, the classic version at Buffalo Chicken Bombs – Family Fresh Meals shows a similar approach. For a homestead-style spin and ideas for outdoor-friendly cooking, take a look at the version found at Buffalo Chicken Bombs – I Am Homesteader.
Print
Buffalo Chicken Bombs
- Total Time: 30 minutes
- Yield: 8 servings 1x
- Diet: Non-Vegetarian
Description
Crispy, cheesy bites filled with spicy buffalo chicken perfect for sharing and cozy family gatherings.
Ingredients
- 2 cups shredded cooked chicken
- 1/2 cup buffalo sauce
- 1 cup shredded mozzarella cheese
- 1 cup crescent roll dough
- 1/4 cup green onions, chopped
- 1/2 teaspoon garlic powder
- Salt and pepper to taste
- Butter for brushing on top (optional)
Instructions
- Preheat your oven to 375°F (190°C) and set a rack in the middle.
- In a mixing bowl, combine the shredded chicken, buffalo sauce, mozzarella cheese, green onions, garlic powder, salt, and pepper. Mix well.
- Unroll the crescent roll dough and separate it into triangles.
- Place a tablespoon of the buffalo chicken mixture on the widest part of each triangle and roll the dough up around the filling, sealing the edges.
- Place the bombs on a baking sheet lined with parchment paper and brush with melted butter if desired.
- Bake for 12-15 minutes, or until golden brown.
- Serve warm with dipping sauce on the side.
Notes
These can be made ahead and stored in the fridge for up to 24 hours before baking, or frozen for later use.
- Prep Time: 15 minutes
- Cook Time: 15 minutes
- Category: Appetizer
- Method: Baking
- Cuisine: American
Nutrition
- Serving Size: 1 serving
- Calories: 300
- Sugar: 2g
- Sodium: 600mg
- Fat: 18g
- Saturated Fat: 8g
- Unsaturated Fat: 8g
- Trans Fat: 0g
- Carbohydrates: 26g
- Fiber: 2g
- Protein: 15g
- Cholesterol: 40mg
Keywords: buffalo chicken, appetizers, party food, comfort food, family meal