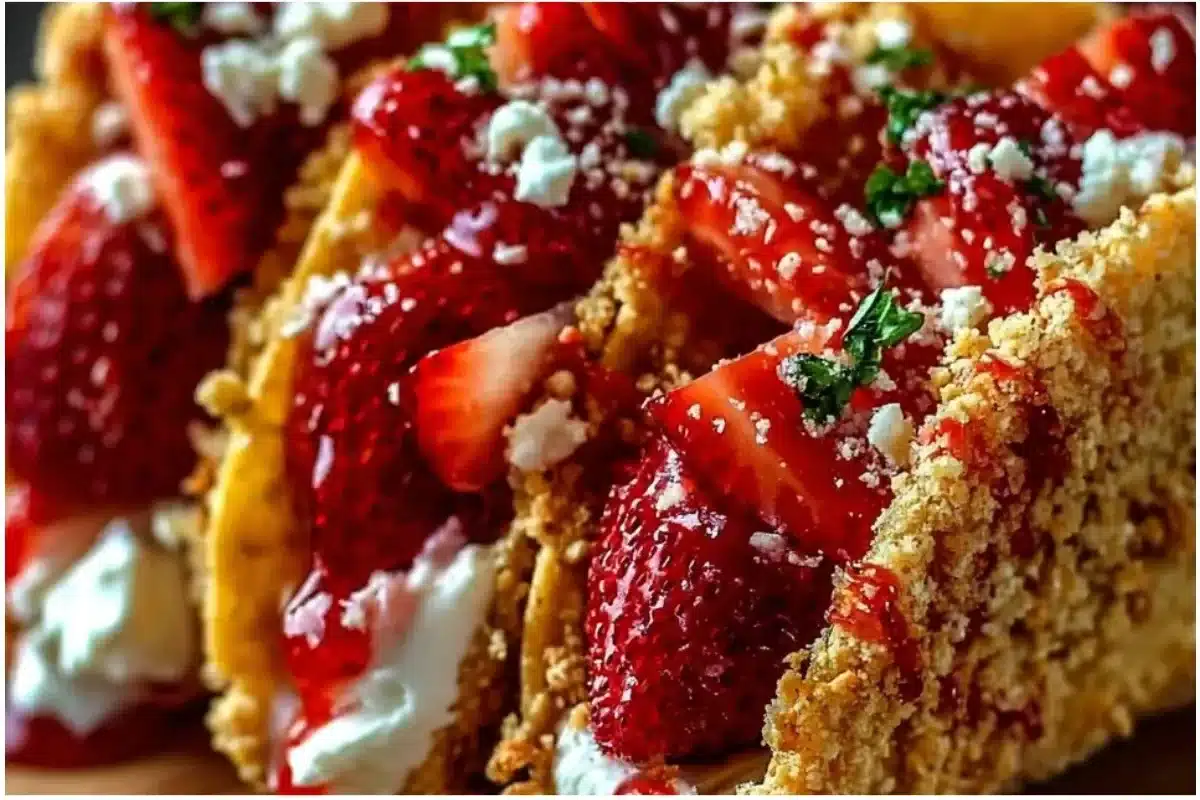
Bright, bold, and a little bit playful — Strawberry Crunch Cheesecake Tacos turn the idea of dessert tacos into a serious showstopper. Whether you’re feeding a summer crowd, planning a picnic, or just want a fun twist on classic strawberry cheesecake, this recipe balances creamy, tangy filling with a crisp, crunchy taco shell and bursts of fresh fruit. Read on for chef-tested techniques, ingredient science, pro tips, and make-ahead strategies so every taco is perfectly textured and brilliantly flavored.
If you already love the format, check out my classic guide to cheesecake tacos for more shell and filling ideas before we dive in.
Why this recipe matters
- It solves the textural challenge dessert tacos face: soggy shells and runny filling.
- It adapts easily to seasonality — use fresh strawberries in summer or roasted frozen berries in winter.
- It’s accessible: no water bath baking required unless you prefer a baked cheesecake filling.
What you’ll get from this article
- A step-by-step, restaurant-grade Strawberry Crunch Cheesecake Tacos recipe.
- The cooking logic behind each component so you can tweak confidently.
- Storage guidance, nutrition insight, and creative variations to suit dietary needs.
What makes a great Strawberry Crunch Cheesecake Taco?
Two things: a stable, creamy cheesecake filling and a shell that stays crisp while complementing, not overpowering, the filling. The “crunch” element gives contrast — think toasted graham clusters, crushed freeze-dried strawberries, or a light nut crunch like pistachios. Balance, temperature, and moisture control are the technical keys.
Chef note: Cream cheese provides body and tang, sour cream or Greek yogurt adds silkiness and acidity, and a stabilizer (gelatin, cornstarch, or even melted white chocolate) helps the filling hold shape inside a shallow taco shell. We’ll use a no-bake stabilized cheesecake filling for effortless assembly.
Print
Strawberry Crunch Cheesecake Tacos
- Total Time: 180 minutes
- Yield: 12 tacos (serves 6-8) 1x
- Diet: Vegetarian
Description
Bright, bold, and playful, Strawberry Crunch Cheesecake Tacos combine creamy cheesecake filling with crispy taco shells and fresh strawberries for a delightful dessert twist.
Ingredients
- 6 small flour tortillas (6-inch) or 12 mini tortillas
- 3 tbsp unsalted butter, melted
- 1/2 cup graham cracker crumbs
- 2 tbsp granulated sugar
- 1 tsp ground cinnamon
- 16 oz (450 g) full-fat cream cheese, room temperature
- 1/2 cup powdered sugar (confectioners’ sugar)
- 1 tsp pure vanilla extract
- 1 tbsp lemon juice (fresh)
- 3/4 cup heavy cream, cold
- 1 tsp gelatin powder + 2 tbsp cold water (or 1/2 tsp agar-agar)
- 1 lb (450 g) fresh strawberries, hulled and sliced
- 2 tbsp granulated sugar (or honey)
- 1 tsp balsamic vinegar (optional, for depth)
- 1/2 cup crushed freeze-dried strawberries or crushed toasted pistachios
- Extra graham crumbs for garnish
Instructions
- Preheat oven to 375°F (190°C). Brush each tortilla lightly with melted butter on both sides.
- Combine graham crumbs, sugar, and cinnamon on a plate. Press tortillas into crumbs to coat both sides evenly.
- Drape tortillas over taco molds or inverted oven-safe bowls on a baking sheet and bake for 8–12 minutes until golden and crisp. Cool completely on molds to maintain shape.
- Sprinkle gelatin over 2 tbsp cold water and let sit for 5 minutes. Warm gently until dissolved (do not boil) and cool slightly.
- Beat cream cheese and powdered sugar on medium speed until smooth (2-3 minutes). Add vanilla and lemon juice.
- In a separate bowl, whip heavy cream to soft peaks. Fold whipped cream into cream cheese mixture. Slowly whisk in the warm gelatin and chill the filling for 15–20 minutes until spreadable.
- Toss sliced strawberries with sugar and balsamic (if using) and let sit for 10–15 minutes to draw juices.
- Pipe or spoon about 2–3 tablespoons of filling into each cooled shell. Top with macerated strawberries, a sprinkle of crushed freeze-dried strawberries or pistachios, and a pinch of graham crumbs.
- Chill assembled tacos for 30–60 minutes to set fully. Serve chilled.
Notes
For a vegan option, use a cashew-based cheesecake filling and coconut cream. Store shells and filling separately for optimal texture.
- Prep Time: 35 minutes
- Cook Time: 12 minutes
- Category: Dessert
- Method: No-Bake
- Cuisine: American
Nutrition
- Serving Size: 1 taco
- Calories: 260
- Sugar: 15g
- Sodium: 180mg
- Fat: 18g
- Saturated Fat: 10g
- Unsaturated Fat: 4g
- Trans Fat: 0g
- Carbohydrates: 22g
- Fiber: 2g
- Protein: 4g
- Cholesterol: 60mg
Keywords: strawberry, cheesecake, tacos, dessert, summer
Ingredient breakdown — science, purpose, and benefits
Here’s each major ingredient, why it belongs, and how to approach swaps.
Cream cheese (full-fat preferred)
- Purpose: structure, tang, richness.
- Science: high fat content creates a stable emulsion with sugar and dairy; chilling firms it up.
- Swap: Neufchâtel or part-skim cream cheese for lighter versions; note lower fat affects mouthfeel.
Heavy cream (or whipped cream fold-in)
- Purpose: lightens the dense cream cheese, creates a whipped texture.
- Science: whipped cream traps air; folding preserves aeration while keeping stability.
- Swap: whipped coconut cream for dairy-free; results differ in flavor and stability.
Powdered sugar (confectioners’ sugar)
- Purpose: sweetening without graininess; helps with texture.
- Science: cornstarch in confectioners’ sugar helps absorb moisture and stabilize.
- Swap: powdered erythritol or stevia blends for low-sugar options (adjust volume/texture).
Gelatin (unflavored) or agar-agar for vegetarian
- Purpose: sets the filling so it holds a taco shape and won’t ooze.
- Science: gelatin forms a thermally reversible gel when hydrated and heated; cold sets to a firm, yet tender gel.
- Swap: agar-agar sets more firmly and is heat-stable, but can be brittle if overused.
Fresh strawberries
- Purpose: freshness, acidity, natural sweetness, and color.
- Science: maceration with a touch of sugar draws juices and softens fruit — use those juices as a finishing glaze or swirl.
- Swap: blueberries, raspberries, or peach slices for seasonal variations.
Graham crackers / digestive biscuits / cinnamon sugar tortillas
- Purpose: base for crunch — used both for shell coating and topping.
- Science: dry crumbs create a barrier on the shell when bound with butter, reducing sogginess.
- Swap: gluten-free cookies, crushed nuts, or cereal like Rice Krispies for different textures.
Tortillas (flour or corn), or pre-baked taco shells
- Purpose: vessel.
- Science: flour tortillas are pliable and crisps evenly when baked; corn tortillas can crack. Baking or frying drives off moisture and firms the shell.
- Swap: cookie-based shells (baked sugar tortillas) or waffle cones for novelty.
Optional: freeze-dried strawberry powder, toasted oats, pistachios
- Purpose: amplifies strawberry flavor and adds stable crunch that resists moisture.
- Chef tip: freeze-dried strawberry pieces are crunchy and keep their power even against juicy fruit.
Health/seasonal benefits
- Strawberries are an excellent source of vitamin C and polyphenols. For lighter versions, replace half of the cream cheese with Greek yogurt for increased protein and fewer calories (see notes in the Nutrition section).
- For diet-friendly desserts, serve smaller, thinner tacos and focus on intense flavor and crunch to satisfy without excess calories.
Tools you’ll need
- Small tart or taco-shaped molds (metal or oven-safe bowls over inverted muffin tins work)
- Electric mixer (stand or handheld)
- Saucepan for gelatin bloom
- Baking sheet and parchment
- Fine sieve for fruit glaze
- Offset spatula or piping bag for neat assembly
Strawberry Crunch Cheesecake Tacos — full recipe card
Yield: 12 small tacos (serves 6–8)
Prep time: 35 minutes (plus chill time)
Cook time: 12–15 minutes (shells)
Chill time: 2 hours (or overnight)
Total time: approx. 3 hours
Ingredients
- For the shells
- 6 small flour tortillas (6-inch) or 12 mini tortillas
- 3 tbsp unsalted butter, melted
- 1/2 cup graham cracker crumbs
- 2 tbsp granulated sugar
- 1 tsp ground cinnamon
- For the cheesecake filling
- 16 oz (450 g) full-fat cream cheese, room temperature
- 1/2 cup powdered sugar (confectioners’ sugar)
- 1 tsp pure vanilla extract
- 1 tbsp lemon juice (fresh)
- 3/4 cup heavy cream, cold
- 1 tsp gelatin powder + 2 tbsp cold water (or 1/2 tsp agar-agar)
- For the strawberry topping
- 1 lb (450 g) fresh strawberries, hulled and sliced
- 2 tbsp granulated sugar (or honey)
- 1 tsp balsamic vinegar (optional, for depth)
- For the crunch finishing
- 1/2 cup crushed freeze-dried strawberries or crushed toasted pistachios
- Extra graham crumbs for garnish
Method
- Prepare shells: Preheat oven to 375°F (190°C). Brush each tortilla lightly with melted butter on both sides. Combine graham crumbs, sugar, and cinnamon on a plate. Press tortillas into crumbs to coat both sides evenly. Drape tortillas over taco molds or inverted oven-safe bowls on a baking sheet and bake 8–12 minutes until golden and crisp. Cool completely on molds to maintain shape.
- Bloom gelatin: Sprinkle gelatin over 2 tbsp cold water and let sit 5 minutes. Warm gently until dissolved (do not boil) and cool slightly.
- Make filling: Beat cream cheese and powdered sugar on medium speed until smooth and lump-free (2–3 minutes). Add vanilla and lemon juice. In a separate bowl, whip heavy cream to soft peaks. Fold whipped cream into cream cheese mixture. Slowly whisk in the warm gelatin. Chill the filling 15–20 minutes until spreadable but not set.
- Macerate strawberries: Toss sliced strawberries with sugar and balsamic (if using) and let sit 10–15 minutes to draw juices.
- Assemble: Pipe or spoon about 2–3 tablespoons of filling into each cooled shell. Top with macerated strawberries, a sprinkle of crushed freeze-dried strawberries or pistachios, and a pinch of graham crumbs.
- Chill & serve: Chill assembled tacos 30–60 minutes to set fully. Serve chilled.
Chef tips throughout the card:
- If using agar-agar, bring mixture to a gentle simmer to dissolve, then cool before adding to the filling.
- For extra stability, reduce heavy cream to 1/2 cup and increase gelatin by 1/4 tsp.
- Use a piping bag with a wide tip for neat, restaurant-style filling.
Step-by-step method with real cooking insights
Baking crisp shells that stay crisp
- Why it matters: A soggy shell kills the experience.
- Technique: Brush tortillas lightly but thoroughly with melted butter — not too much or they’ll become greasy. The butter helps graham crumbs and sugar adhere, creates flavor, and drives crispness. Bake at 375°F until golden; cooling on the mold preserves shape. If you skip the coating, at minimum bake shells fully until they feel brittle.
- Alternative: Fry briefly in 2 tbsp oil for ultra-crisp shells, but drain well to avoid oil flavor transfer to the filling.
Stabilizing no-bake cheesecake filling
- Key insight: Cold, high-fat fillings will be scoopable but can weep over time. Gelatin or agar-agar ensures the filling holds shape when scooped into delicate shells.
- Technique: Always bloom gelatin in cold water first — this prevents clumping — and warm gently to dissolve. Allow the dissolved gelatin to cool slightly before adding to avoid melting whipped cream. Incorporate gelatin slowly and fold gently to retain air.
- For quick sets: Use 1 tsp powdered gelatin for firmer results if you plan to pipe tall mounds.
Balancing sweetness and acidity
- Strawberries bring natural acidity. Lemon juice in the filling brightens and cuts through richness. Taste as you go: the mixture should be pleasantly tangy but not sour.
- If using very sweet fruit, reduce powdered sugar by 1–2 tbsp.
Adding crunch that resists moisture
- Freeze-dried strawberry pieces retain crunch next to juicy fruit, unlike nuts that can absorb moisture. Toasted oats or quick-crisped cereal (lightly toasted for a few minutes) also perform well.
- To keep a crunchy rim: mix crumbs with a small amount of melted butter to create a slight moisture barrier on the shell surface.
Assembly order
- Fill shells just before serving for best texture. If you must assemble ahead, keep shells and filling separate and store shells in an airtight container with a paper towel to maintain dryness.
Tips, pro advice, and mistakes to avoid
Pro tips
- Room temperature cream cheese mixes smoother. Warm too long and it’s greasy; cold cream cheese lumps. Aim for soft but still cool.
- If your filling is too runny after adding gelatin, refrigerate briefly (20–40 minutes) to firm up. If it becomes too firm, gently whip a splash of cream to loosen.
- Use a piping bag for uniform portions; a wide round or petal tip works well.
- For a showpiece, glaze strawberries with a thin apricot jam warmed and sieved to shine fruit without pooling.
Common mistakes and fixes
- Soggy shells: Bake longer and ensure they cool on a mold. Re-crisp by returning to a 325°F oven for 5 minutes.
- Lumpy filling: Overworked low-fat cream cheese or cold lumps cause a curdled texture. Beat until smooth, and pass through a fine mesh if necessary.
- Gelatin clumps: Always bloom gelatin in cold water. If you see clumps, warm gently to dissolve and strain before adding.
- Too sweet: Taste the filling before folding in whipped cream; sweetness perception changes when air is incorporated.
Variations and swaps
Seasonal or dietary modifications you can make without sacrificing structure or flavor:
- Keto / low-sugar: Use full-fat cream cheese, swap powdered sugar for erythritol powdered substitute, and use almond flour + butter to dust the shell. You can also use low-carb tortillas or make a nut crust shell.
- Lighter / higher-protein: Replace half the cream cheese with Greek yogurt (strained for thickness) and omit heavy cream. Add 1/2 tsp gelatin for structure.
- Vegan: Use a firm cashew-based cheesecake (soaked cashews processed with coconut cream and agar-agar) and coconut cream for whipping. Use coconut oil instead of butter for shells.
- Fruit swaps: Replace strawberries with peaches, blueberries, or macerated raspberries. For an autumn twist try baked apple compote and a pinch of pumpkin spice.
- Nutty crunch: Use crushed pistachios or toasted almonds for a Mediterranean flavor (think of combining with a honey drizzle).
- Dessert mashup inspiration: For a playful savory-sweet board, serve with small portions of candied salmon for tacos and bowls as a contrasting savory option at a party.
Fancy variations
- Strawberry balsamic reduction: Reduce 1/2 cup strawberry puree with 1 tbsp balsamic and 1 tbsp sugar until syrupy. Drizzle lightly over tacos for acidity and gloss.
- Layered swirl filling: Fold a puree swirl (thickened with a touch of gelatin) into half the filling for visual contrast.
For a more autumnal cheesecake taco, take cues from our caramel-apple-cheesecake recipe and swap strawberries for cinnamon apples with a caramel drizzle.
Storage and reheating
Short-term
- Assembled tacos: Best eaten within 24 hours. Store in a single layer in a covered container in the refrigerator. Place a sheet of parchment between layers to prevent sticking.
- Unassembled components: Shells in an airtight container at room temperature for up to 3 days (with a paper towel to absorb residual moisture). Filling in refrigerator for up to 3 days, covered.
Freezing
- Filling: You can freeze the cheesecake filling in an airtight container for up to 2 months. Thaw overnight in the refrigerator and re-whip lightly to restore texture before assembly.
- Assembled tacos: Not recommended — freezing will ruin shell crispness.
Reheating crisp shells
- If shells lose crispness, re-crisp in the oven at 300°F for 5–7 minutes. Let cool fully before refilling.
Transporting for events
- Pack shells and filling separately. Bring a cooler with ice packs if traveling long distances and assemble on site for best results.
Nutrition insights
Estimated nutrition per taco (based on 12 tacos, full-fat ingredients):
Calories: ~220–260 kcal | Protein: 3–4 g | Fat: 16–18 g | Carbs: 18–22 g | Sugar: 12–15 g
Notes:
- Using part-skim cream cheese and Greek yogurt reduces calories and increases protein.
- Reducing powdered sugar and relying on sweetened fruit cuts added sugar.
- Replace heavy cream with whipped aquafaba for vegan and lower-fat options (note texture differences).
Ingredient swap effects on nutrition
- Greek yogurt swap: Increases protein by 3–5 g per taco, reduces fat by 4–6 g.
- Nut-crusted shells: Increase healthy fats and calories; lower GI impact.
- Smaller taco size: Serving 18 mini tacos instead of 12 reduces calories per piece while keeping indulgence controlled.
If you track macros for specific diets, weigh your final assembled portions and use a nutrition calculator for accurate values. For protein-focused desserts, try our tips in the Ricotta and Greek-yogurt content across the site to learn how to boost protein without losing creaminess.
FAQs (schema-ready style)
Q: Are Strawberry Crunch Cheesecake Tacos made with baked or no-bake filling?
A: This recipe uses a stabilized no-bake cheesecake filling (gelatin or agar-agar) for a creamy, scoopable texture that holds in a taco shell. You can use a baked cheesecake filling, but it requires slicing or scooping very precisely and risks moisture transfer to the shell.
Q: How long can I assemble the tacos ahead of time?
A: Assembled tacos are best served within 24 hours. For longer prep, keep shells and filling separate and assemble 1–2 hours before serving.
Q: Can I make the shells gluten-free?
A: Yes. Use gluten-free tortillas or make cookie shells from gluten-free shortbread cookies pressed over molds and baked until crisp. Alternatively, use nut-based crusts (almond flour + butter).
Q: How do I keep the shells from getting soggy from the strawberries?
A: Two strategies: (1) Macerate strawberries briefly and drain excess juices before topping, and (2) coat the interior of shells with a thin butter-crumb layer (graham + butter) to create a moisture barrier.
Q: Can I use frozen strawberries?
A: Thawed frozen berries release a lot of juice; cook them down into a compote and cool before using, or strain off excess liquid to maintain shell crispness.
Q: What’s the best substitute for gelatin?
A: Agar-agar is a vegetarian substitute but requires heating to activate and sets firmer. Use sparingly and test proportions to avoid brittle texture.
Serving suggestions and pairings
- Presentation: Serve tacos on a long board lined with parchment and a scattering of freeze-dried strawberry dust and pistachio halves. Add a jug of warm chocolate sauce or balsamic reduction for guests to drizzle.
- Beverage pairings: Sparkling rosé or a lemon balm iced tea play nicely with the richness. For non-alcoholic options, try a sparkling strawberry or cucumber mint cooler.
- Party strategy: Offer two or three shell types (plain cinnamon-sugar, chocolate-dusted, and nut-crusted) and a small “assembly station” where guests pick fillings and toppings. This is especially effective for kids’ parties and brunches.
Advanced technique: making taco shells from scratch (sweet sugar tortillas)
If you want custom-flavored shells:
- Make a simple tortilla dough with 2 cups all-purpose flour, 1/2 tsp baking powder, 1/2 tsp salt, 2 tbsp sugar, 1/4 cup melted butter, and 3/4 cup warm water. Knead until smooth and rest 30 minutes.
- Roll thinly and brush with melted butter. Dust with equal parts sugar and cinnamon.
- Bake at 375°F for 8–10 minutes, flip, and bake another 4–6 minutes. Immediately shape over molds to cool.
This method gives a sweeter, cookie-like shell that’s sturdier and bakes into a crisp, clutchable taco.
Recipe troubleshooting quick reference
- Filling too soft after chilling: Add 1/2 tsp powdered gelatin dissolved in 1 tbsp warm water; whisk into filling and chill until set.
- Shells cracked while shaping: Wrap hot baked tortillas immediately over molds to form shape; they are more pliable right out of the oven.
- Fruit too runny: Reduce maceration time or drain juices and use as glaze separately.
Final inspiration
Cheesecake tacos are an ideal canvas for flavor experimentation. When strawberries are at their sweetest, keep things simple: bright filling, perfectly crisp shells, and a light sprinkle of crunch. During cooler months, reach for roasted or spiced fruits and a warm caramel drizzle — you’ll keep the core technique the same and change only the toppings.
If you’re inspired to expand your dessert taco repertoire, browse our related creative recipes and seasonal takes across the site for ideas and pairings.
Conclusion
Ready to make your own Strawberry Crunch Cheesecake Tacos? For more takes on the idea and extra presentation inspiration, check out this enthusiastic roundup: Strawberry Crunch Cheesecake Tacos Is My Number 1 Dessert. If you want another version with step-by-step photos and an alternate assembly, try Strawberry Cheesecake Tacos – Sugar Apron.
If you enjoyed this guide, save the recipe, share the tacos at your next gathering, and come back for more seasonal dessert ideas and chef tricks from the WeCookRecipe kitchen.


