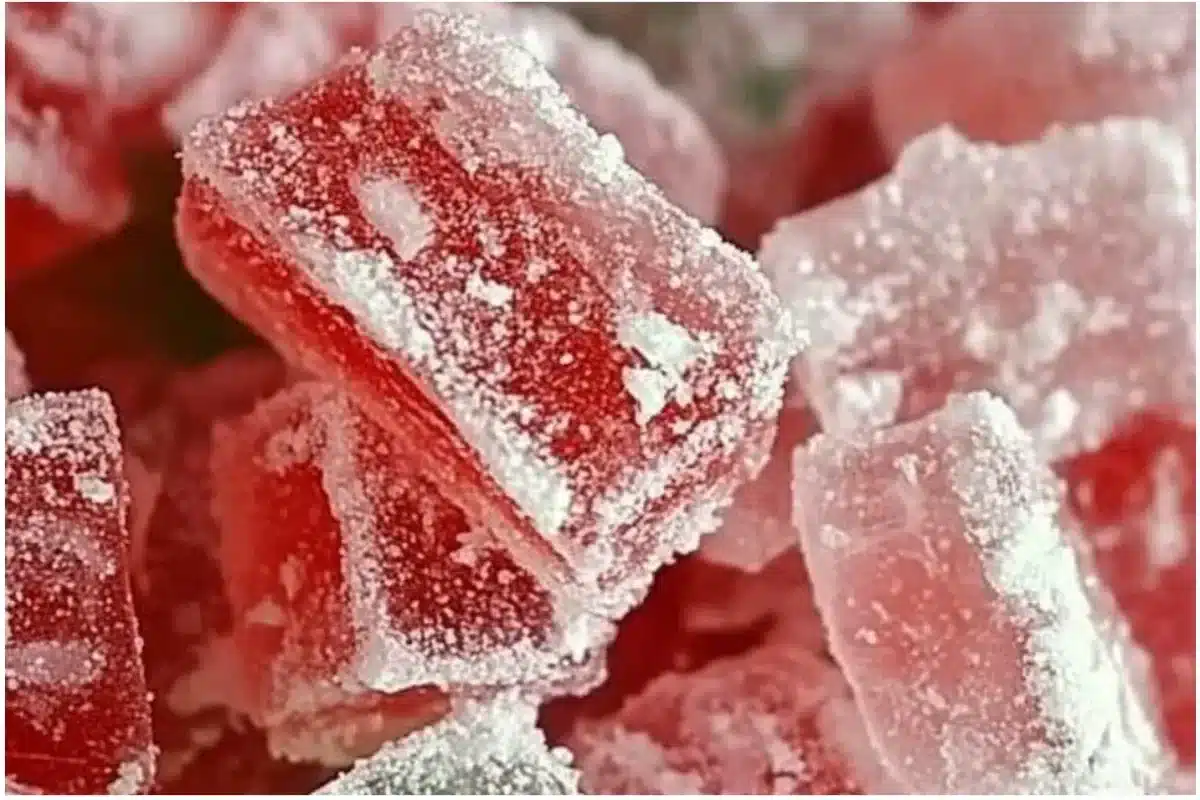
Christmas Rock Candy are a fudgy, chocolatey delight everyone will love. With just four pantry ingredients, this Christmas Rock Candy recipe is quick, easy, and perfect for parties or weekday treats. The crunchy exterior and creamy center make Christmas Rock Candy irresistible — the aroma is warm, cocoa-rich, and slightly minty if you choose peppermint. Check out more desserts here: more desserts here.
Why You’ll Love This Recipe
This recipe is ideal for holiday gatherings, classroom treats, or a cozy night in when you want something special without a big time commitment. It’s festive, portable, and doubles as a lovely edible gift. You’ll appreciate how few ingredients transform into layers of texture — a crisp outer shell and a tender, melt-in-your-mouth center with a hint of your chosen extract. Versatile enough to flavor or color for any theme, this candy is a small-batch winner when you want elegant sweets without fuss.
Seasonal Ingredients Spotlight
Bright, seasonal touches make these candies feel holiday-ready: think peppermint extract for a cool tingle, deep red and forest-green food coloring for cheerful stripes, and a dusting of powdered sugar to mimic fresh snow. Locally produced cane sugar or corn syrup improves flavor transparency and supports sustainable sourcing when you can find them. Texturally, the sugar-based shell snaps with a satisfying crack while the interior stays tender and fudgy. Aromas range from rich cocoa to sharp peppermint or warm vanilla — choose what best fits your season and pantry.
seasonal cookie ideas can pair beautifully if you’re planning a holiday cookie tray.
What You’ll Need
- 2 cups granulated sugar — The primary ingredient for the candy. Adds sweetness and structure; use organic cane sugar for a cleaner flavor.
- 1 cup light corn syrup — Adds sweetness and helps achieve the right texture; prevents large crystals.
- 1 cup water — Used to dissolve the sugar; warm water helps speed dissolution.
- Various drops food coloring — Choose your favorite colors for a festive look; gel colors give richer hues with less liquid.
- 1 teaspoon flavored extract (e.g., peppermint or vanilla) — Enhances the flavor of the candy; peppermint brightens, vanilla rounds.
- Powdered sugar for dusting — To give the candy a snowy appearance and prevent sticking.
Sensory notes & substitutions: swap corn syrup for brown rice syrup for a vegan-friendly, slightly less glossy shell (texture will be a touch chewier). Use flavored extracts (almond, orange) to change the aroma. For a dairy-like richness, stir in a teaspoon of cocoa butter or melted vegan chocolate into the base before setting.
How to Make This Recipe
- Prepare the Base — Gather and measure all ingredients; line a tray with parchment. Crushing or pre-grinding any add-ins (like candy cane pieces) creates even texture. The kitchen will smell faintly sweet as sugars warm.
- Mix the Ingredients — In a medium saucepan, combine sugar, corn syrup, and water over medium heat. Stir until the sugar dissolves and the mixture becomes clear, about 3–5 minutes; it will steam and smell slightly syrupy.
- Heat to Candy Stage — Attach a candy thermometer and bring to the hard-crack stage (300–310°F / 149–154°C). The syrup will bubble vigorously and turn glossy; remove from heat promptly to avoid burning.
- Flavor and Color — Quickly stir in the flavored extract and a few drops of food coloring. The mixture will spit and steam; the aroma will peak here — peppermint will be sharp, vanilla more floral.
- Shape or Set — Pour the hot syrup carefully onto the prepared tray in dollops or thin ribbons. If you want rock-like pieces, let cool slightly then use a knife to score before fully setting. Wear oven mitts — the candy is extremely hot.
- Finish or Garnish — Once set and cooled, break into irregular pieces and dust lightly with powdered sugar for a snowy look. If desired, drizzle melted chocolate over some pieces for contrast; the chocolate should be smooth and warm, not hot, to avoid melting the sugar shell.
- Serve and Enjoy — Arrange on a festive platter and offer alongside warm drinks. Expect a crunchy snap followed by a tender, slightly chewy center and lingering flavor of your chosen extract.
Preparation (timing & troubleshooting): Allow 30–45 minutes total. If the candy becomes grainy, reheat gently with a splash of water and bring back to temperature while stirring to dissolve crystals. If too soft, reheat and return to hard-crack stage.
Step Examples
- Prepare the Base — Measure and line your tray; ensure parchment is flat so syrup spreads evenly.
- Mix the Ingredients — Combine sugars and water; watch for clear syrup and smaller bubbles indicating dissolved sugar.
- Shape or Cook — Pour into shapes; look for a glossy surface and listen for the rapid bubbling sound before removing from heat.
- Finish or Garnish — Dust with powdered sugar or drizzle chocolate; contrast textures and colors for holiday appeal.
- Serve and Enjoy — Let guests hear the snap and taste the creamy center, noting the bright aroma.
Essential Tools
- Medium saucepan with heavy bottom — for even heat.
- Candy thermometer — essential for reaching the hard-crack stage.
- Heatproof spatula and small ladle or spoon — for pouring and stirring.
- Parchment-lined baking sheet or silicone mat — prevents sticking. Optional: cookie scoops for uniform dollops, pastry bag for decorative ribbons, and a small offset spatula to score shapes. (Affiliate product notes: choose a reliable digital candy thermometer for accuracy.)
Meal Prep & Storage Tips
Make these candies up to two weeks ahead and store in an airtight container at room temperature, separated by parchment to prevent sticking. Avoid humidity — keep in a cool, dry spot; moisture will soften the crisp shell. For longer storage, freeze sealed candies for up to 3 months; thaw at room temperature before serving. For food safety, always use clean, dry hands or gloves when handling set candy to avoid introducing moisture or contaminants.
Perfect Pairings
Serve Christmas Rock Candy with hot cocoa, spiced coffee, or mulled cider — the warm drinks highlight the candy’s mint or vanilla notes. For a dessert board, pair with shortbread, ginger snaps, or fruit slices for textural contrast; the candies’ crunchy shells and creamy centers contrast nicely with crumbly cookies and juicy fruit. Visually, place candies near evergreen sprigs or citrus slices to echo color and scent. For gifting, wrap in cellophane with a festive ribbon and include a small tag suggesting a drink pairing.
Nutrition Facts
Estimated per serving:
- Calories: ~180 kcal
- Fat: 8 g
- Carbohydrates: 24 g
- Protein: 3 g
- Fiber: 1 g
- Sugar: 14 g
Avoid These Common Pitfalls
- Overcooking the sugar — results in bitterness; remove at the correct hard-crack temperature and cool promptly.
- Undercooking the sugar — leads to a sticky, soft candy; ensure you reach 300–310°F (149–154°C).
- Adding flavor too early — volatile extracts can lose brightness if added while boiling; stir them in off the heat.
- Humidity exposure — store candies in airtight containers; damp air will soften the shell. Examples:
Dough Too Dry —
Add a splash of warm water to soften mixtures needing moisture.
Chocolate Coating Breaks —
Ensure melted chocolate is smooth and warm; avoid overheating.
Unevenly Shaped Balls —
Use a cookie scoop for consistent sizing.
Pro Tips for Best Results
Work quickly once the syrup reaches temperature — sugar sets fast. Use gel food coloring for vivid hues without watering down the mixture. For a marbled effect, pour two colors side-by-side and drag a skewer through them before the candy sets; the surface will reflect the swirl in glossy ribbons. Cool on a silicone mat for easy release and clean breaks. Keep your candy thermometer clipped to the pot and calibrated; a few degrees make a big difference in final texture.
Recipe Variations to Explore
Try peppermint and crushed candy-cane pieces for a classic holiday variation, or orange extract with a sprinkle of grated zest for a bright twist. Swap peppermint for almond or espresso extract for different aroma profiles. For a chocolate-dipped version, temper dark chocolate and partially dip set pieces; the contrast of bitter chocolate and sugar is sublime. Create layered colors by pouring small amounts in stages, letting each thin layer set briefly before the next for a stained-glass effect. For a grown-up spin, add a splash of coffee liqueur or peppermint schnapps to the flavoring (use sparingly).
Dietary Adaptations & Safety Info
Allergens: this recipe is naturally gluten-free. For vegan-friendly candy, ensure corn syrup or its substitute is plant-based and avoid any added butter. To make the candy dairy-free, skip chocolate drizzling or use dairy-free chocolate. Be cautious with nut extracts for those with nut allergies. Handle the hot syrup carefully to avoid burns and keep children at a safe distance during the boiling stage.
Frequently Asked Questions
Q: How long does it take to make rock candy from start to finish? A: Plan for about 30–45 minutes total, including heating to the hard-crack stage and cooling enough to break into pieces.
Q: Can I reuse the sugar if I mess up a batch? A: If the sugar didn’t burn, you can dissolve it again with a small amount of water and bring it back to temperature. Discard any burnt or discolored syrup.
Q: Why did my candy turn out grainy? A: Graininess usually comes from sugar crystals forming. Make sure sugar fully dissolves before boiling, avoid stirring once boiling begins, and use a little corn syrup to inhibit recrystallization.
Q: Can I use liquid food coloring instead of gel? A: Yes, but liquid coloring can thin the syrup slightly and may affect setting time; use sparingly. Gel gives stronger color with less added moisture.
Q: What’s the best way to flavor these candies? A: Add extracts after removing from heat so delicate aromas aren’t lost. Peppermint, vanilla, almond, and orange work best; essential oils are potent, so use much less.
Q: Can I make shaped candies? A: Yes — pour syrup into small silicone molds, but be cautious: molds must tolerate the high temperature and the candy will be very hot.
Q: How do I prevent sticking? A: Dust finished pieces lightly with powdered sugar or cornstarch and store in single layers separated by parchment.
Final Thoughts & Next Steps
These Christmas Rock Candy pieces are a simple, festive treat that look stunning on a cookie tray or in gift bags. Try different extracts and color combinations to match your celebration, and let me know which twist you loved most. For more chocolate-forward ideas and related recipes, explore the chocolate candy category.
Conclusion
For more detailed techniques and visual step-by-step inspiration on rock candy, check this classic guide: Rock Candy | Serena Bakes Simply From Scratch.
Print
Christmas Rock Candy
- Total Time: 45 minutes
- Yield: 4 servings 1x
- Diet: Vegan
Description
A fudgy, chocolatey delight perfect for parties or weekday treats, featuring a crunchy exterior and creamy center.
Ingredients
- 2 cups granulated sugar
- 1 cup light corn syrup
- 1 cup water
- Various drops food coloring
- 1 teaspoon flavored extract (e.g., peppermint or vanilla)
- Powdered sugar for dusting
Instructions
- Prepare the Base: Gather and measure all ingredients; line a tray with parchment.
- Mix the Ingredients: In a medium saucepan, combine sugar, corn syrup, and water over medium heat. Stir until the sugar dissolves, about 3–5 minutes.
- Heat to Candy Stage: Attach a candy thermometer and bring to the hard-crack stage (300–310°F / 149–154°C).
- Flavor and Color: Quickly stir in the flavored extract and food coloring.
- Shape or Set: Pour the hot syrup onto the prepared tray.
- Finish or Garnish: Once set and cooled, break into pieces and dust with powdered sugar.
- Serve and Enjoy: Arrange on a festive platter and enjoy.
Notes
Store in an airtight container at room temperature, separated by parchment to avoid sticking. For longer storage, freeze sealed candies for up to 3 months.
- Prep Time: 15 minutes
- Cook Time: 30 minutes
- Category: Dessert
- Method: Cooking
- Cuisine: American
Nutrition
- Serving Size: 1 serving
- Calories: 180
- Sugar: 14g
- Sodium: 0mg
- Fat: 8g
- Saturated Fat: 0g
- Unsaturated Fat: 0g
- Trans Fat: 0g
- Carbohydrates: 24g
- Fiber: 1g
- Protein: 3g
- Cholesterol: 0mg
Keywords: rock candy, Christmas candy, holiday treats, fudge, desserts


