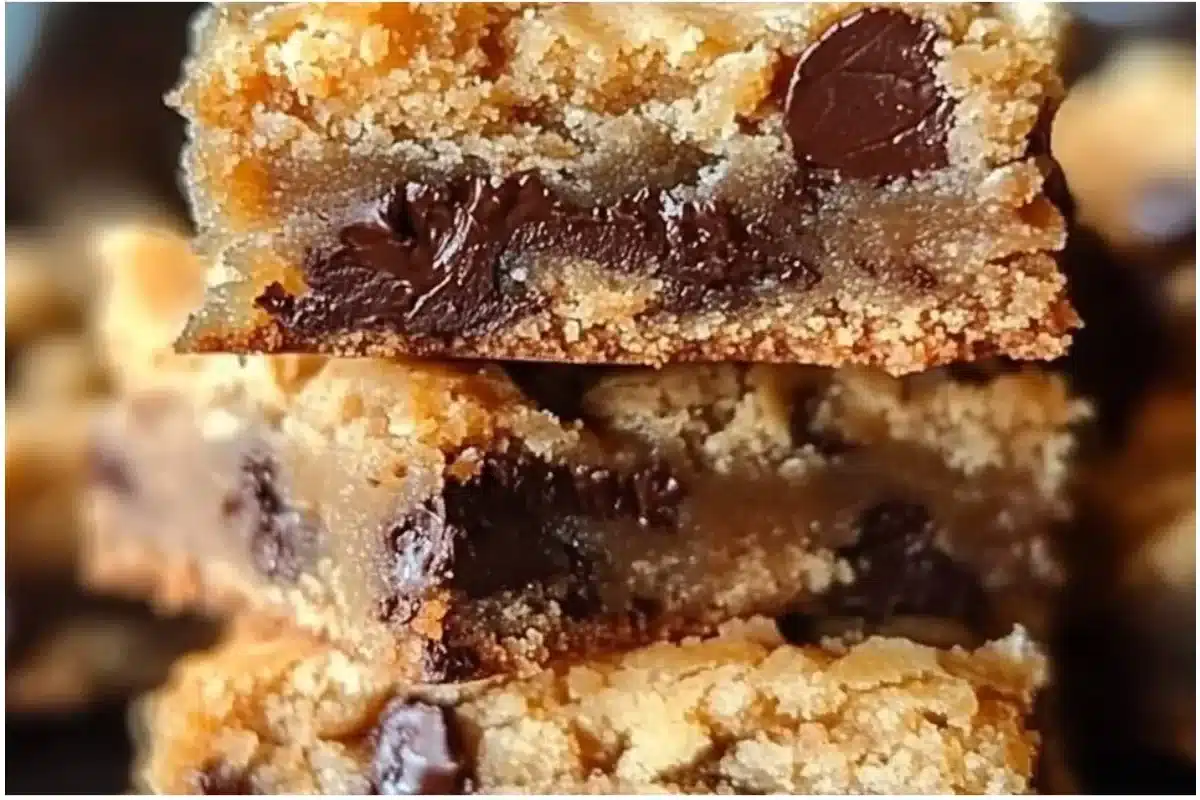
Coconut Toffee Chocolate Chip Cookie Bars are a fudgy, chocolatey delight everyone will love. Warm from the oven, they smell of caramelized coconut and toasted toffee, with glossy chocolate pockets that melt on the tongue. With just a few pantry staples, these bars are quick to make and ideal for parties, gifts, or weekday comfort baking. The crunchy exterior gives way to a chewy, gooey center — irresistible with coffee or milk. Check out more desserts like Peppermint Chocolate Chip Cookies for seasonal inspiration.
Why You’ll Love This Recipe
These Coconut Toffee Chocolate Chip Cookie Bars are perfect for holidays, bake sales, and casual gatherings when you want something nostalgic but impressive. They combine the convenience of a one-pan bar with the layered textures of a cookie: a buttery oat base, sweet condensed milk filling, and crunchy toffee topping. The recipe is versatile — swap chocolate types, use gluten-free flour, or make them ahead for easy entertaining. Expect warm, toasty aromas to fill your kitchen and guests to ask for seconds.
Seasonal Ingredients Spotlight
This recipe shines when you use fresh, seasonal pantry finds: locally milled flour for a nuttier flour note, fresh coconut when available for extra fragrance, and artisanal toffee bits for richer caramel nuances. In autumn, swap dark brown sugar to amplify molasses and pair with pumpkin-spiced treats like Pumpkin Chocolate Chip Cookies for a cozy dessert spread. Visually, the bars show golden-brown edges, flecks of coconut white, and dark chocolate jewels; aromatically they offer toasted coconut and deep caramel notes. Choosing local, seasonal ingredients keeps flavors bright and supports sustainable practices.
What You’ll Need
- 1 ½ cups all-purpose flour (or 1:1 gluten-free baking blend) — use whole grain for a nuttier texture.
- 1 ½ cups old-fashioned oats (avoid quick oats) — gives chew and structure.
- 1 cup sweetened flaked coconut (unsweetened can be used for less sweetness) — adds aroma and chew.
- ½ teaspoon salt — balances the sweetness.
- 1 cup light or dark brown sugar (dark brown sugar gives richer caramel flavor) — darker sugar deepens the toffee notes.
- 1 cup unsalted butter, softened — for rich, tender crumb; dairy-free margarine can be substituted.
- 1 large egg, lightly beaten — binds the dough; flax egg for vegan option.
- 1 cup semi-sweet chocolate chips (milk or dark chocolate may be substituted) — pockets of molten chocolate.
- 1 can (14 oz) sweetened condensed milk — creates the fudgy, caramel-like filling.
- ¼ cup light corn syrup — stabilizes and keeps the filling glossy.
- 1 ½ cups toffee bits (store-bought or homemade) — for crunchy caramel bursts.
Sensory notes: the dry mix smells subtly nutty from oats; brown sugar adds a warm molasses scent; melted butter yields a rich, comforting aroma. For less sweet bars, reduce condensed milk slightly or use unsweetened coconut. For gluten-free, ensure oats are certified gluten-free and use a GF flour blend.
How to Make This Recipe
- Preheat & Prepare Pan — Preheat oven to 350°F (175°C) and lightly grease a 13×9-inch baking dish. Greasing ensures easy release and creates a slightly crisp edge.
- Combine Dry Ingredients — In a large bowl, combine flour, oats, coconut, salt, and brown sugar. Mix at low speed until combined. The mixture should look evenly speckled and smell toasted from the brown sugar.
- Incorporate Butter & Egg — Add softened butter and mix until crumbly. Beat in the egg until incorporated, then fold in chocolate chips. The dough will hold together when pressed but remain slightly loose.
- Reserve Topping Dough — Reserve about 1 ½ cups of the dough for the topping. This makes a crumbly, golden streusel that bakes into crunchy peaks.
- Press & Parbake Base — Press the remaining dough evenly into the bottom of the prepared pan. Bake for 10 minutes. The crust should be set and just beginning to color at the edges.
- Make Filling — In a bowl, whisk together sweetened condensed milk and corn syrup until smooth. Pour evenly over hot crust. The filling should spread into a glossy layer that seeps into the oats.
- Add Toffee & Top — Sprinkle toffee bits evenly over the filling, then crumble reserved dough evenly over the top. The topping will create crunchy islands of golden oat-sweetness.
- Final Bake — Return to the oven and bake for 25–30 minutes, until the top is golden brown. Watch closely the last 5 minutes to prevent overbrowning; toffee may melt and caramelize.
- Cool & Cut — Cool completely in the pan before cutting into squares or rectangles. Cooling lets the filling set so bars slice cleanly.
Troubleshooting: If the filling bubbles up during baking, tent loosely with foil. If your topping browns too fast, reduce oven temperature by 10–15°F and extend baking time slightly.
Step Examples
Prepare the Base
Press the dough firmly and evenly into the pan; you should feel a compact, slightly tacky surface that will bake into a chewy foundation. Prebaking sets the structure so the filling won’t soak through.
Mix the Ingredients
Combine dry ingredients until uniform, then cut in butter until the texture resembles coarse crumbs. The batter will smell buttery with molasses undertones from the brown sugar.
Shape or Cook
After pressing the base, parbake to create a stable rim. When adding the filling, spread quickly while the crust is hot so the condensed milk nestles into the oats.
Finish or Garnish
Sprinkle extra toasted coconut or a drizzle of melted chocolate after baking for a polished look. Let the bars develop a golden crust and glossy filling.
Serve and Enjoy
Serve at room temperature or slightly warm. Expect a crunchy top, chewy oat base, and sweet, sticky center — pair with cold milk or robust coffee.
Essential Tools
- 13×9-inch baking dish (metal for crisper edges).
- Mixing bowls (one large, one medium).
- Electric mixer or sturdy wooden spoon.
- Rubber spatula for spreading.
- Measuring cups and spoons, and a cookie scoop for even portions.
Optional: silicone baking mat, offset spatula for cleaner cuts. If using affiliate links, choose heavy-duty metal pans for consistent heat distribution.
Meal Prep & Storage Tips
Make these bars up to 48 hours in advance; store in an airtight container at room temperature for up to 3 days. For longer storage, refrigerate up to one week or freeze tightly wrapped squares for up to 3 months. To freeze, cut bars, place parchment between layers, and seal in a freezer-safe container. Thaw overnight in the fridge, then bring to room temperature before serving. For food safety, keep out of direct heat and avoid leaving dairy-filled bars at room temperature more than a day in warm climates.
Perfect Pairings
These bars pair beautifully with hot coffee, espresso, or a creamy latte to balance the sweetness. For a festive touch, serve alongside vanilla bean ice cream and a dusting of toasted coconut for contrast in temperature and texture. If offering a holiday spread, set them next to peppermint desserts or minty treats — try complementing with chocolate peppermint cookie cups like Chocolate Peppermint Cookie Cups for a themed platter. Visually, present bars on a rustic wooden board with scattered toffee bits and coconut flakes for an inviting, homey display.
Nutrition Facts
Estimated per serving (1 bar, serves ~24):
- Calories: ~180 kcal
- Fat: 8 g
- Carbohydrates: 24 g
- Protein: 3 g
- Fiber: 1 g
- Sugar: 14 g
These are rough estimates — exact values depend on ingredient brands, portion size, and any substitutions like dairy-free butter or different chocolate types.
Avoid These Common Pitfalls
- Dough Too Dry — If the dough crumbles and won’t press, add a splash of milk or an extra egg yolk to bring it together.
- Filling Too Runny — Ensure you use sweetened condensed milk; thinning the filling with extra corn syrup can make it runny — stick to the recipe amounts.
- Topping Browning Too Fast — If the top is darkening before the filling sets, tent with foil and continue baking until done.
- Uneven Baking — Use a reliable oven thermometer and rotate the pan halfway through baking for even color.
- Toffee Sinking — Scatter toffee bits evenly and press a little into the filling; very fine toffee can melt — choose chunkier bits for more texture.
Pro Tips for Best Results
- Use dark brown sugar for a deeper caramel flavor and richer aroma.
- Toast the coconut lightly in a dry skillet until golden for amplified nuttiness.
- Chill the dough briefly if butter softens too much while mixing — it helps retain structure.
- For clean slices, chill bars completely and warm a knife under hot water before each cut.
- Make double batches and freeze extras for quick gifts or last-minute parties.
Recipe Variations to Explore
- Salted Caramel Twist: finish with a drizzle of warm salted caramel and flaky sea salt for contrast.
- Nutty Add-ins: fold in ½ cup chopped pecans or macadamia nuts with the chocolate chips for crunch.
- Tropical Version: use macadamia nuts and swap semi-sweet chips for white chocolate, plus extra shredded coconut.
- Lower-Sugar Option: use unsweetened coconut, reduce chocolate chips to ½ cup, and use a lighter sweetened condensed milk alternative.
- Mini Bars: bake in muffin tins for portable, single-serve treats — reduce bake time slightly and watch for firm edges.
Dietary Adaptations & Safety Info
Allergens: contains dairy, egg, gluten (unless adapted), and possibly nuts if added. For vegan bars, use a vegan butter substitute, flax egg (1 tbsp ground flax + 3 tbsp water per egg), and a vegan condensed milk alternative. For gluten-free, use certified gluten-free oats and a 1:1 gluten-free flour blend. Always label bars if serving to guests with allergies and avoid cross-contamination on shared surfaces.
Frequently Asked Questions
Q: Can I make these bars ahead of time?
A: Yes — make up to 48 hours ahead at room temperature in an airtight container, refrigerate up to a week, or freeze for up to 3 months. Thaw overnight in the fridge.
Q: My topping browned too quickly. How can I prevent burning?
A: Tent the pan loosely with foil once the top reaches golden brown; continue baking until the center sets. Lowering oven temperature by 10–15°F can also help.
Q: Can I substitute the sweetened condensed milk?
A: Sweetened condensed milk gives the signature fudgy filling. You can try reduced-sugar condensed milk or vegan condensed milk, but texture and sweetness will change slightly.
Q: How do I get clean slices?
A: Cool completely and refrigerate before slicing. Wipe a sharp knife clean and warm it under hot water between cuts for smoother edges.
Q: Why use old-fashioned oats instead of quick oats?
A: Old-fashioned oats provide a chewy texture and structure that hold up during baking; quick oats can make the texture gummier and less distinct.
Q: Can I add nuts or extra mix-ins?
A: Yes — fold in up to ½ cup chopped nuts, dried fruit, or swapped chocolate types. Be mindful of added moisture from dried fruit.
Q: My filling bubbled over. Is it still okay?
A: Slight bubbling is normal; if it overflowed, clean the pan rim and check for excess filling next time. The bars will still be tasty if the pan caught most of the spill.
Q: Any tips for making these gluten-free?
A: Use certified gluten-free oats and a cup-for-cup gluten-free flour blend. Resting the dough in the fridge for 30 minutes before pressing helps with structure.
Final Thoughts & Next Steps
These Coconut Toffee Chocolate Chip Cookie Bars are an easy, crowd-pleasing bake that balances crunchy, chewy, and gooey textures. Try the variations, tag your photos, and share feedback so others can find this recipe. For more dessert inspiration, explore our cookie and bar recipe collections.
Print
Coconut Toffee Chocolate Chip Cookie Bars
- Total Time: 55 minutes
- Yield: 24 servings 1x
- Diet: Vegetarian
Description
These fudgy, chocolatey cookie bars are perfect for gatherings, featuring a buttery oat base, caramelized coconut, and crunchy toffee.
Ingredients
- 1 ½ cups all-purpose flour
- 1 ½ cups old-fashioned oats
- 1 cup sweetened flaked coconut
- ½ teaspoon salt
- 1 cup light or dark brown sugar
- 1 cup unsalted butter, softened
- 1 large egg, lightly beaten
- 1 cup semi-sweet chocolate chips
- 1 can (14 oz) sweetened condensed milk
- ¼ cup light corn syrup
- 1 ½ cups toffee bits
Instructions
- Preheat oven to 350°F (175°C) and lightly grease a 13×9-inch baking dish.
- In a large bowl, combine flour, oats, coconut, salt, and brown sugar. Mix until combined.
- Add softened butter and mix until crumbly. Beat in the egg and fold in chocolate chips.
- Reserve about 1 ½ cups of dough for topping.
- Press the remaining dough into the bottom of the prepared pan and bake for 10 minutes.
- In a bowl, whisk together sweetened condensed milk and corn syrup, then pour over the hot crust.
- Sprinkle toffee bits over the filling, then crumble reserved dough on top.
- Bake for an additional 25–30 minutes, until golden brown.
- Cool completely in the pan before cutting into squares.
Notes
For a richer flavor, use dark brown sugar. If baking ahead, store in an airtight container at room temperature for up to 3 days.
- Prep Time: 15 minutes
- Cook Time: 40 minutes
- Category: Dessert
- Method: Baking
- Cuisine: American
Nutrition
- Serving Size: 1 bar
- Calories: 180
- Sugar: 14g
- Sodium: 100mg
- Fat: 8g
- Saturated Fat: 5g
- Unsaturated Fat: 2g
- Trans Fat: 0g
- Carbohydrates: 24g
- Fiber: 1g
- Protein: 3g
- Cholesterol: 30mg
Keywords: cookie bars, chocolate, toffee, dessert, baking


