As the seasons shift, so does the need for a little extra immune support. Enter Easy Homemade Elderberry Gummies—a delicious way to enjoy the benefits of elderberries while indulging your sweet tooth. Not only are these gummies packed with antioxidants and vitamins, but they’re also simple to make and fun for the whole family. With the rise of wellness trends, elderberry has become a household name, known for its natural properties that may help fend off colds and flu.
In this article, we’ll guide you through the process of making your own elderberry gummies, outlining the ingredients, health benefits, and essential tips for perfecting this delightful recipe. Whether you’re a seasoned gummy-maker or a novice in the kitchen, by the end of this guide, you’ll be ready to whip up these chewy health boosters at home!
The Benefits of Elderberry
Elderberries, the small dark berries of the Sambucus tree, have been used for centuries in traditional medicine. With a rich history rooted in herbal remedies, these berries are known for several health benefits:
- Immune Support: Elderberries are packed with antioxidants like flavonoids, which help to bolster the immune system.
- Antiviral Properties: Studies suggest that elderberry extract may help to reduce the duration and severity of cold and flu symptoms.
- Rich in Vitamins: Elderberries contain vitamins A, B, and C, which are essential for maintaining good health.
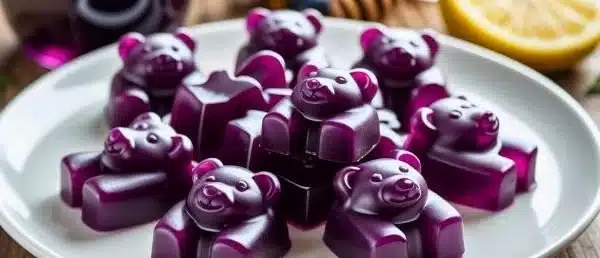
Combining these potent berries with the fun texture of gummies makes for a perfect health snack that children and adults alike will love.
Print
Easy Homemade Elderberry Gummies
- Total Time: 30 minutes
- Yield: 20–30 gummies 1x
- Diet: Vegetarian
Description
A delicious way to enjoy the benefits of elderberries while indulging your sweet tooth. Simple to make and fun for the whole family.
Ingredients
- 1 cup elderberry syrup
- 2 tablespoons gelatin (or agar-agar for vegan option)
- ¼ cup honey or maple syrup
- ¼ cup lemon juice
- ½ cup cold water
- Optional: Turmeric, Vitamin C powder, flavorings (like vanilla extract or fruit juices)
Instructions
- Gather your ingredients and equipment.
- In a small bowl, sprinkle gelatin over cold water and let it bloom for 5-10 minutes.
- In a saucepan, combine elderberry syrup, honey (or maple syrup), and lemon juice. Add any optional ingredients and heat over low-medium heat, stirring until combined.
- Once warm, remove from heat and whisk in the bloomed gelatin until fully dissolved.
- Using a dropper or spoon, carefully pour the mixture into gummy molds.
- Chill in the fridge for at least 2-4 hours until firm.
- Once set, remove from molds and store in an airtight container in the refrigerator.
Notes
Adjust sweetness and experiment with flavors to customize your gummies. Ensure you don’t boil the mixture or skip the blooming process for best results.
- Prep Time: 10 minutes
- Cook Time: 20 minutes
- Category: Snacks
- Method: No-Bake
- Cuisine: American
Nutrition
- Serving Size: 1 gummy
- Calories: 15
- Sugar: 5g
- Sodium: 10mg
- Fat: 0g
- Saturated Fat: 0g
- Unsaturated Fat: 0g
- Trans Fat: 0g
- Carbohydrates: 4g
- Fiber: 0g
- Protein: 0g
- Cholesterol: 0mg
Keywords: elderberry, gummies, homemade, health snack, immune support, vegan option
Ingredients Breakdown
To create your own Easy Homemade Elderberry Gummies, you will need the following ingredients:
Core Ingredients
- Elderberry Syrup: This will be the main flavor and active ingredient in the gummies. If you want to make your own elderberry syrup, check out our guide on how to make elderberry syrup.
- Gelatin: A key element that gives gummies their chewy consistency. You can choose between traditional gelatin or a vegan alternative like agar-agar.
- Honey or Maple Syrup: For sweetness, and this also adds additional health benefits.
- Water: The base for your gelatin.
- Lemon Juice: Adds acidity and enhances flavor while also boosting vitamin C content.
Optional Add-Ins
- Turmeric: For its anti-inflammatory benefits.
- Vitamin C Powder: To further enhance the immune-boosting properties.
- Flavorings: Like vanilla extract or fruit juices for variety.
Step-by-Step Recipe for Easy Homemade Elderberry Gummies
Let’s dive into the process of making these delectable gummies. Follow the steps below to ensure consistent results.
Step 1: Gather Your Ingredients
Before you start, gather all your ingredients and equipment. You will need a mixing bowl, a saucepan, a whisk, a gummy mold, and a dropper or spoon for pouring.
Step 2: Prepare the Gelatin
In a small bowl, sprinkle 2 tablespoons of gelatin over ½ cup of cold water and let it bloom for about 5-10 minutes. This step is crucial for ensuring that your gummies have the right consistency.
Step 3: Create the Elderberry Mixture
In a saucepan, combine 1 cup of elderberry syrup, ¼ cup of honey (or maple syrup), and ¼ cup of lemon juice. If you’re using turmeric or vitamin C powder, add it to the mixture now. Heat this mixture over low-medium heat, stirring until combined but not boiling.
Step 4: Incorporate the Gelatin
Once your elderberry mixture is warm, remove it from the heat. Slowly whisk in the bloomed gelatin until fully dissolved. This might take a few minutes, but it’s essential for a nice texture.
Step 5: Pour into Molds
Using a dropper or spoon, carefully pour the mixture into your gummy molds. Ensure they are evenly filled but be cautious not to overfill. This mixture can make approximately 20-30 gummies, depending on the size of your molds.
Step 6: Chill and Set
Place the filled molds in the fridge and let them set for at least 2-4 hours or until fully firm.
Step 7: Store the Gummies
Once set, gently remove the gummies from the molds. Store them in an airtight container in the refrigerator where they can last up to two weeks.
Pro Tips for Perfect Gummies
- Adjust the Sweetness: If you prefer less sweetness, reduce the amount of honey or syrup.
- Experiment with Flavors: Try adding pureed fruit like strawberries or blueberries to the mix for a twist.
- Watch the Temperature: Be careful not to boil the mixture, as this can compromise the gelling properties of the gelatin.
Common Mistakes to Avoid
- Not Blooming the Gelatin: This is critical for achieving the right texture. Skipping this step will result in a gummy that doesn’t set properly.
- Overheating the Mixture: Gelatin can lose its gelling properties if overheated, so warm only to dissolve.
- Skipping the Refrigeration: Gummies need adequate time to set; rushing this step will lead to a soft gummy.
Variations and Swaps
- Vegan Option: Substitute gelatin with agar-agar, using it in a similar blooming process.
- Juice Infusion: Incorporate different fruit juices for a blend of flavors that can suit different preferences.
- Herbal Additions: Add extracts like echinacea or ginger for additional health benefits.
Storage and Reheating
Store your elderberry gummies in an airtight container in the refrigerator for optimal freshness. If the gummies become sticky over time, you can lightly dust them with cornstarch to prevent sticking.
Nutritional Insights
Elderberry gummies are not just a tasty treat but also a nutritious option. Here’s a breakdown of what you can expect per serving:
- Calories: Varies based on sweetener and serving size (approximately 15-20 calories each)
- Sugar: Approximately 4-5 grams per gummy, primarily from honey or syrup.
- Vitamins A, B, C: Excellent sources of these vitamins due to the elderberries and lemon juice.
Incorporating these gummies into your routine can serve as a delightful boost, especially during colder months when immunity needs a little extra support.
FAQs About Elderberry Gummies
1. How often can I take elderberry gummies?
You can safely consume elderberry gummies daily, but it’s best to follow the recommended serving size, usually 2-4 gummies per day.
2. Can children eat elderberry gummies?
Yes! Elderberry gummies are suitable for children, typically from age 2 and up, but always consult your pediatrician first.
3. What are the side effects of elderberry?
While elderberry is generally safe, some people may experience mild side effects such as stomach upset. Always start with a small quantity to assess tolerance.
4. Can I freeze elderberry gummies?
Yes, you can freeze them! Just be aware that freezing may change their texture slightly.
Conclusion
Creating Easy Homemade Elderberry Gummies is a fantastic way to combine health benefits with a fun and enjoyable snack. Not only do you get to control the ingredients, making them as healthy or indulgent as you desire, but you also reap the benefits of elderberries, which have provenance steeped in traditional wellness practices.
Remember to experiment with different flavors and ingredients to find the perfect mix that works for you and your family! Your journey into homemade gummy-making is just beginning—share your experience or this recipe with friends, or even better, try making them together!
Now it’s time to get cooking! Enjoy your homemade elderberry gummies as a delightful treat or health supplement. Don’t forget to save or bookmark this article for your next batch!
By integrating these elements into your life, you’re not just enhancing your diet; you’re embracing a healthier, more enjoyable lifestyle!


