A warm scent of garlic and cabbage rises as I open the jar, and for a moment I am back at my mother’s table where every meal felt like a small celebration. The salty tang and the soft crunch bring the house alive, and I think of how a simple jar can hold so many ordinary beautiful moments. If you love slow kitchen work that rewards you with a lively, bright bite, you are welcome here, and you might also enjoy these favorite Japanese weeknight recipes that remind me of easy comfort and steady hands.
The Story Behind Our Favorite Ten Easy Fermented Vegetable Recipes for Beginners
Fermenting feels like a tiny ritual to me. I remember the first time I tucked shredded carrots and cabbage into a jar, pressed them down, and waited. The house smelled faintly of sweet earth, and the kids kept asking every day if the jars were ready. That waiting was a kind of gentle work that made me slow down and notice small things.
When I began, I kept things simple because my earliest jars taught me that confidence comes from repetition. I learned to trust salt, hands, and time. Over the years those jars became a language in our house. They sit next to bread on the table, they travel in lunch boxes, and they turn a plain bowl of rice into something full of life. If you like small habits that change your meals, also try these quick kitchen rituals that have helped me keep flavor close at hand.
There is also a memory thread that runs through every recipe. A cucumber pickled the summer my garden overflowed. A beet jar glowed like jewel tones on a rainy day. Each one has a place at the table and a story in it. I want these Ten Easy Fermented Vegetable Recipes for Beginners to be welcoming, easy, and steady. They are for busy mornings, for tiny victories, and for those evenings when you want the house to feel like home.
How to Make Ten Easy Fermented Vegetable Recipes for Beginners
“Every time I stir this pot, it smells just like Sunday at home.”
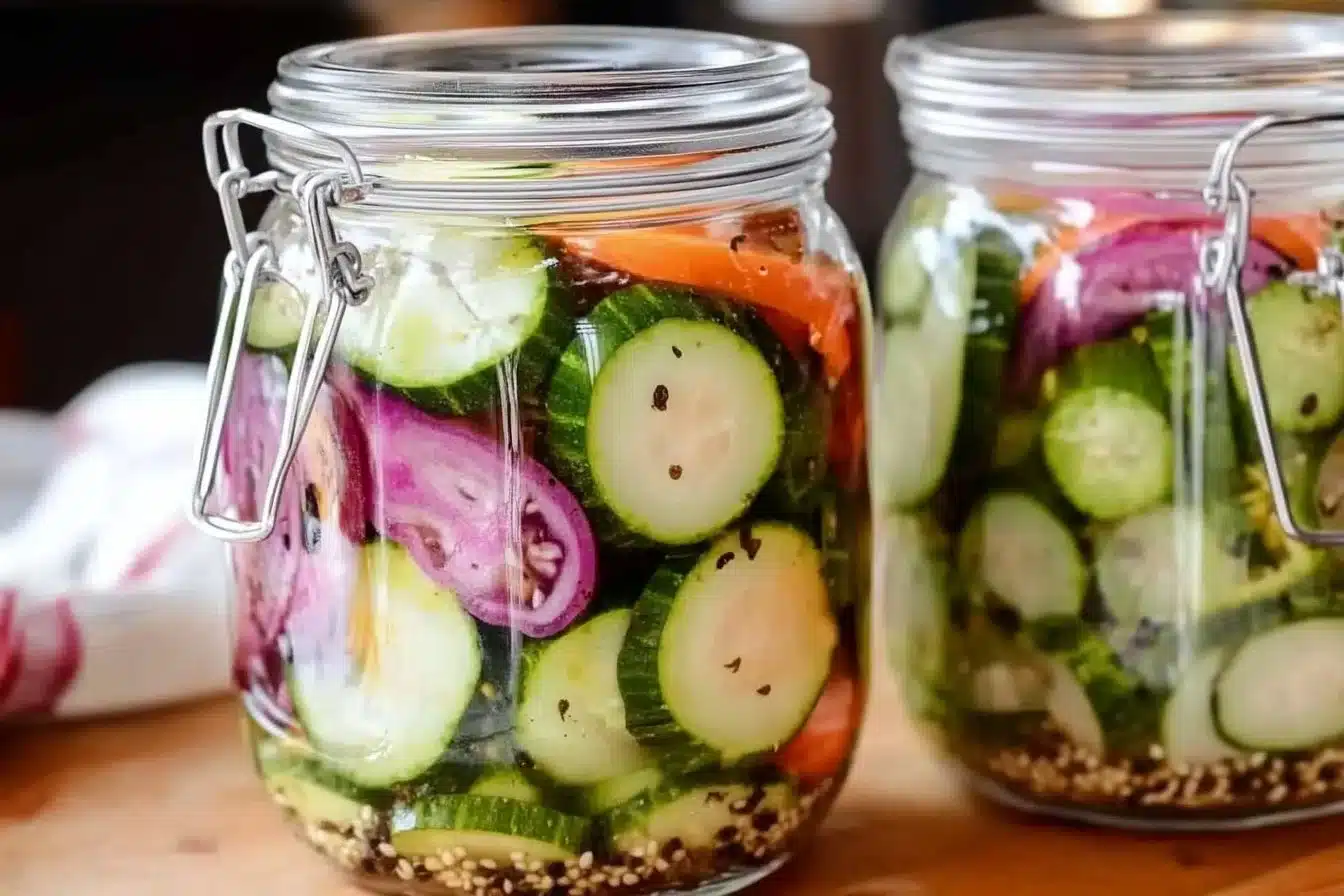
Fermenting vegetables is mostly about gentle pressure, clear jars, and a calm touch. You will see colors shift, hear tiny bubbles, and smell bright, pleasing tangs. The method I share keeps steps small so beginners can follow without fuss. Think of it as a slow conversation between salt, vegetable, and time.
Start with clean hands and clean jars. There is a rhythm to pressing and packing. I press with my palms, feeling the vegetable release its juices. That sound of bubbles is inviting. If you want to learn one small trick for keeping jars tidy, read these simple pantry tricks I use when I want less mess.
Once the jar is closed and tucked onto a shelf, patience becomes the final ingredient. Check them after a couple of days for the first taste. The flavors will change and deepen over the week. After that, store them in the cool part of your fridge to keep the tang slow and steady.
Ingredients You’ll Need
- Cabbage, green or red, shredded fine or thick as you like. (A little extra cabbage means more crunchy jars.)
- Carrots, peeled and julienned or grated. (They add bright color and a sweet snap.)
- Cucumbers, sliced into coins or spears. (Best when firm and fresh.)
- Beets, peeled and cut into small wedges. (They dye everything beautifully and taste sweet-tart.)
- Daikon or other radishes, sliced thin. (They give a peppery lift.)
- Green beans or snap peas, trimmed. (They hold a nice crisp through fermentation.)
- Garlic cloves, whole or sliced. (Freshness matters, and a clove per jar is usually enough.)
- Fresh dill, parsley, or cilantro for herb notes. (A sprig changes the aroma gently.)
- Fresh ginger, thinly sliced for a lift in Asian-style jars. (A little goes a long way.)
- Sea salt or pickling salt. (No iodine. Measure by weight or use the rule: 1 tablespoon per 2 cups loosely packed vegetables for a basic brine.)
- Filtered water, if making a brine. (Chlorine can slow fermentation.)
- Optional: sugar or honey for sweeter ferments. (A teaspoon helps faster fermentation for certain vegetables.)
- Optional spices: coriander seeds, mustard seeds, peppercorns, bay leaf. (These add pockets of flavor that surprise you.)
Small side note: I sometimes add a thin apple slice to jars of beets for a faint sweetness. It is not necessary, but it is one of those little choices that makes the jar feel like a memory. Another tip is to have a weight you like. I use a small clean jar lid or a reusable ferment weight. If you want a comforting idea for what to serve alongside your jars, think about simple bowls of soup or rice that soak up the briny flavors, similar to the way I pair my comforting ways to use leftovers for quick weeknight meals.
Step-by-Step Directions
- Wash and dry your jars and hands well. Pack the vegetables into the jar firmly but not smashed, leaving about one to two inches of headspace. Press so juices rise, and breathe in the fresh vegetable scents that fill your kitchen.
- Layer aromatics like garlic or herbs between vegetable layers for even flavor. If you are using a dry-salt method, sprinkle salt between layers as you pack. If you are using a brine, dissolve salt in filtered water and pour enough to cover the vegetables.
- Press the vegetables down under a weight so the liquid covers them completely. Remove any floating bits so they do not sit in air. You want a clear line of brine above the vegetables and the smell of bright salt and earth.
- Cover the jar with a loose lid or a fermentation lid if you have one. Place the jars on a plate to catch any foam or bubbles. Write the date on a label and tuck the jar in a cool, shaded area of the kitchen.
- Taste the jar after two to three days. You will taste a lively tang that is still mild. For a deeper tang, let them ferment for five to seven days at room temperature. Keep a small spoon nearby so you can sample and notice the changes.
- If foam or white kahm yeast appears, skim it away with a clean spoon. It is a harmless part of fermentation but not everyone likes the look. If you see dark mold or a bad smell, discard and start over; that is rare when you keep vegetables submerged.
- Once the flavor is where you like it, move jars to the refrigerator. The cold slows fermentation and keeps the texture bright. I find that most jars taste best after a day or two in the fridge but will keep evolving gently over weeks.
- Serve in small bowls, on top of rice, or with toasted bread. Use the brine as a tangy mixer in dressings. The smell when you open the jar will draw children and grownups to the table.
- Refresh your jars by scooping out portions with clean utensils. Do not double-dip. If you want to keep the flavor brighter, eat within three to four weeks. Some jars last longer and keep improving in character over months.
- When you finish a jar, save the last spoonful of brine to start a new jar if you like. It is an old kitchen trick that gives your new jar a head start. Small acts like this make fermenting feel like a shared rhythm in the kitchen.

Ten Simple Fermented Vegetable Recipes for Beginners
1. Classic Sauerkraut
Ingredients
- 1 medium green cabbage, thinly shredded
- 1 tablespoon sea salt
- 1 teaspoon caraway seeds, optional
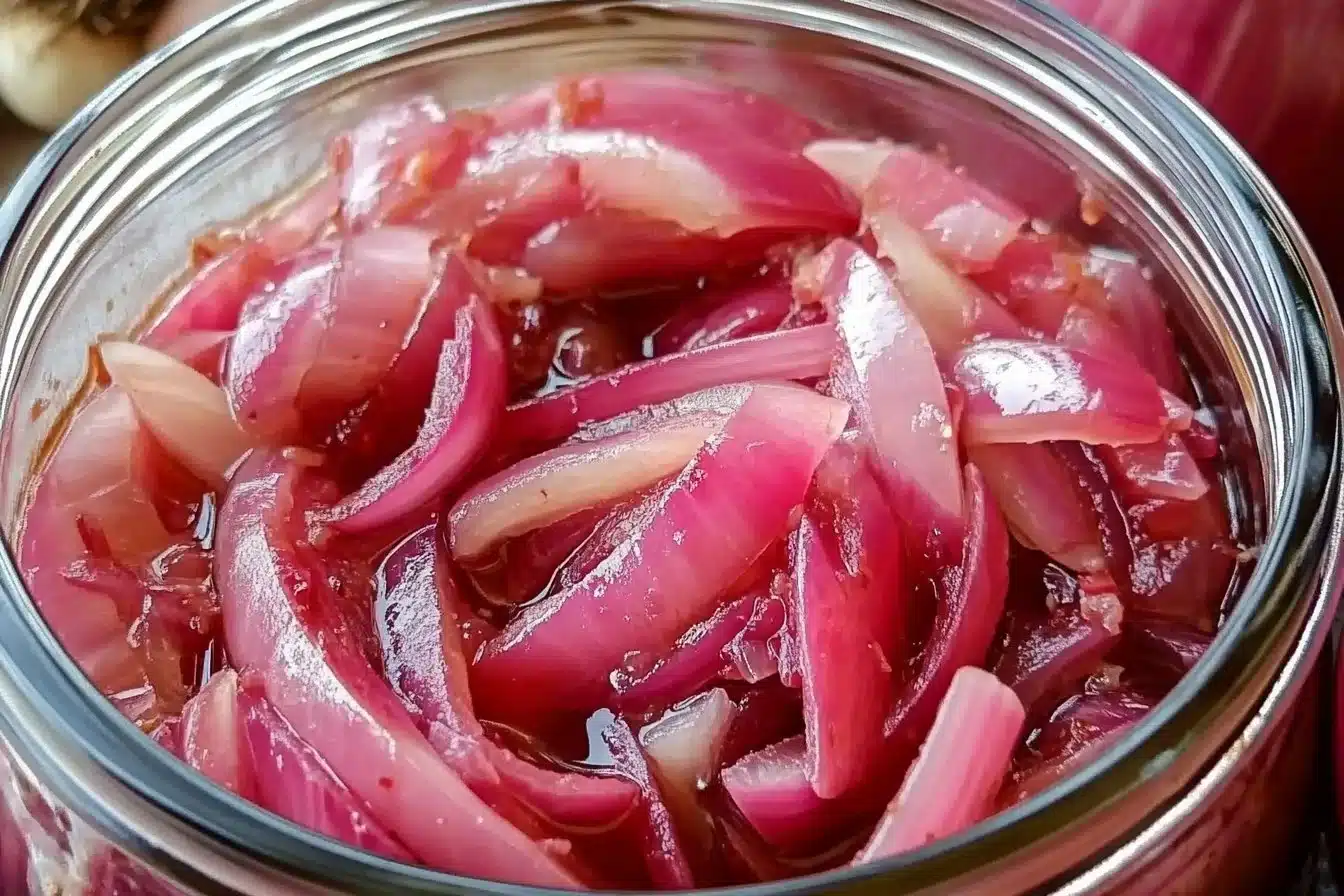
This is how my mother taught me to get comfortable with salt and cabbage. Mix cabbage with salt, massage until glossy and wet, then pack into a jar until juices cover it. Add a sprig of caraway if you love a warm, faintly sweet note. Let ferment at room temperature for three to seven days, tasting until the tang is soft and pleasing.
2. Quick Pickled Cucumbers
Ingredients
- 4 small cucumbers, cleaned and sliced
- 1 tablespoon sea salt
- 1 clove garlic, sliced
- 1 sprig fresh dill
Cucumbers ferment fast and give you quick rewards. Pack cucumbers with garlic and dill, add salt, and press down so brine rises. Taste after 48 hours for a crisp, bright result. They are wonderful with sandwiches and grilled cheese.
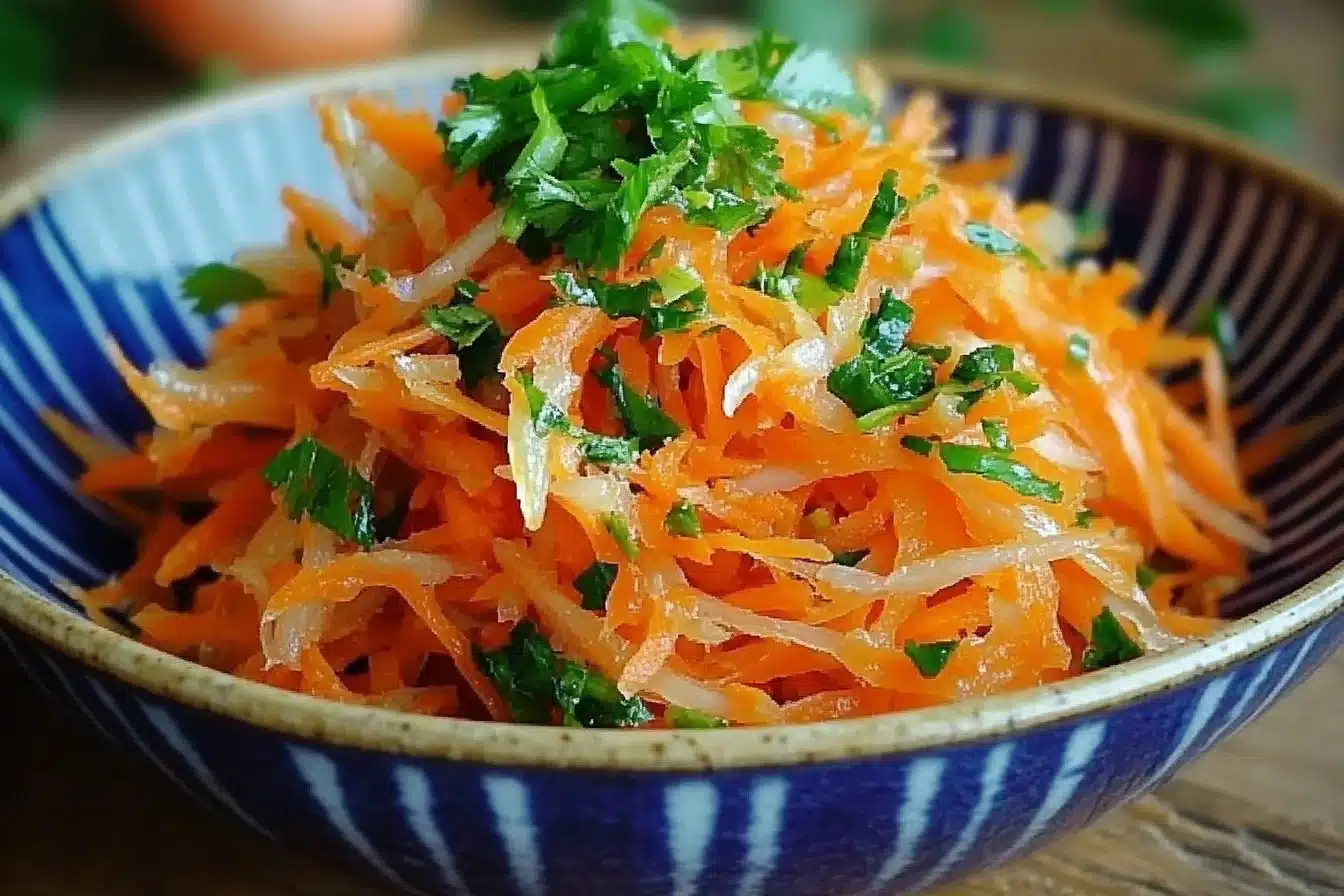
3. Carrot and Ginger Sticks
Ingredients
- 4 large carrots, peeled and cut into sticks
- 1 teaspoon grated ginger
- 1 tablespoon salt
- 1 teaspoon sugar, optional
Carrots keep a satisfying snap when fermented. Toss them with ginger and salt, and pack tightly into jars. If you like a touch of sweet, add a little sugar to help fermentation. I often give these to children with a little hummus for dipping.
4. Spicy Kimchi-Inspired Mix
Ingredients
- 1 small napa cabbage, chopped
- 1 carrot, julienned
- 2 scallions, chopped
- 1 tablespoon Korean red pepper flakes, go light for beginners
- 1 tablespoon sea salt
- 1 teaspoon fish sauce or soy sauce, optional
This is my simplified kimchi for people who want spice without fuss. Salt the cabbage until soft, then mix with carrot, scallion, pepper flakes, and a spoonful of sauce. Pack into a jar, taste after three days, and let it develop a warm, peppery lift.
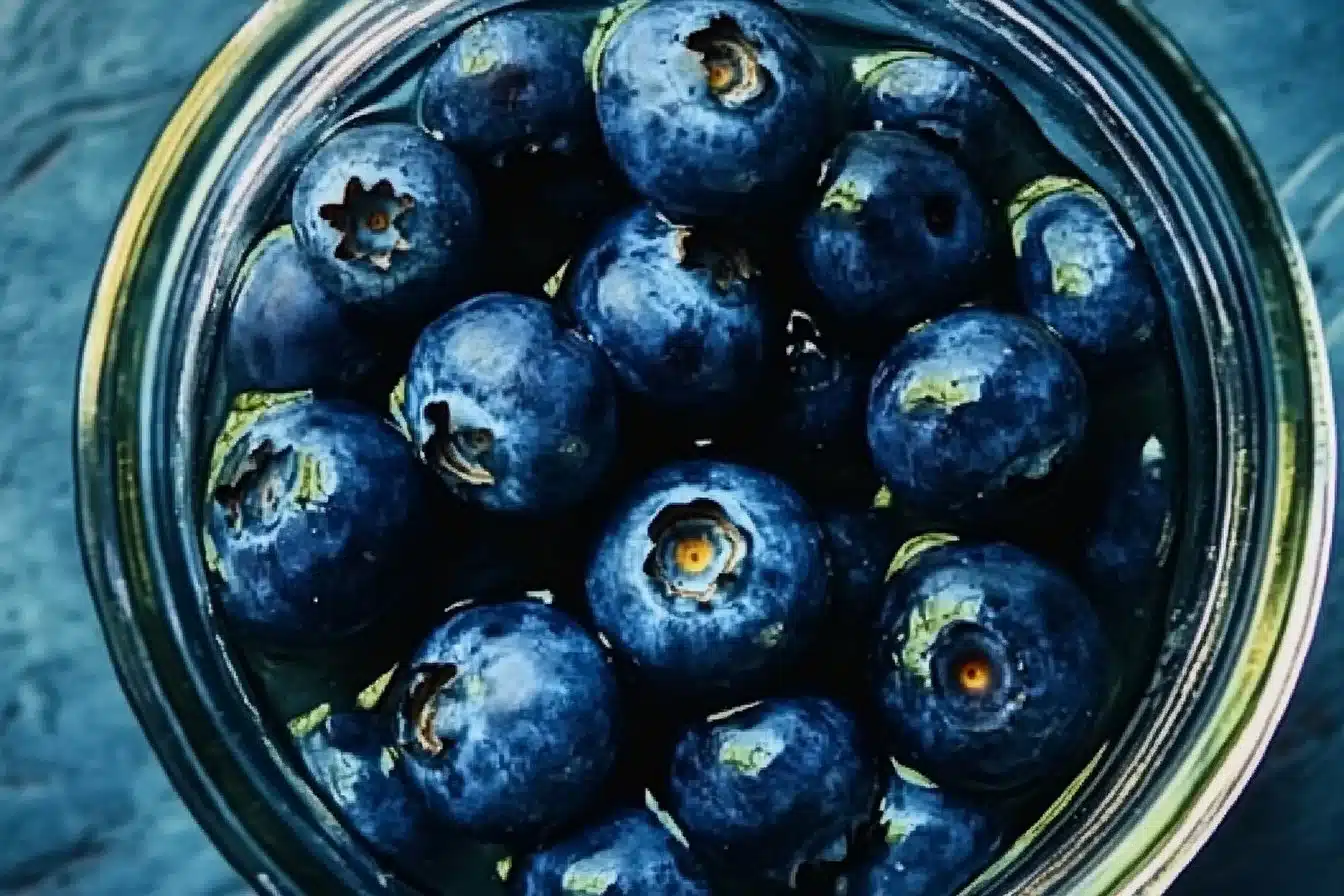
5. Beet Kvass Light
Ingredients
- 2 medium beets, peeled and chopped
- 1 teaspoon salt
- 4 cups filtered water
Beet kvass is a gentle ferment that makes a vivid drink and a tender handful of beets to use as a condiment. Put beets and salt in a jar, cover with water, and leave to ferment for three to five days. The liquid turns bright pink and tastes earthy and lively. I sip it in small amounts or add a splash to dressings for color.
6. Tangy Radish Slices
Ingredients
- 1 bunch radishes, thinly sliced
- 1 tablespoon sea salt
- 1 teaspoon sugar, optional
- 1 teaspoon coriander seeds, optional
Radishes retain their pepper and become milder with fermentation. Slice them thin, add salt and a pinch of sugar if you like, then pack into jars. These are lovely with cheese plates and grilled fish. The crunch gently softens, and the flavor deepens into something surprising.
7. Garlic Dill Green Beans
Ingredients
- 1 pound green beans, trimmed
- 2 cloves garlic
- 1 tablespoon dill seeds or fresh dill sprigs
- 1 tablespoon sea salt
Green beans make a beautiful jar with whole beans standing upright. Tuck a garlic clove and dill sprig into each jar, add salt, and pour brine to cover. Let them ferment until the beans are tender-crisp. They remind me of summer and jarred sunshine.
8. Sweet and Sour Beets
Ingredients
- 3 medium beets, peeled and sliced thin
- 1 tablespoon sea salt
- 1 apple slice, optional
- 1 cinnamon stick, optional for a warm note
Beets turn the jar into a jewel box. Add a single apple slice for a faint sweetness, and a cinnamon stick if you want a soft spiced edge. Ferment until beets are tender and sweet-tangy. I like them with salads and roasted meats.
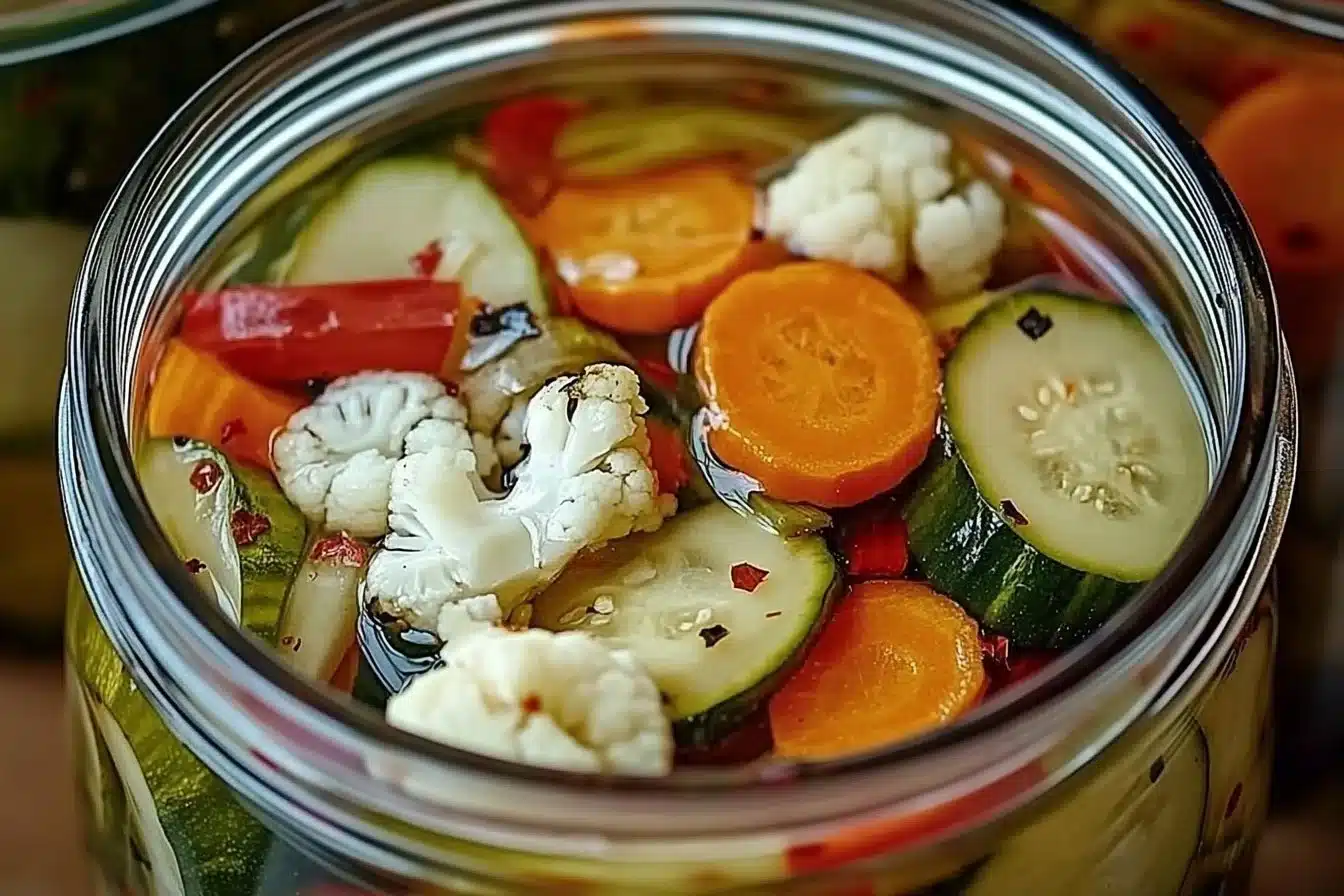
9. Mixed Vegetable Picnic Jar
Ingredients
- Small handful each of cauliflower florets, carrot sticks, and bell pepper slices
- 1 tablespoon sea salt
- 1 teaspoon mustard seeds
This is my go-to when I have little bits left in the crisper. Pack a mix for a crunchy, varied jar that makes an easy picnic side. Mustard seeds add a pop that keeps every bite interesting. Taste in three to five days.
10. Fermented Jalapeno Slices
Ingredients
- 6 jalapenos, sliced into rings
- 1 teaspoon sea salt
- 1 clove garlic
For those who like heat, jalapeno rings mellow into a rounded, tangy spice. Pack with garlic, salt, and press so the brine covers them well. They transform sandwiches and tacos with a bright, friendly heat. Keep a jar by the fridge for a spicy lift.
Serving Ten Easy Fermented Vegetable Recipes for Beginners With Family Warmth
I serve these jars like little presents. A stack of small bowls with different colors sits on the center of the table, and everyone reaches for what they want. My children like the carrots and cucumbers best, while my husband often grabs the beets. It is a small, shared exchange that makes dinner feel cozy.
Plating is simple and honest. I place a spoonful on a plate beside warm bread, scatter a few herbs, and pour a little brine into a dressing if I want a tangy drizzle. For weekend lunches, a scoop of sauerkraut or spicy kimchi over rice and a fried egg becomes a satisfying bowl that feels like a hug from the inside.
If you are hosting, put a selection in a small tray and label them. Guests love trying tiny tastes. Offer crackers, soft cheese, and slices of roast meat. These jars are also excellent as part of a brunch spread or alongside a bowl of soup on a cool evening.
Storing Ten Easy Fermented Vegetable Recipes for Beginners for Tomorrow
Store jars in the refrigerator once they reach the flavor you love. The cold keeps fermentation slow and textures bright. Use clean utensils and keep lids tight to maintain a steady taste.
Flavors will mellow over time and sometimes deepen into a richer tang. Some jars are at their best in the first few weeks, while others, like sauerkraut, can grow more complex over months. If you see a white film on the top, it is often harmless yeast and can be skimmed off with a clean spoon.
If you want to make larger batches, split them into two jars so you have a jar in the fridge and one maturing at room temperature. That way you always have something ready and something developing. When a jar is nearly empty, save the last spoonful of brine to jump-start a new batch and keep the rhythm going.
Troubleshooting and Gentle Tips for Beginner Success
If the vegetables seem too soft, you may have fermented at too warm a temperature. Move the jar to a cooler spot or shorten the fermentation time next time. If it tastes too salty, rinse a little before serving or cut salt slightly on the next batch.
If the jar smells off in a way that feels unpleasant or you see fuzzy mold, discard and start again. This is rare if you keep vegetables submerged and use clean jars. Small bubbles and a fresh, tangy smell are signs of healthy fermentation.
Remember that every kitchen is different. The same recipe will respond differently depending on room temperature, the vegetable’s water content, and the salt you use. The first few batches are about learning the rhythm. Keep notes on the date, time, and flavors that you liked. These notes become a kind of kitchen map that you will follow and revise.
Recipes for Small Hands and Busy Days
For tiny mouths, shorten fermentation time and remove seeds from spicy peppers. Let children help press the vegetables into jars and taste the early changes. It is a safe way to teach them about time and transformation in food.
For busy days, make a large batch and keep it in the fridge. I portion jars into small containers to tuck into lunch boxes and to use as quick sides. The jars travel well and they brighten quick dinners without much fuss.
Tools I Love and Why They Matter
You do not need special tools to begin. Clean jars, a wooden pounder or your hands, and a weight are enough. A dedicated small cutting board and a sharp knife make the work faster and more pleasant. I keep a simple label and a marker near my jars so I always note the start date.
If you want to invest a little, consider an airlock lid that releases gas without letting air in. It helps for people who like to keep jars at room temperature longer. But truly, the heart of fermenting is patience, salt, and care. Those simple things are what make the magic happen.
A Final Thought on Flavor and Family
Fermenting reconnects us to small, slow pleasures and creates a pantry that tells stories. Each jar is an invitation to remember, to wait, and to taste how simple things can turn into something lovely. I hope these Ten Easy Fermented Vegetable Recipes for Beginners give you a place to start and grow.
Conclusion
If you want another set of clear, friendly recipes to begin with, this guide to Ten Easy Fermented Vegetable Recipes for Beginners is a helpful companion. For a different perspective and more guaranteed results if you like to follow tested patterns, explore these 5 No-Fail Fermented Food Recipes for Beginners.
Print
Ten Easy Fermented Vegetable Recipes for Beginners
- Total Time: 5 days 15 minutes
- Yield: 10 jars 1x
- Diet: Vegan
Description
Learn to ferment vegetables effortlessly with these ten simple recipes that celebrate fresh flavors and add a vibrant touch to your meals.
Ingredients
- 1 medium green cabbage, thinly shredded
- 1 tablespoon sea salt
- 1 teaspoon caraway seeds (optional)
- 4 small cucumbers, cleaned and sliced
- 1 clove garlic, sliced
- 1 sprig fresh dill
- 4 large carrots, peeled and cut into sticks
- 1 teaspoon grated ginger
- 1 tablespoon salt
- 1 teaspoon sugar (optional)
- 1 small napa cabbage, chopped
- 1 carrot, julienned
- 2 scallions, chopped
- 1 tablespoon Korean red pepper flakes (adjust to taste)
- 1 teaspoon fish sauce or soy sauce (optional)
- 2 medium beets, peeled and chopped
- 4 cups filtered water
- 1 bunch radishes, thinly sliced
- 1 teaspoon sugar (optional)
- 1 teaspoon coriander seeds (optional)
- 1 pound green beans, trimmed
- 2 cloves garlic
- 1 tablespoon dill seeds or fresh dill sprigs
- 3 medium beets, peeled and sliced thin
- 1 apple slice (optional)
- 1 cinnamon stick (optional)
- Small handful each of cauliflower florets, carrot sticks, and bell pepper slices
- 1 teaspoon mustard seeds
- 6 jalapenos, sliced into rings
Instructions
- Wash and dry your jars and hands well. Pack the vegetables into the jar firmly but not smashed, leaving about one to two inches of headspace.
- Press so juices rise, and breathe in the fresh vegetable scents that fill your kitchen.
- Layer aromatics like garlic or herbs between vegetable layers for even flavor.
- Sprinkle salt between layers as you pack or dissolve it in filtered water and pour enough to cover the vegetables.
- Press the vegetables down under a weight so the liquid covers them completely.
- Cover the jar with a loose lid and place on a plate to catch any overflow.
- Write the date on a label and tuck the jar in a cool, shaded area of the kitchen.
- Taste the jar after two to three days for a lively tang; let it ferment longer for deeper flavors.
- Move jars to the refrigerator once the flavor is to your liking; cold slows fermentation.
- Serve in small bowls on top of rice or alongside bread, enjoying the vibrant colors and flavors of your creations.
Notes
Try adding different herbs or spices to customize your ferments. Remember, fermentation is a personal journey that evolves with each batch.
- Prep Time: 15 minutes
- Cook Time: 5 days
- Category: Side Dish
- Method: Fermenting
- Cuisine: Japanese
Nutrition
- Serving Size: 1 jar
- Calories: 50
- Sugar: 2g
- Sodium: 320mg
- Fat: 0g
- Saturated Fat: 0g
- Unsaturated Fat: 0g
- Trans Fat: 0g
- Carbohydrates: 12g
- Fiber: 2g
- Protein: 1g
- Cholesterol: 0mg
Keywords: fermented vegetables, easy recipes, kraut, pickles, healthy eating