Gluten free pizza crust recipe disasters used to be my personal kitchen villain. You know the vibe, you want Friday night pizza, but you also want to feel good after eating it, and somehow the crust turns into a sad cracker or a gummy plate. After a lot of tinkering, I finally landed on a simple method that actually works in a regular home kitchen. No fancy equipment, no weird techniques, and no stress. If you have missed pizza nights because gluten free dough feels intimidating, this is for you. 
Nicole’s Recipe Notes
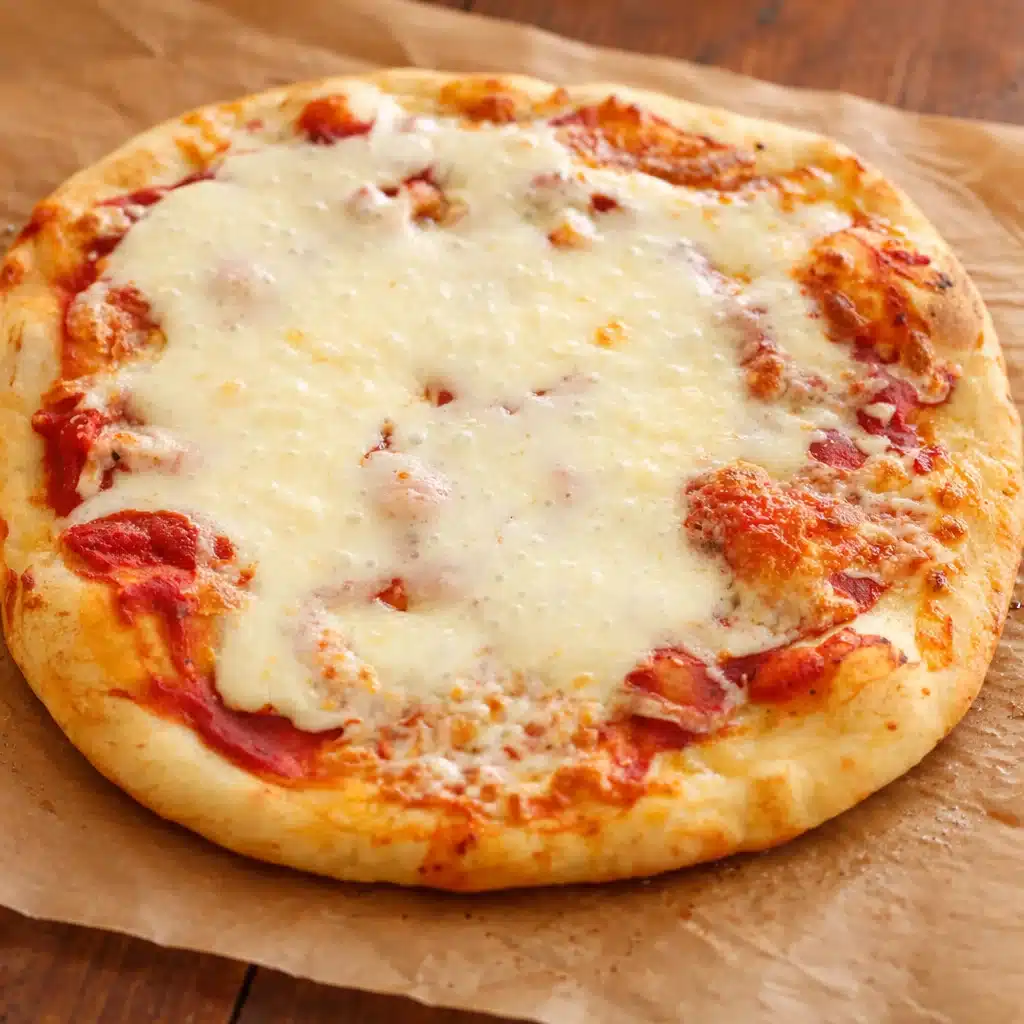
I like to keep this gluten free pizza crust recipe super practical, because when I am hungry I do not want a science project. This dough is soft, easy to spread, and it bakes up with crisp edges and a chewy middle if you do it right.
Here is what you will need for my go to crust. I am listing it in a way that matches how I actually cook at home, so you can move fast and not second guess yourself.
- Gluten free all purpose flour blend (with xanthan gum if possible), 2 1/2 cups
- Instant yeast, 2 1/4 teaspoons (1 packet)
- Sugar or honey, 1 teaspoon (just to wake up the yeast)
- Salt, 1 teaspoon
- Warm water, about 1 cup (start with 3/4 cup and add as needed)
- Olive oil, 2 tablespoons (plus extra for the pan)
- Optional: garlic powder or Italian seasoning, 1/2 teaspoon
A couple quick notes that save me every time:
- Gluten free dough is usually a bit wetter than regular dough. That is normal and it is how you avoid a dry crust.
- If your flour blend does not include xanthan gum, the dough can fall apart. You can still do it, but you need to add a binder (I talk about that later).
- I like baking on a preheated pan or pizza stone for better browning, but a regular sheet pan works too.
Also, if you are into easy weekend breakfasts to go with pizza night leftovers, my kitchen has been loving this gluten free pancake mix situation lately. Same goal, simple and reliable. 
Expert tips
This is where the little details make a big difference. I have made every mistake so you do not have to.
My 7 simple steps for a crust that actually tastes like pizza
1) Preheat your oven to 475 F. If you have a pizza stone or heavy sheet pan, put it in the oven now so it heats up too.
2) In a large bowl, mix warm water with sugar and yeast. Let it sit 5 minutes. It should look foamy or at least a bit bubbly.
3) Add flour blend, salt, and any seasonings. Stir it well.
4) Pour in olive oil and mix again until the dough looks thick and sticky, like a very soft bread dough. If it seems dry, add a tablespoon of water at a time.
5) Cover the bowl and let it rest for 20 to 30 minutes. It will not rise like wheat dough, but it should puff slightly. This rest helps the flour hydrate so your crust is not gritty.
6) Oil a piece of parchment paper and your hands. Press the dough out into a 12 inch circle or a rectangle, about 1/4 inch thick. Do not fight it with a rolling pin, just press and shape.
7) Par bake the crust for 8 to 10 minutes, then add sauce and toppings, and bake 8 to 12 minutes more until the edges are browned and the cheese is bubbling.
If you want the crust crispier:
- Go lighter on sauce.
- Use a preheated pan or stone.
- Par bake a little longer, closer to 10 minutes.
One more real life tip. If you load on tons of watery toppings, even the best gluten free pizza crust recipe can end up soft in the middle. If you want mushrooms, cook them first. If you want fresh mozzarella, pat it dry.
And since I am always pairing pizza night with something fun to sip, I sometimes blend a quick smoothie earlier in the day so I feel like I have my life together. If you like that kind of vibe, this 7 minute anti inflammatory smoothie recipe is an easy one. 
Ingredient substitutions
If your pantry is not perfectly stocked, you can still pull this off. Here are swaps I have tried and what to expect.
Flour blend:
If you can, use a gluten free all purpose blend made for baking. The ones with a mix of rice flour, starches, and a binder tend to give the most consistent results. If your blend does not have xanthan gum, add 1 teaspoon xanthan gum to the dry ingredients.
Yeast:
Instant yeast is easiest. If you only have active dry yeast, it still works, just give it a few extra minutes to get foamy in the warm water.
Sugar:
You can use honey, maple syrup, or regular sugar. It is not for sweetness, it is just to help the yeast start.
Dairy free:
This crust is naturally dairy free. For toppings, dairy free mozzarella works, but I recommend adding it halfway through baking so it does not dry out.
Egg free:
This specific dough does not need eggs, which is one reason I love it. Some recipes do use eggs for structure, but I prefer keeping it simple.
And if you are the kind of person who likes themed dinners, I have totally done gluten free pizza night followed by a cozy Japanese dessert situation. This list of 30 easy Japanese recipes is a fun browse when you want a new idea.
How to make gluten free pizza dough
This section is basically the play by play, like if you were standing in my kitchen while I make it.
Start with the yeast. Warm water should feel like bath water, not hot. If it is too hot, you can kill the yeast and then you are stuck with dense dough.
When you mix the dough, do not panic if it looks stickier than what you remember from regular pizza dough. That stickiness is part of the deal. Gluten free dough does not stretch the same way, so hydration is what keeps it tender.
Now the shaping part. I press the dough out on oiled parchment because it saves your counter and your sanity. If the dough sticks to your fingers, oil your hands again. It is not failing, it is just being gluten free.
After the par bake, I pull it out and add toppings. My standard is simple:
- Pizza sauce
- Shredded mozzarella
- Pepperoni or roasted veggies
- A pinch of oregano
Then I bake again until the edges look browned and the center looks set.
“I tried this on a weeknight and honestly did not expect much, but the crust held up and had that real pizza chew. Even my gluten loving husband went back for a second slice.”
If you are new to gluten free baking, do not judge it too early. Let it cool for 3 to 5 minutes before slicing. Hot gluten free crust can seem soft, but it firms up as it rests.
Storage instructions
This gluten free pizza crust recipe is great fresh, but it is also meal prep friendly, which is my love language.
To store in the fridge:
Let the baked crust or finished pizza cool completely. Store slices in an airtight container for up to 3 days.
To freeze:
Par bake the crust, cool it, wrap it well, and freeze up to 2 months. When you want pizza, add sauce and toppings straight from frozen and bake until hot and browned.
To reheat:
My favorite method is a skillet. Medium heat, slice in the pan, cover it for a few minutes. The bottom gets crisp and the cheese gets melty again. Oven works too at 400 F for 8 to 10 minutes. Microwave is fine in a pinch, but the crust will be softer.
If you are planning a lighter week and want something to balance out pizza night, I sometimes do a big pot of veggie soup the next day. This 7 day vegetable soup diet recipe is a helpful reset style option. 
Common Questions
Why is my gluten free crust gummy in the middle?
Usually it is too much sauce or toppings, or the crust did not get a par bake. Try par baking 10 minutes and use less sauce next time.
Do I need a pizza stone?
Nope. A heavy sheet pan works. Just preheat it so the bottom starts cooking right away.
Can I make the dough ahead of time?
Yes. Mix it, cover it, and refrigerate up to 24 hours. Let it sit on the counter 30 minutes before shaping.
How do I keep the dough from sticking to my hands?
Oil your hands and use parchment. With gluten free dough, that little bit of oil makes shaping so much easier.
What thickness is best?
About 1/4 inch gives a nice balance. Too thin can turn crackly, too thick can stay soft in the center.
Your next pizza night is handled
Once you get the hang of the rest time and the par bake, this gluten free pizza crust recipe starts to feel like second nature. Keep the dough a bit wet, do not overload the toppings, and let the oven do its job. If you want to compare methods, I have bookmarked a few solid guides like Easy Gluten Free Pizza Dough and The Best Gluten-Free Pizza Crust + Sauce – Minimalist Baker.
For more ideas and tiny tweaks, you can also check Homemade Gluten Free Pizza Crust – Amusing Foodie, Gluten-Free Pizza Crust (5-Star Recipe!) – Meaningful Eats, and Gluten Free Pizza Crust – Light + Airy, and Vegan Too! – Iowa Girl Eats. Now go plan that pizza night and tell me what toppings you picked, because I am always looking for new combinations.