The kitchen smelled of warm sugar and a whisper of citrus, and my small son pressed his nose to the counter while I filled the candy molds. Those afternoons are where Jello Candy Melts began for me, a recipe that grew out of sticky fingers, bright colors, and the quiet ritual of shaping something joyful out of simple pantry items. If you ever need a softer, gentler version of jiggly treats, I sometimes send friends to a helpful bariatric Jello guide that walks through gentle gelatin options with care and kindness.
Why This Jello Candy Melts Means So Much
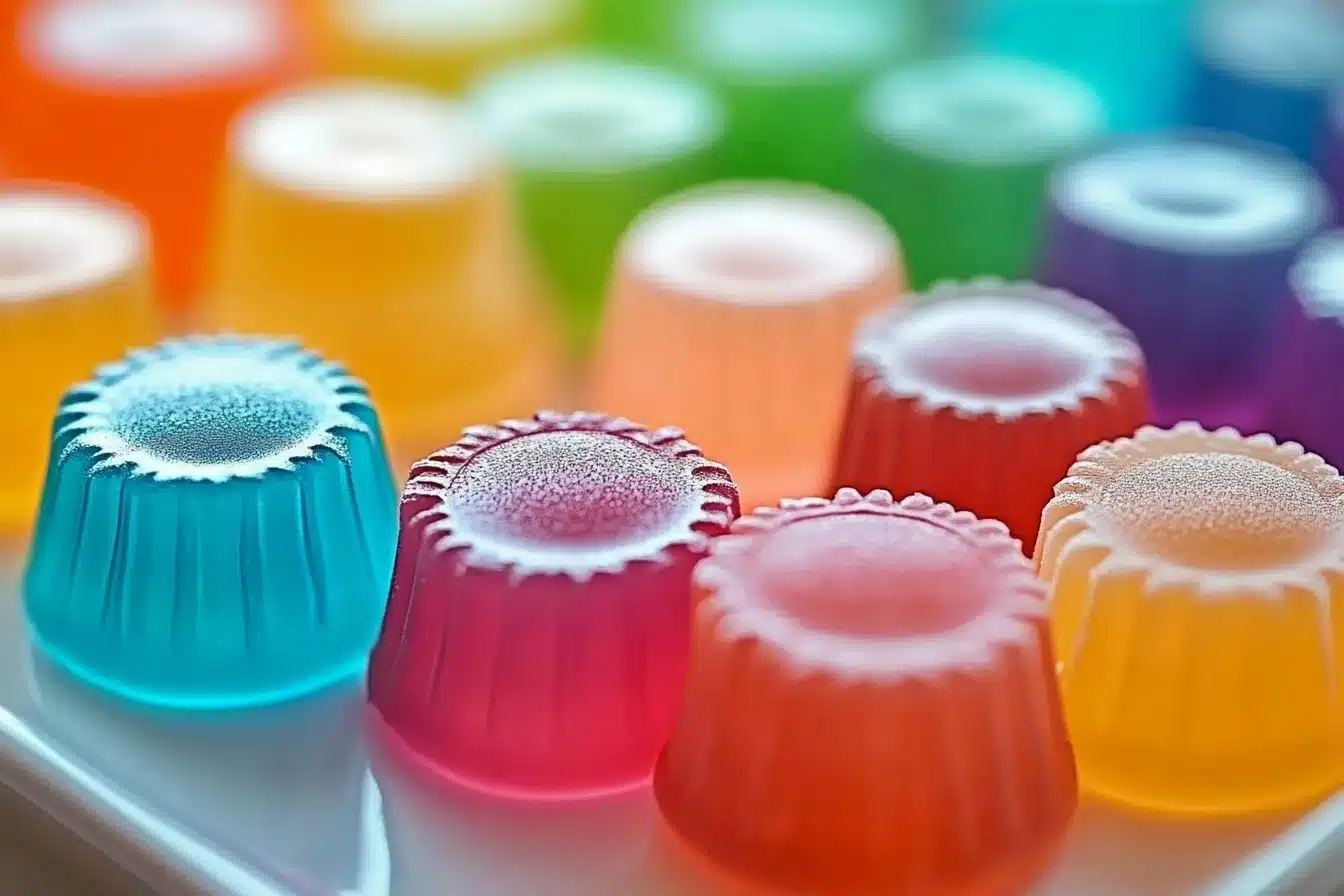
There are recipes that feel like a skill and recipes that feel like a keepsake. Jello Candy Melts sits in the second category for me. I first tried mixing gelatin into little candy shapes on a rainy afternoon when my daughter was three and wanted "rainbow stars" for her lunchbox. The first batch was imperfect. Some candies stuck to the molds, and a few colors ran together. But when my daughter bit into one and laughed at the wiggle, I knew I had something to come back to.
This recipe connects to the small, ordinary moments that make up a week. It is the treat you bring to a neighbor’s house, the little surprise tucked into a lunch, the colorful plate you set out at a simple party. The process is forgiving, which is how I like most home cooking to be. You can follow it exactly, or you can bend it around what you have, what your family likes, and how much time you have that afternoon.
The memory of the first time I made a whole tray comes back in layers. I remember the soft light falling across the counter, the smell of sweet gelatin warming in the pan, and the sound of my husband calling from the other room. That sense of ordinary joy is what I want this dish to pass on. It is not about perfection. It is about sharing a small pleasure that feels handmade and true.
How to Make Jello Candy Melts
“Every time I stir this pot, it smells just like Sunday at home.”
When I make Jello Candy Melts, the rhythm matters more than the clock. Start by measuring with intention. You will see the colors shift from opaque to translucent as the powdered mix dissolves, and that is the moment when you know the texture will be right. Heat is gentle here. Too hot, and the mixture loses some of its glossy look. Too cool, and it will not set smoothly into the molds. I like to keep a soft hand on the spoon and listen to the small sounds: the bubble of warm syrup, the whisper as the spoon skims the bowl.
I often wander between stove and counter while stirring, tasting the mixture on the back of a spoon. It is candy, so the sugar bite is expected, but there is also a childhood sweetness to it. If you add a pinch of vanilla, you will notice a cozy scent that makes the whole kitchen feel like home. Sometimes I mix colors to make soft ombre candies that look like little sunsets. Other times I keep each hue pure, and the tray becomes a bright, neat collection like crayons in a box.
When the mixture has the right shine and pours without clumping, you will see tiny bubbles break on the surface. That little pop is usually when I stop stirring and start filling molds. Pouring is meditative. The mixture slips into each cavity and rests there, cooling and solidifying into the familiar soft chew. Once they are set, the candies carry that memory of the warm pot, the poured streams, and the laughter nearby.
Ingredients You’ll Need
Jello gelatin mix
Water
Corn syrup
Powdered sugar
Vegetable oil
Food coloring (optional)
Candy molds
(a little extra vanilla if you love a cozy aroma)
(a drizzle of fresh butter gives richness if you like a softer melt)
(a sprinkle of citric acid for a tiny tart bite, optional)
Gathering these items should feel easy and doable. Most of them are pantry staples, and that is part of what makes this recipe friendly to a busy kitchen. You can find a wide range of colored gelatin mixes at the store or pick single-flavor packets and mix them for custom shades. Corn syrup helps the candies stay glossy and a bit flexible, while powdered sugar smooths out the texture. Vegetable oil keeps the molds from clinging, and optional food coloring gives you freedom if you want brighter tones. If you are curious about other gelatin treats, I like the gentle textures in a chia Jello recipe that plays with layers and freshness.
Step-by-Step Directions
In a mixing bowl, combine Jello gelatin mix and water according to package instructions.
Start with clean bowls and a level cup of water. Measure carefully so the final texture is balanced.
Watch the powder dissolve into the water until the liquid looks even and the color begins to bloom.Heat the mixture in a microwave or on the stove until fully dissolved.
Warm it slowly over low heat or in short bursts in the microwave, stirring between intervals.
Stir until glossy and smooth, breathing in the scent as it warms and becomes syrupy.Stir in corn syrup and powdered sugar to achieve a smooth consistency.
Add the corn syrup a spoonful at a time, then sift or sprinkle the powdered sugar in slowly.
Keep stirring until the mix feels silky, with no grainy bits, and the surface catches the light.If desired, add food coloring to the mixture for different shades.
A tiny drop goes a long way, so test colors in a small bowl before committing.
Stir gently until the color is even and the mixture is satiny.Pour the melted mixture into candy molds of your choice.
Lightly oil the molds so the candies release easily and pour steadily to avoid splashing.
Tap the molds on the counter once to settle the liquid and smooth the tops.Allow the candies to cool and solidify at room temperature or in the fridge for quicker results.
Leave them undisturbed so the texture sets without cracks, and check after thirty minutes to an hour.
If chilled, bring back to room temperature before serving for a softer mouthfeel.Once set, remove the candies from the molds and enjoy your colorful, sweet treats!
Run a butter knife around the edge if any pieces cling, then gently pop each candy free.
Arrange them on a small plate and breathe in the faint, sweet aroma before tasting.

Serving Jello Candy Melts With Family Warmth
There is a small pleasure in plating these candies with intention. I often line a shallow bowl with a soft linen napkin and arrange the candies in a tidy circle. For a casual snack, set a few on a saucer beside tea or a cold glass of milk. At a weekend brunch, I tuck a handful into a little paper cup and place one on each plate as a playful, colorful finishing touch. The kids like to sort them by color before eating, and we make a little game of guessing which flavor will be most picked.
If you want to bring a plate to a friend, wrap the candies in parchment and tie with a simple string. They travel well for short trips and make lovely, low-fuss gifts. Pair them with other small bites, like simple butter cookies, fresh fruit, or a plate of mild cheese. The candies are sweet and light, so they sit nicely beside more savory options at a gathering.
Serving is also about ritual. We have a tiny habit in my house of passing a tray of these to whoever is doing something ordinary, like folding laundry or watering plants. It is a small ceremony of appreciation. Even when the day is ordinary, a little candy can turn it inward into something gentle and shared. If you are looking for chocolate ideas that pair well with bright sweet bites, a chocolate candy note on the side can make the plate feel balanced and grown up.
Storing Jello Candy Melts for Tomorrow
Storing these candies is simple and forgiving. Place them in an airtight container with a layer of parchment between layers if you are stacking them. Keep them in a cool, dry place if you plan to eat them within a day. For longer storage, place the container in the refrigerator; this can help them maintain a firmer shape. Before serving chilled candies, let them sit at room temperature for a short while to soften slightly so the texture feels pleasing on the tongue.
Flavor often deepens over a day. The brightest notes may mellow into a softer, rounder sweetness that many people prefer. If you find the candies stick together after a day in the fridge, give them a minute on the counter to breathe and separate the edges with a knife. If humidity is high where you live, include a small packet of desiccant or a folded paper towel in the container to absorb extra moisture. These small steps keep the candies looking and tasting fresh.
Tips, Variations, and Troubleshooting
A few small adjustments will make this recipe fit your life. If you want a firmer candy, reduce the water slightly and increase the powdered sugar by a tablespoon or two. If you prefer a softer texture, add a bit more corn syrup to make the center more tender. For a tart counterpoint, mix a small dash of citric acid into the powdered sugar before stirring it in. If your mixture seems grainy, simmer it a little longer while stirring; you should see the particles disappear and the syrup become glossy.
Coloring can be part of the fun. Try layering colors in the molds for a striped effect. Pour a thin layer and let it set slightly before adding the next. This creates a beautiful banded candy that feels festive. If you like a more natural approach, experiment with juice concentrates or powdered natural colorings, keeping in mind they can change flavor or sweetness.
Stuck candies are a common worry. To prevent sticking, lightly oil the molds or mist them with a little nonstick spray. If pieces still cling, run the mold briefly under warm water for a moment, then use a thin spatula to ease the edges free. The goal is gentle coaxing rather than force, which keeps the candies whole and pretty.
If the candies do not set, the usual cause is too much water or not enough gelatin from the mix. Double-check your package proportions and try reducing liquid next time. If texture turns out rubbery, that usually points to overheating or simmering too long. Keep the heat low and stir patiently until the syrup only barely simmers.
Why Kids and Grown Ups Both Love This
There is an almost universal joy to bright, hand-shaped candies. For kids, the visual appeal is immediate. Little hands love picking colors and shapes, which turns the kitchen into a place of play. For grown ups, there is a nostalgic comfort in their simplicity. They are not flashy gourmet candies; they are honest, home-made treats that bring back simple pleasures.
I remember once bringing a tray to a small neighborhood playdate. The toddlers lined up for a taste and the parents lingered at the doorway. People asked me if the candies were store-bought, and I felt pleased to tell them they were made that afternoon. The recipes we share in real life often inspire others to try small things in their own kitchens. This is a recipe like that. It is easy enough for a weekday afternoon and special enough for a celebration.
Making It Your Own: Flavor and Shape Ideas
Use different shaped molds to match the season. Stars and hearts are lovely for holidays, while small fruit shapes feel fresh in summer. You can make tiny bite-sized candies or larger ones that are chewier. For flavor twists, mix different gelatin flavors together. A little lemon blended with strawberry gives a bright, layered taste.
Another idea is to make a two-part candy with a soft center. Pour a thin shell of one color and let it set until tacky, then add a contrasting softer mixture in the middle. The result is a little surprise inside each bite. If you like a creamy texture, stir in a spoonful of sweetened cream or condensed milk into part of the batch before pouring.
For a party favor, press small edible decorations, like sugar pearls or tiny sprinkles, into the candies just before they set. They will stick gently and look festive. You can also dust finished candies with a little powdered sugar to cut some surface stickiness while adding a pretty finish.
A Note About Safety and Young Eaters
If serving to small children, always consider any food sensitivities in your household. Some gelatin mixes include additives that you may want to avoid. Read labels if allergies or dietary restrictions are a concern. Small candies are also a choking risk for children under three, so supervise little ones and consider making slightly larger pieces for older kids or adults.
If you are sharing with people who follow specific diets, there are gelatin options that fit different needs. Look for vegetarian gelatin alternatives if that is preferred, though they may change the texture. If you need ideas for gentle gelatin for certain diets, the bariatric gelatin guide mentioned earlier can be a thoughtful starting place.
A Few Favorite Memories While Making These
I have made these candies on rainy afternoons, for school holidays, and as a treat after a long day. One of my favorite memories is from a summer when a neighbor brought over fresh lemon juice and we spent an hour mixing lemony molds that smelled like sun and grass. Another time, my son helped me pour blue candies that ended up at his class party, and his teacher told me the kids still remembered them the next week.
These little memories are part of why I keep making Jello Candy Melts. It is not about the perfect recipe. It is about the act of making something small and beautiful for people you care about. These candies become bookmarks in ordinary days.
Common Questions I Hear from Readers
Can I make these ahead for a party?
Yes. You can make them a day or two ahead if stored properly. Keep them in an airtight container in a cool place and separate layers with parchment.
How long do they last?
They are best within a few days. Texture may change after several days, and flavors tend to mellow.
Can I use natural colorings?
Yes, but natural options can affect taste and may not be as bright. Test them in a small batch first.
What molds work best?
Silicone molds are forgiving and usually release candies easily. Plastic molds can work too, but oil them lightly.
Do they melt in hot weather?
They can become softer in warm, humid conditions. Keep them cool for transport and serving.
A Little About Tools and Small Upgrades
A few small tools can make the process easier. Flexible silicone molds make unmolding simple, and a small offset spatula helps level off layers. Fine mesh sieves are useful if your powdered sugar has lumps. A hand-held digital thermometer is not required, but it can help you keep the mixture at the right warmth if you are experimenting with textures.
For a small upgrade, use a measuring syringe or squeeze bottle to fill tiny molds neatly. This keeps colors from blending and gives you precise control over small shapes. Use a low, steady heat source and stir with a silicone or wooden spoon for a smooth finish.
About Joudia’s Kitchen
My kitchen is not a projector for perfection. It is a place where the kettle whistles, toys gather under a chair, and the radio plays soft music while I stir. I want you to feel welcome here. If you try these candies and the first batch is a little off, I hope you will try again. Most recipes get better with a few small adjustments, and the best ones are the ones you make your own.
If you make Jello Candy Melts for someone you love, tell me about it. I treasure notes from readers who have made a recipe into a tradition. This dish is simple enough for beginners and flexible enough to inspire those who cook a lot. It is made of easy ingredients, warm memories, and the kind of small fuss that makes life at home feel tender.
Thank you for spending this moment in my kitchen. May the tray you make bring a little light to a regular day, and may the scent of sweet gelatin remind you of gentle afternoons and warm hands shared around a table.
Print
Jello Candy Melts
- Total Time: 25 minutes
- Yield: 12 servings
- Diet: Vegetarian
Description
Colorful and delightful homemade gelatin candies that are easy to make and perfect for sharing.
Ingredients
- Jello gelatin mix
- Water
- Corn syrup
- Powdered sugar
- Vegetable oil
- Food coloring (optional)
- Candy molds
- Vanilla (optional)
- Fresh butter (optional)
- Citric acid (optional)
Instructions
- In a mixing bowl, combine Jello gelatin mix and water according to package instructions.
- Heat the mixture in a microwave or on the stove until fully dissolved.
- Stir in corn syrup and powdered sugar to achieve a smooth consistency.
- If desired, add food coloring to the mixture for different shades.
- Pour the melted mixture into candy molds of your choice.
- Allow the candies to cool and solidify at room temperature or in the fridge for quicker results.
- Once set, remove the candies from the molds and enjoy your colorful, sweet treats!
Notes
Experiment with different shapes and flavors. Store candies in an airtight container to keep them fresh.
- Prep Time: 15 minutes
- Cook Time: 10 minutes
- Category: Dessert
- Method: No-Bake
- Cuisine: American
Nutrition
- Serving Size: 4 candies
- Calories: 100
- Sugar: 20g
- Sodium: 15mg
- Fat: 0g
- Saturated Fat: 0g
- Unsaturated Fat: 0g
- Trans Fat: 0g
- Carbohydrates: 24g
- Fiber: 0g
- Protein: 0g
- Cholesterol: 0mg
Keywords: jello, candy, kids, dessert, homemade


