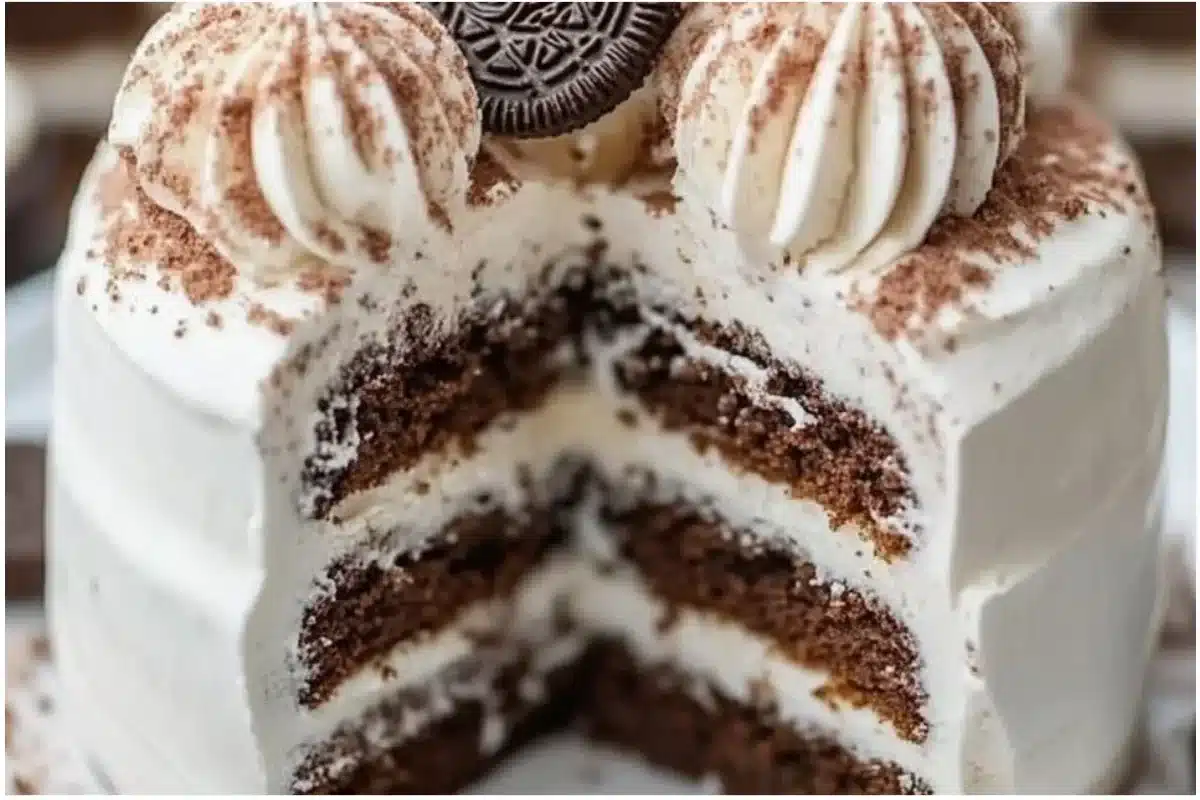
This Oreo cake is a show-stopping, creamy-chocolate centerpiece with a crisp cookie crust and pillowy, milky filling the aroma is pure nostalgia with warm cocoa and sweet vanilla. It’s perfect for holiday parties or a midweek treat, and the contrast between crunchy Oreo bits and silky frosting is irresistible. Quick to assemble and adaptable for seasonal toppings, this recipe is as festive as it is fuss-free. Check out a bright, balancing drink to serve alongside: 7‑minute anti‑inflammatory smoothie recipe.
Why You’ll Love This Recipe
Oreo Cake is ideal for holidays, birthdays, or anytime you crave a nostalgic dessert with grown-up flavor. It’s a crowd-pleaser that travels well to potlucks and scales easily for small or large gatherings. The layered textures crunchy cookie base, soft cake or mousse middle, and glossy chocolate or whipped topping deliver variety in each bite. Plus, it’s quick to make using mostly pantry staples, so you can spend less time in the kitchen and more time enjoying the season with guests.
Seasonal Ingredients Spotlight
Use fresh, seasonal additions to brighten this cake for winter or the holidays: candied orange zest, tart cranberries, or a sprinkle of toasted nuts add color and crunch. In winter, deep red cranberries contrast beautifully against dark chocolate, while citrus peels lend a fragrant, zesty note that lifts the dessert. Choose locally sourced dairy and eggs when possible for better flavor and lower food miles; seasonal citrus grown nearby will taste brighter and reduce environmental impact. For crunchy, savory snacks to serve alongside, consider making your own seasoning try this salt-and-vinegar seasoning for an unexpected pairing.
Print
Oreo Cake
- Total Time: 240 minutes
- Yield: 8 servings 1x
- Diet: Vegetarian
Description
A show-stopping Oreo cake with a cookie crust and creamy filling, perfect for holiday gatherings.
Ingredients
- 24 Oreo cookies (whole)
- 4 tbsp melted butter
- 8 oz cream cheese, softened
- 1 cup heavy cream (or coconut cream)
- 1/2 cup powdered sugar
- 6 oz dark chocolate, melted
- 1 tsp vanilla extract
- Pinch of salt
Instructions
- Prepare the Crust: Crush Oreos finely and mix with melted butter. Press into a 9-inch springform pan to form an even base; chill for 10-15 minutes to set.
- Whip the Cream: Chill bowl and beaters, then whip cream to soft peaks.
- Beat the Cream Cheese: In another bowl, beat softened cream cheese with powdered sugar and vanilla until silky and smooth, about 1-2 minutes.
- Fold Together: Gently fold whipped cream into the cream cheese mixture until uniform and airy.
- Add Chocolate: Fold in melted dark chocolate or swirl it in for marbling.
- Assemble & Chill: Spoon the filling over the crust, smooth the top, and refrigerate for 4 hours or overnight to firm.
- Finish & Garnish: Melt extra chocolate for drizzle, top with crushed Oreos, zest, or candied fruit, and slice with a warm knife.
Notes
For a lighter version, fold Greek yogurt into the filling. For vegan options, use plant-based cream cheese and coconut cream.
- Prep Time: 30 minutes
- Cook Time: 0 minutes
- Category: Dessert
- Method: No-Bake
- Cuisine: American
Nutrition
- Serving Size: 1 slice
- Calories: 180
- Sugar: 14g
- Sodium: 200mg
- Fat: 8g
- Saturated Fat: 4g
- Unsaturated Fat: 3g
- Trans Fat: 0g
- Carbohydrates: 24g
- Fiber: 1g
- Protein: 3g
- Cholesterol: 30mg
Keywords: Oreo cake, no-bake dessert, holiday dessert, chocolate cake
What You’ll Need
- 24 Oreo cookies (whole): The star for crust and garnish; use classic or chocolate-filled for extra richness. Substitute gluten-free cookies for GF.
- 4 tbsp melted butter: Binds the crust; unsalted keeps sweetness balanced vegan butter works too.
- 8 oz cream cheese, softened: Provides tang and creaminess; use plant-based cream cheese for dairy-free.
- 1 cup heavy cream (or coconut cream): Whipped to soft peaks for airy texture; aquafaba can replace it for vegan mousse.
- 1/2 cup powdered sugar: Smooth sweetness swap for coconut sugar blend if preferred.
- 6 oz dark chocolate, melted: For ganache or stirred into batter; use dairy-free chocolate if needed.
- 1 tsp vanilla extract: Aromatic lift; try almond extract for a nutty twist.
- Pinch of salt: Enhances chocolate and balances sweetness.
Substitutions & tips: For a lighter version, fold Greek yogurt into the filling (reduces richness but adds tang). For a crunchy twist, mix in finely chopped nuts or extra cookie crumbs. For a savory contrast, a small sprinkle of a seasoned crumb can be interesting see this salt-and-vinegar dry rub idea for inspiration.
How to Make This Recipe
- Prepare the Crust — Crush Oreos finely and mix with melted butter. Press into a 9-inch springform pan to form an even base. It should feel compact and slightly glossy from the butter; chill 10–15 minutes to set.
- Whip the Cream — Chill bowl and beaters, then whip cream to soft peaks. You’ll see it thicken and hold a gentle curl on the whisk — don’t overbeat or it will grain.
- Beat the Cream Cheese — In another bowl, beat softened cream cheese with powdered sugar and vanilla until silky and smooth, about 1–2 minutes. Scrape sides to avoid lumps.
- Fold Together — Gently fold whipped cream into the cream cheese mixture until uniform and airy. The texture should be light, mousse-like with no streaks.
- Add Chocolate — Fold in melted (cooled slightly) dark chocolate or swirl it in for marbling. The mixture should be slightly denser and streaked with chocolate ribbons.
- Assemble & Chill — Spoon the filling over the chilled crust, smooth the top, and refrigerate 4 hours or overnight to firm. You’ll notice the filling sets into a sliceable yet creamy consistency.
- Finish & Garnish — Melt extra chocolate for a glossy drizzle, top with crushed Oreos, zest, or candied fruit. Slice with a warm knife for clean cuts and enjoy the contrast of textures.
H3: Step Examples
- Prepare the Base — Crush Oreos in a food processor until sandy; the aroma will be intensely cocoa. Mix with melted butter until the crumbs clump when pressed.
- Mix the Ingredients — Beat cream cheese until smooth, then fold in whipped cream; the cream should be airy and light, not runny.
- Shape or Cook — Press crust firmly and chill to keep edges intact; no baking required for a no-bake version.
- Finish or Garnish — Drizzle warm ganache across the top and sprinkle crushed cookies immediately so they stick.
- Serve and Enjoy — Slice to reveal layers; expect a cool, creamy center against a crunchy, chocolatey base.
Essential Tools
- 9-inch springform pan (or pie dish for easier serving)
- Food processor or resealable bag + rolling pin for crushing cookies
- Electric mixer or whisk for whipping cream and cream cheese
- Mixing bowls (medium and large)
- Spatula and offset knife for smoothing
Optional: microplane for zest, piping bag for decorative whipped topping. If you use affiliate or local products, choose heatproof bowls and a reliable mixer for faster, consistent results.
Meal Prep & Storage Tips
Make this cake up to 48 hours ahead — it actually tastes better after chilling as flavors meld. Store covered in the refrigerator in an airtight container or with plastic wrap over the springform pan. For longer storage, freeze slices wrapped tightly in plastic and foil for up to 1 month; thaw overnight in the fridge. Avoid leaving at room temperature longer than two hours (food safety for dairy). If ganache becomes dull after refrigeration, warm briefly (low heat) and re-glaze before serving.
Perfect Pairings
Serve slices with a bright contrast: spiced cranberry compote, candied orange slices, or a dollop of lightly sweetened whipped cream. Drinks: hot espresso or rich hot chocolate emphasize the cake’s cocoa notes, while sparkling wine or a citrusy mocktail cuts through richness. For holiday spreads, display alongside savory cheese boards and a crunchy snack to balance textures. Visually, add a dusting of cocoa or powdered sugar and a few whole Oreos for dramatic contrast against the dark ganache.
Nutrition Facts
Estimated per serving:
- Calories: ~180 kcal
- Fat: 8 g
- Carbohydrates: 24 g
- Protein: 3 g
- Fiber: 1 g
- Sugar: 14 g
Values are approximate and depend on portion size and specific ingredients used; substitutions (low-fat dairy, sugar alternatives) will change totals.
Avoid These Common Pitfalls
- Dough Too Dry — If the crust won’t press together, add a splash of melted butter or a teaspoon of milk until it holds. Overly dry crumbs won’t form a cohesive base.
- Chocolate Coating Breaks — Don’t overheat chocolate; melt slowly over a double boiler and stir until smooth. Cool slightly before using so it doesn’t seize on contact.
- Unevenly Shaped Slices — Use a warmed, clean knife for slicing (run under hot water and dry) to get clean edges. Pressing crust unevenly causes slices to wobble; press firmly and evenly.
- Overwhipped Cream — Stop when soft peaks form; overwhipping leads to grainy texture and separation.
- Soggy Crust — Chill the crust before adding wet filling to keep it crisp.
Pro Tips for Best Results
- Chill metal bowls before whipping for quicker, more stable peaks and a silkier mousse texture.
- Toast a few cookie crumbs for a nutty depth — they’ll add warmth and a subtle aroma.
- For intense chocolate flavor, use a mix of dark and semi-sweet chocolate; guard sweetness with a pinch of salt.
- Use a silicone spatula to fold ingredients gently to keep air in the filling; this yields a lighter mouthfeel.
- Make mini versions in ramekins for individual servings and faster chilling.
Recipe Variations to Explore
- Peppermint Oreo Cake: Fold crushed candy canes into the topping and use peppermint extract sparingly in the filling for a festive twist.
- Salted Caramel Oreo: Drizzle salted caramel over the top and add flaky sea salt to enhance contrast.
- Coffee-Infused: Add a tablespoon of espresso to melted chocolate for mocha notes.
- Gluten-Free: Use certified gluten-free chocolate and cookies; press into a gluten-free crust and proceed as directed.
- Vegan: Substitute plant-based cream cheese, coconut cream, and dairy-free chocolate; chill longer to set fully.
- Mini Trifles: Layer cookie crumbs, mousse, and ganache in small glasses for elegant individual desserts perfect for parties.
Dietary Adaptations & Safety Info
Allergens: contains dairy and wheat (unless using GF substitutes) and may contain soy from chocolate. For vegan or dairy-free options, use plant-based cream cheese and coconut cream; ensure your chocolate is dairy-free. For gluten-free diets, use certified gluten-free Oreo-style cookies. Always label desserts served at gatherings with allergen info. Keep refrigerated and consume within 48 hours for best quality, or freeze portions to extend shelf life safely.
Frequently Asked Questions
Q: Can I bake this cake instead of making a no-bake version?
A: Yes — you can make a chocolate sponge layer to replace the mousse. Bake a thin chocolate cake layer, cool completely, then assemble with the Oreo crust and filling.
Q: How long does the cake need to chill?
A: Chill at least 4 hours, preferably overnight, to allow the filling to firm and flavors to meld. Overnight chilling also makes slicing neater.
Q: Can I make it ahead for a party?
A: Absolutely. Make it up to 48 hours before serving and keep refrigerated; you can freeze slices up to one month for longer storage.
Q: Why did my filling weep or become watery?
A: Overwhipping cream or using warm ingredients can cause separation. Ensure fillings and bowls are cool, and fold gently — do not overmix.
Q: How do I get a clean slice every time?
A: Use a sharp knife warmed under hot water between cuts and wipe clean. Chill the cake well and slice in one smooth motion rather than sawing.
Q: Can I add other cookies or mix-ins?
A: Yes — try mixing in chopped chocolate, nuts, or seasonal candies. Adjust sweetness accordingly and keep texture contrasts in mind.
Q: Is there a low-sugar option?
A: Replace powdered sugar with a powdered sweetener designed for baking, and choose darker chocolate with lower sugar content. Textures may vary slightly.
Final Thoughts & Next Steps
Ready to serve up something showy but simple? This Oreo cake balances comfort and polish, making it a holiday favorite or an easy weekend indulgence. Try one variation, leave a comment with your twist, and tag your photos so others can enjoy your results. Explore more dessert ideas in our Christmas baking collection and share what you tried!
Conclusion
For a festive pairing or another seasonal treat idea, check out this Little Debbie Christmas Tree Cheesecake recipe: Little Debbie Christmas Tree Cheesecake – Cookie Dough and …


