Chocolate Covered Peanut Buttercream Truffles
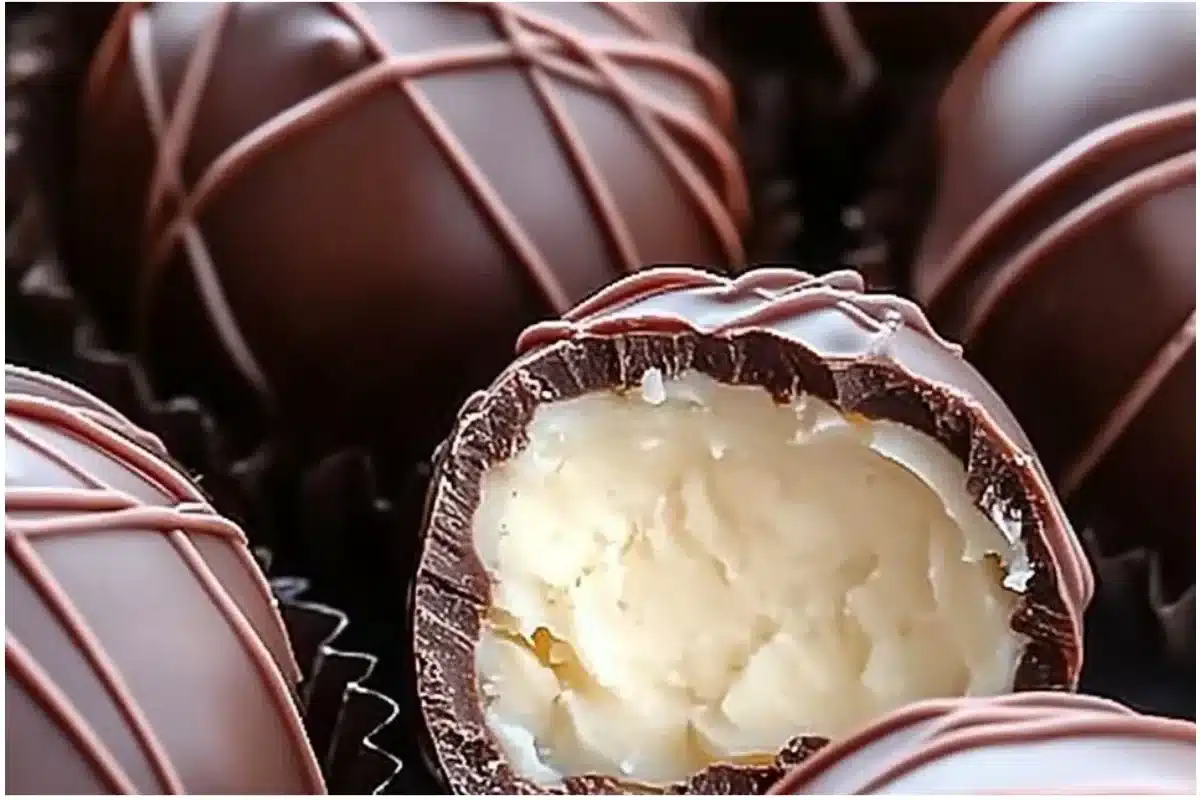
Chocolate Covered Peanut Buttercream Truffles melt-in-your-mouth with a glossy chocolate shell and a smooth, nutty center. These little bites smell of toasted peanuts and warm vanilla, with a silky chew that gives way to rich chocolate — perfect for gifting or a cozy night in. They’re special because they use simple pantry staples, come together quickly, and can be made with sustainable, locally sourced butter and chocolate when available. If you love seasonal no-bake sweets, try this alongside other treats like our gingerbread truffles for a festive spread: Gingerbread Truffles — Easy No-Bake White Chocolate Christmas Treats.
Why You’ll Love This Recipe
These truffles are ideal for parties, holiday cookie exchanges, or when you need a fast, comforting treat. The recipe is forgiving — no tempering, no baking — so it’s perfect for busy hosts or beginner bakers. Flavor-wise, the creamy peanut butter base contrasts the snap of chocolate for a delightful texture play; swap semi-sweet for dark if you prefer a slightly less sweet finish. Versatile and portable, they travel well in small boxes or layered between parchment in airtight containers, making them great for gifts and last-minute entertaining.
Seasonal Ingredients Spotlight
When making these truffles, seek out fresh, locally produced butter and sustainably sourced chocolate to boost flavor and reduce your carbon footprint. Look for peanut butter made from roasted, single-origin peanuts — it will be darker in color and have a round, toasty aroma that shines through the filling. In winter markets, find chocolate chips with a higher cocoa percentage for deeper color and a fragrant, cocoa-forward scent; in summer, opt for lighter roasts or milk blends for a creamier mouthfeel. Freshness shows in texture: creamy butter and smooth peanut butter create a glossy, pliable dough that rolls easily. If you’re celebrating a season (holiday, spring picnic), add seasonal toppings like crushed peppermint or toasted coconut to highlight local flavors and textures. For a peppermint twist idea, see this playful option: Chocolate Peppermint Cookie Cups.
What You’ll Need
- 1 cup creamy peanut butter (smooth works best) — look for roasted-peanut aroma and a silky texture.
- 1/2 cup unsalted butter, softened (fresh butter gives this its richness) — adds a tender, buttery mouthfeel.
- 2 cups powdered sugar (powdered for a smooth coating) — produces a silky, non-grainy interior.
- 1 teaspoon vanilla extract (a little extra vanilla if you love a cozy aroma) — enhances warmth and depth.
- 1 1/2 cups chocolate chips (semi-sweet or dark, depending on your preference) — choose good-quality chips for shine and snap.
- 1 tablespoon coconut oil (to help the chocolate melt smoothly) — optional, for glossy finish and smoother melt.
Substitutions and notes:
- Texture: Use natural peanut butter for a tangier, slightly oilier center; reduce powdered sugar by 1/4 cup if you prefer less sweet.
- Flavor swaps: Try almond or cashew butter for a different nut profile; add 1/4 teaspoon salt if using unsalted nut butter.
- Dietary swaps: For dairy-free, use vegan butter and dairy-free chocolate chips; for lower sugar, try a powdered erythritol blend but expect slight texture differences.
How to Make This Recipe
Prepare the Truffle Base — In a medium bowl, beat the softened butter and creamy peanut butter until smooth and fragrant (about 1–2 minutes). The mixture should look glossy and uniform, with a subtle buttery aroma. If it’s grainy, continue mixing to warm and smooth it slightly.
Mix the Ingredients — Add the vanilla, then gradually sift in the powdered sugar, mixing after each addition until you have a thick, pliable dough (2–3 minutes). The dough should hold together without being sticky; if too dry, add a teaspoon of milk; if too wet, add a little more powdered sugar.
Shape the Balls — Use a small cookie scoop or a tablespoon to portion the dough, then roll between your palms into 1-inch balls (about 24–28 truffles). Place on a parchment-lined tray and chill for 20–30 minutes until firm — the dough becomes easier to dip when cold.
Prepare the Chocolate Coating — Melt chocolate chips and coconut oil in a heatproof bowl over simmering water (double boiler) or in 20–30 second microwave bursts, stirring between intervals until smooth and glossy. The chocolate should be warm, fluid, and free of lumps; if it looks grainy, gently reheat or add a touch more coconut oil.
Dip the Truffles — Using a fork or dipping tool, submerge each chilled truffle into the melted chocolate, letting excess drip off before placing back on parchment. For a smooth finish, tap the fork once gently on the bowl rim. Work quickly but gently to avoid melting the centers.
Finish or Garnish — While the chocolate is still wet, add a sprinkle of flaky salt, chopped peanuts, or a drizzle of contrasting chocolate for visual appeal. The chocolate should set within 10–20 minutes at room temperature or faster in the fridge (5–10 minutes).
Serve and Enjoy — Let the truffles come to room temperature for a minute before biting to appreciate the contrast between the crisp shell and creamy center. Store and serve as suggested below.
H3: Step Examples
- Prepare the Base — Cream butter and peanut butter until glossy and aromatic; the texture should be smooth and slightly soft.
- Mix the Ingredients — Sift powdered sugar in stages until the mixture forms a stiff dough that is not sticky.
- Shape or Cook — Scoop and roll into uniform balls; chilling helps them hold shape when dipped.
- Finish or Garnish — Dip in melted chocolate, then add salt, nuts, or drizzle for contrast.
- Serve and Enjoy — Allow chocolate to set, then savor the snap of the shell and the creamy, nutty interior.
Essential Tools
- Mixing bowls (large and medium) — stainless or glass to avoid retaining odors.
- Hand mixer or stand mixer — speeds up creaming and produces a smoother base.
- Measuring cups and spoons — for consistent results.
- Small cookie scoop or tablespoon — ensures evenly sized truffles.
- Baking tray and parchment paper — prevents sticking and aids easy cleanup.
- Double boiler or microwave-safe bowl — for melting chocolate evenly.
Optional: dipping fork or skewers, cooling rack for draining excess chocolate. Affiliate tip: a silicone bowl scraper and an adjustable cookie scoop make shaping and cleanup faster.
Meal Prep & Storage Tips
Make-ahead: You can form the truffle centers and refrigerate them up to 48 hours before dipping, or freeze shaped balls on a tray for 1 hour then transfer to a freezer-safe container for up to 3 months. After dipping, store truffles in an airtight container layered with parchment in the fridge for up to 2 weeks, or freeze for longer storage — thaw in the refrigerator overnight before serving. Food safety: keep truffles chilled if your kitchen is warm and avoid leaving chocolate-coated truffles at room temperature for extended periods. Use shallow, airtight containers to protect the chocolate finish and prevent odor absorption.
Perfect Pairings
These truffles pair beautifully with bold coffee (espresso or americano) to cut through the sweetness, or with a full-bodied hot chocolate for a double-chocolate experience. For adult gatherings, serve with a fortified wine like tawny port or a nutty sherry; the caramel notes mirror the peanut butter’s richness. On a dessert board, balance the dense truffles with fresh berries, crisp biscotti, and a simple fruit preserve to add brightness and color contrast. For texture, include toasted almonds or freeze-dried raspberries nearby so guests can add crunch or tang. Present them on a white platter to showcase the glossy chocolate and any garnishes, adding sprigs of mint or edible flowers for a refined touch.
Nutrition Facts
Estimated nutrition per truffle (approximate):
- Calories: ~180 kcal
- Fat: 8 g
- Carbohydrates: 24 g
- Protein: 3 g
- Fiber: 1 g
- Sugar: 14 g
Note: Values are estimates and will vary based on specific ingredients and portion sizes (type of chocolate and peanut butter can change fat and sugar content).
Avoid These Common Pitfalls
- Overly Dry Dough — If the centers crack or feel crumbly, add a teaspoon of milk or a bit more softened butter, mixing until pliable.
- Chocolate Coating Breaks — If the melted chocolate looks lumpy or seizes, gently rewarm over low heat and stir in a small amount of coconut oil to smooth it.
- Unevenly Shaped Balls — Use a small cookie scoop to portion dough, then roll quickly to create uniform truffles and ensure even setting in the chocolate.
H3: Examples
Dough Too Dry — Add a splash of milk until pliable; chill briefly then roll.
Chocolate Coating Breaks — Ensure melted chocolate is smooth and warm; don’t overheat.
Unevenly Shaped Balls — Use a cookie scoop and chill before dipping.
Pro Tips for Best Results
- Chill the centers well before dipping to prevent melting and to create a sharp chocolate shell contrast.
- Use a high-quality chocolate with a cocoa percentage you enjoy; higher cocoa gives a deeper color and faster snap.
- Add 1 tablespoon of neutral oil (like coconut or avocado) per cup of chocolate for a glossier finish and smoother dipping.
- For perfectly smooth truffles, sift powdered sugar to prevent lumps; beat the peanut butter mixture well to release aromas.
- Work in batches and keep unused dipped truffles in a single layer while the chocolate sets to avoid smudging.
Recipe Variations to Explore
- Salted Caramel Peanut Butter Truffles: Fold in 2 tablespoons of soft caramel or a teaspoon of fleur de sel into the base for a sweet-salty finish.
- Chocolate-Peanut Butter Swirl: Mix a tablespoon of melted dark chocolate into half the dough before shaping and swirl for marbled centers.
- Nutty Crunch: Roll centers in crushed pretzels or nuts before dipping to add texture and visual appeal.
- Holiday Flavors: Add 1/4 teaspoon of peppermint extract to the base for winter, or fold in orange zest for a bright, citrusy version.
- Boozy Twist: Stir 1 teaspoon of bourbon or rum into the base for grown-up flavors (reduce any added liquid elsewhere slightly).
Dietary Adaptations & Safety Info
Allergens: contains peanuts and dairy (butter, possibly milk in chocolate). For nut-free diets, use sunflower seed butter and ensure chocolate is processed in a nut-free facility. Vegan/dairy-free: use plant-based butter and dairy-free chocolate chips. Gluten-free: the recipe is naturally gluten-free if ingredients are certified GF. Safety: clearly label if gifts contain nuts or alcohol. When serving to children or allergy-sensitive guests, keep a separate, clearly marked nut-free version.
Frequently Asked Questions
Q: Can I use natural peanut butter instead of creamy commercial peanut butter?
A: Yes — natural peanut butter works, but it’s oilier and may produce a slightly looser dough. Reduce any added oil, chill the mixture longer, and add powdered sugar sparingly to reach the right consistency.
Q: How long do these truffles keep at room temperature?
A: In cool conditions (under 70°F / 21°C), they can sit out for a few hours. For longer storage, refrigerate for up to 2 weeks; freeze for up to 3 months.
Q: Can I temper the chocolate for extra shine and snap?
A: You can, but it’s not necessary. Adding 1 tablespoon coconut oil per cup of chocolate helps achieve a glossy finish without full tempering. Tempered chocolate will give the best long-term shine at room temperature.
Q: How do I prevent the chocolate shell from blooming (white streaks)?
A: Bloom is primarily from temperature fluctuation or moisture. Keep truffles chilled until serving and avoid sudden temperature changes. Properly melted chocolate and a cool, dry storage environment prevent bloom.
Q: Can I make mini or bite-sized versions?
A: Yes — use a smaller scoop and reduce chilling time; smaller truffles will set faster. Adjust calorie expectations accordingly.
Q: Is there a gluten-free version of Chocolate Covered Peanut Buttercream Truffles?
A: The base recipe is naturally gluten-free, but confirm all components (powdered sugar, chocolate chips) are certified gluten-free if sensitivity is a concern.
Final Thoughts & Next Steps
These Chocolate Covered Peanut Buttercream Truffles are quick to make, endlessly adaptable, and perfect as gifts or dessert table stars. Try one variation, then another — the recipe invites creativity. Share your photos, tag us, and check similar treats in our chocolate collection for inspiration: Chocolate Candy.
Conclusion
For an alternate method and a video walkthrough, see Peanut Butter Balls (Truffles) Recipe + Video – Sally’s Baking: Peanut Butter Balls (Truffles) Recipe + Video – Sally’s Baking.
Print
Chocolate Covered Peanut Buttercream Truffles
- Total Time: 50 minutes
- Yield: 28 truffles 1x
- Diet: Vegetarian
Description
Delicious truffles with a smooth peanut butter center enveloped in glossy chocolate, perfect for gifting or enjoying at home.
Ingredients
- 1 cup creamy peanut butter
- 1/2 cup unsalted butter, softened
- 2 cups powdered sugar
- 1 teaspoon vanilla extract
- 1 1/2 cups chocolate chips (semi-sweet or dark)
- 1 tablespoon coconut oil (optional)
Instructions
- In a medium bowl, beat the softened butter and creamy peanut butter until smooth and fragrant (about 1–2 minutes).
- Add the vanilla, then gradually sift in the powdered sugar, mixing after each addition until you have a thick, pliable dough (2–3 minutes).
- Use a small cookie scoop or a tablespoon to portion the dough, then roll into 1-inch balls (about 24–28 truffles). Chill on a parchment-lined tray for 20–30 minutes until firm.
- Melt chocolate chips and coconut oil in a heatproof bowl over simmering water or in the microwave, stirring until smooth and glossy.
- Dip each chilled truffle into the melted chocolate, letting excess drip off before placing back on parchment.
- While the chocolate is still wet, add desired toppings and let set at room temperature for 10–20 minutes or faster in the fridge (5–10 minutes).
- Enjoy at room temperature for the best texture experience.
Notes
For dairy-free, use vegan butter and dairy-free chocolate chips. Make-ahead options available.
- Prep Time: 20 minutes
- Cook Time: 30 minutes
- Category: Dessert
- Method: No-Bake
- Cuisine: American
Nutrition
- Serving Size: 1 truffle
- Calories: 180
- Sugar: 14g
- Sodium: 80mg
- Fat: 8g
- Saturated Fat: 3g
- Unsaturated Fat: 5g
- Trans Fat: 0g
- Carbohydrates: 24g
- Fiber: 1g
- Protein: 3g
- Cholesterol: 30mg
Keywords: chocolate truffles, peanut butter, no-bake desserts, holiday treats, easy recipes


