Snowman Cake Pops are one of those instant-smile desserts: portable, kid-friendly, and perfect for holiday parties or winter school treats. But if you’ve tried making cake pops before, you know they can go wrong fast crumbly balls, dipping chocolate that slides off, melted faces, or soggy, heavy centers. This guide gives you a reliable Snowman Cake Pops recipe plus real chef tactics and troubleshooting so your pops look professional and hold up during serving and transport.
If you’re also planning a sweet brunch spread or bagging little treats for a morning gathering, pair them with brunch-friendly sweets like banana pancakes or a warm breakfast cake. Read on for ingredient science, step-by-step directions, pro tips, creative variations, storage, nutrition, and an easy recipe card you can print.
Why Snowman Cake Pops work — the method made simple
At the core, cake pops are a controlled mixture of cake crumbs (structure) and a binder (usually frosting) that holds crumbs together enough to form balls but not so much that they taste like frosting. The coating (chocolate or candy melt) seals and protects the pop and provides a clean canvas for decorating.
For Snowman Cake Pops you’ll typically build a stacked shape — two or three spheres — or a single larger sphere decorated as a snowman. This guide covers the stacked two-tier snowman (head + body) for best balance, plus how to dip and assemble without collapse.
What matters most:
- Cake texture: slightly dry cake crumbles bind better than a very moist cake.
- Binder ratio: too much frosting = heavy, too little = crumbly.
- Temperature control: chilling is essential; pops dip best when cold.
- Coating consistency: thin enough to coat but viscous enough to dry into a smooth shell.
Small technique changes make huge differences. Keep reading to learn the why behind each step.
Print
Snowman Cake Pops
- Total Time: 255 minutes
- Yield: 20 pops 1x
- Diet: Vegetarian
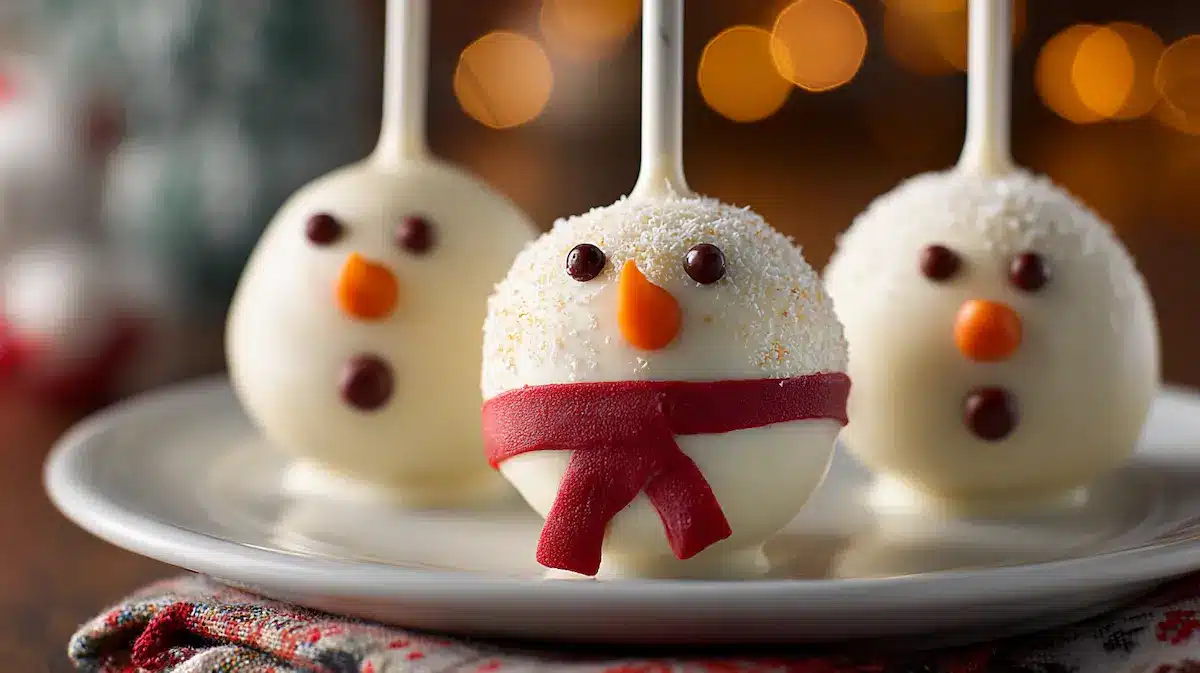
Description
Make adorable Snowman Cake Pops that stay smooth, not crumbly. Perfect for holiday parties or winter school treats.
Ingredients
- 1 (8–9 inch) cake or about 6 cups crumbled cake (vanilla, white, or yellow recommended)
- 3/4 to 1 cup frosting (vanilla buttercream or cream cheese frosting)
- 20 lollipop sticks
- 24 oz (about 680 g) white candy melts or white chocolate chips
- 2 tsp vegetable oil (if using white chocolate)
- Black decorating gel or mini chocolate chips (for eyes and buttons)
- Orange sanding sugar or small orange candies (for carrot noses)
- Red or colored candy melts or icing for scarves (or fondant)
- Sprinkles or edible glitter (optional)
- Non-stick spray or parchment for trays
Instructions
- Crumble the cake: Break cake into chunks and pulse in a food processor or crumble by hand until you have fine crumbs.
- Add frosting gradually until the mixture holds together but is not greasy.
- Portion about 1.25 tablespoons for small spheres (head) and 2 tablespoons for the larger body sphere, roll 40 spheres.
- Chill spheres on a baking sheet lined with parchment for at least 30 minutes.
- Insert lollipop stick into the head sphere, dip both spheres into the coating, then assemble and let dry in a styrofoam block.
- Decorate with black gel for eyes and buttons, orange candies for noses, and pipe scarves with colored melts.
Notes
Avoid soggy cake by ensuring it’s slightly dry before crumbling. Work in a cool room to maintain coating consistency.
- Prep Time: 75 minutes
- Cook Time: 180 minutes
- Category: Dessert
- Method: Dipping
- Cuisine: American
Nutrition
- Serving Size: 1 pop
- Calories: 200
- Sugar: 15g
- Sodium: 100mg
- Fat: 9g
- Saturated Fat: 5g
- Unsaturated Fat: 4g
- Trans Fat: 0g
- Carbohydrates: 30g
- Fiber: 0g
- Protein: 2g
- Cholesterol: 0mg
Keywords: cake pops, snowman cake pops, holiday desserts, kid-friendly treats
Ingredient breakdown — what to use and why it matters
Understanding the function of each component stops guesswork. Here’s the key ingredient list and the role each plays:
Cake base (crumb): You can use leftover cake, boxed cake mix, or a quick homemade cake. Slightly drier cake crumbs are easier to shape. Flavors: vanilla, white, yellow, or even spice cake all work. For a chocolate snowman, start with chocolate cake.
- Science: The crumb provides particles that create a semi-solid matrix when combined with binder. Finer crumbs pack better and create smoother surfaces.
- Swap idea: For a richer flavor, use a lightly toasted nut cake or mix with cookie crumbs (Oreo or shortbread). For a breakfast table pairing, think of the gentle sweetness of a blueberry breakfast cake to echo the brunch vibe.
Binder (frosting or cream cheese): Buttercream, cream cheese frosting, or even condensed milk can act as binders.
- Science: Fat and sugar in the binder coat crumbs, helping them ‘glue’ together via surface tension and crystallization. Too much binder creates a paste that loses crumb structure; too little can’t hold balls intact.
Coating: White chocolate or white candy melts (coating wafers).
- Science: Cocoa butter or palm oil in coatings sets into a firm shell that stabilizes the shape and prevents moisture migration from the cake into the air. Candy melts are forgiving; real white chocolate gives superior flavor but must be tempered or mixed with a small amount of oil to thin for dipping.
Add-ins & decorations: Mini chocolate chips, edible markers, sprinkles, fondant, candy melts for scarves, orange M&M or small sugar cones for noses.
- Science: Small edible decorations adhere to the coating when the outer shell is still tacky. For precise piped details, use royal icing or a thin candy-melt piping.
Tools (not ingredients but essential): lollipop sticks, styrofoam block or cake-pop stand, parchment paper, double boiler or microwave, fine piping tips.
Ingredient ratios and technique are more important than exotic flavorings. Below is a dependable ingredient list for about 20 snowman pops (two-sphere snowmen).
Snowman Cake Pops — Recipe Card
Yields: 20 snowman pops (40 spheres; makes 20 two-sphere snowmen)
Active time: 1 hour 15 minutes (plus chilling)
Total time: 3–4 hours (includes chilling and drying)
Difficulty: Intermediate (easy with tips)
Ingredients
- 1 (8–9 inch) cake or about 6 cups crumbled cake (baked and cooled) — vanilla, white, or yellow recommended
- 3/4 to 1 cup frosting (vanilla buttercream or cream cheese frosting) — start with 3/4 cup and add a TBS if needed
- 20 lollipop sticks
- 24 oz (about 680 g) white candy melts or white chocolate chips + 2 tsp vegetable oil if using white chocolate
- Black decorating gel or mini chocolate chips (for eyes and buttons)
- Orange sanding sugar or small orange candies (for carrot noses)
- Red or colored candy melts or icing for scarves (or fondant)
- Sprinkles or edible glitter (optional)
- Non-stick spray or parchment for trays
Equipment
- Mixing bowl, rubber spatula
- Baking sheet or tray
- Styrofoam block or cake pop stand
- Microwave-safe bowl or double boiler
- Parchment paper
Basic nutrition estimate per snowman pop: ~150–200 kcal (dependent on cake and frosting choice).
Full method in the next section.
Step-by-step method — chef-tested process
This section assumes you’re starting from baked cake. If you use store-bought or boxed, the steps are identical.
Prep and crumb
- Crumble the cake: Break cake into chunks and pulse briefly in a food processor, or crumble by hand into a bowl until you have fine crumbs. Avoid blitzing into powder; you want fine, but slightly textured crumbs.
- Chef tip: Freeze cake for 20 minutes before crumbling if it’s too moist. Slightly chilled cake creates cleaner crumbs.
Bind and test ratio
2. Add frosting gradually: Start with 3/4 cup of frosting; fold into crumbs with a spatula until uniformly moistened. Test by pinching — the mixture should hold together when squeezed but not feel greasy.
- Science note: The ideal cake-to-binder ratio is empirical — aim for a texture like slightly wet play-dough. If you can roll a ball that keeps shape, you’re good. If it’s sticky, add crumbs. If it splits, add a teaspoon of frosting at a time.
Form spheres
3. Roll spheres: Portion about 1.25 tablespoons for small spheres (head) and 2 tablespoons for the larger body sphere. For two-sphere snowmen, roll 40 spheres (20 small, 20 big).
- Use a small cookie scoop for uniform sizing.
- Chill spheres: Place rolled spheres on a baking sheet lined with parchment and refrigerate for at least 30 minutes or freeze 10–15 minutes until firm but not frozen solid.
- Why chilling matters: Cold spheres are firmer and less likely to fall apart during dipping; they also reduce the risk of the coating cracking due to heat transfer.
Assemble on sticks (method A: assemble after dipping — method B: assemble before dipping)
- Method A (recommended for stacked snowmen):
a. Insert lollipop stick into the bottom of the smaller head sphere about halfway. Dip the stick end (about 1/2 inch) into the melted coating before inserting — this tacks the head to the stick.
b. Dip the small sphere (head) about 2/3 into coating, let excess drip, and stand upright in a styrofoam block to dry.
c. Once head shells are set, take the larger body sphere, insert the stick into its top and slightly into the bottom of that sphere so the two shells meet. Alternatively, dip the base of the head into coating and affix it to the top of the body. - Method B (assemble after both spheres coated):
a. After coating and drying both spheres separately, use a thin line of melted coating as “glue” and attach head to body. Hold in place until set.
Dipping technique (for smooth shell)
5. Melt coating: Use a double boiler or microwave in 20–30 second bursts, stirring until smooth. If using real white chocolate, add 1–2 teaspoons vegetable oil per cup to thin and reduce chance of seizing.
- Pro tip: For white chocolate, avoid overheating (keep below 110°F/43°C). Candy melts tolerate higher temperatures but should be smooth, not grainy.
- Achieve the right viscosity: The melted coating should be fluid enough to drip off in a smooth sheet but thick enough to cling and fill gaps. If too thick, add a small amount of neutral oil (vegetable or coconut) in 1/4 teaspoon increments. If too thin, let it cool slightly.
- Dip and drain: Hold the sphere by the stick, submerge fully, and lift straight up. Tap the stick gently against the bowl edge to remove excess. Rotate with a flicking motion to smooth the coating. Let dry in a styrofoam stand vertically to maintain shape.
- Common issue: Coverage lines or ridges happen if you rotate while the coating is very fluid; keep motions steady.
Decorating the snowman
8. Eyes and buttons: Add two small dots of black decorating gel or press two mini chocolate chips into the head while coating is still tacky. For buttons, place three chips or piped dots down the body.
9. Nose: Press a small orange sprinkle or a tiny piece of orange candy (or sculpt a mini carrot from orange fondant) into the head.
10. Scarf and hat: Pipe a scarf across the neck with colored candy melts using a small round tip; add hat details from black fondant or melted black candy.
– Drying: Allow pops to set fully at room temperature or in the refrigerator for 10–15 minutes before handling.
Finishing touches: Add edible glitter or snowflake sprinkles to enhance the winter effect. If shipping or transporting, place each pop in a cellophane bag sealed with ribbon.
Tips, pro advice, and common mistakes to avoid
These are the actionable lessons seasoned bakers learn through trial-and-error:
- Avoid soggy cake: If your cake is too moist, bake it for a few minutes longer next time or gently toast crumbs in a 300°F oven for 7–10 minutes. Let it cool before crumbling.
- Get the binder right: Start with less frosting. You can always add more, but you can’t remove it. Too much binder > soft, sweet paste that tastes like frosting and doesn’t set.
- Temperature control is everything: Work in a cool room if possible. Warm kitchens will melt your coating and frosting quickly, causing slumping and cracking.
- Use the right dip thickness: If the coating is too thin, it will drip off and expose cake; too thick and the surface will be bumpy or will crack as it cools irregularly. Aim for a glossy, paint-like viscosity.
- Prevent cracking: Avoid sudden temperature changes. If you chill pops to set them, let them reach room temperature before sealing in bags or transporting.
- Fixing cracks: If the coating cracks after drying, you can paint over small cracks with a thin layer of melted coating and let it set. For bigger cracks, re-dip.
- Decorative precision: Use edible markers for tiny facial details on white chocolate. For piped details, chill the pops first so the surface is firm.
- Storage during serving: Keep pops upright in styrofoam and out of direct heat sources. Avoid overcrowding so that candy decorations don’t touch.
- Transport hacks: Use a shallow box with styrofoam or crumpled parchment to keep pops upright and cushioned. Individually bagged pops minimize smudging.
For a completely different holiday dessert that complements cake pops at a dessert table, consider a chewy, caramel-like centerpiece such as Caramel Apple Cheesecake — it’s a great pairing with small bites.
Variations and swaps — make them your own
Snowman cake pops are a blank canvas. Here are creative variations and allergy-friendly swaps:
Flavor swaps
- Chocolate snowman: Use chocolate cake + chocolate coating tinted white (or white coating). For a true chocolate flavor, use chocolate coating for outer shell and then paint white fondant details for snow.
- Peppermint: Add 1/2 teaspoon peppermint extract to frosting, and sprinkle crushed candy canes on top of tacky coating.
- Red velvet: Use red velvet cake and pair with cream cheese binder for an extra tang.
Texture swaps
- Oreo cake pops: Replace cake crumbs with finely ground Oreo (cream included) and use a cream cheese binder; will be richer and more cookie-like.
- Gluten-free: Use gluten-free cake or gluten-free cake mix; ensure all decorations are GF-certified.
- Vegan: Use vegan cake, vegan buttercream, and dairy-free candy melts.
Shape variations
- Single-sphere snowman: Make one larger sphere and draw on a snowman face with royal icing — quicker and simpler.
- Mini snowmen: Use smaller scoops for bite-sized pops — ideal for party platters.
Decoration ideas
- Use tiny licorice bits for hats and scarves or pipe scarfs from melted colored candy. Mini pretzel sticks can make twig arms if you attach after the coating sets with a dab of melted coating.
- Edible mica or pearl dust brushed on the shell gives a frosty sheen.
Creative presentation
- Place each pop in a mini mug or paper cup filled with crinkled tissue or white sugar to mimic snow.
- Use a cake-pop wood board and arrange snowmen around a small faux evergreen centerpiece.
Storage and reheating
How you store snowman cake pops affects texture, appearance, and safety.
Short-term storage (1–3 days)
- Room temperature: If your cake and frosting are shelf-stable (no perishable fillings like fresh fruit or cream cheese), store upright in a cool, dry place in an airtight container or sealed cellophane bags.
- Refrigeration: If using cream cheese binder, refrigerate. Keep pops upright with generous spacing and wrap loosely with plastic wrap to avoid condensation on the coating.
Long-term storage (up to 1 month)
- Freeze: Place fully set pops on a tray until solid, then individually wrap in plastic wrap and store in an airtight container or freezer bag. Thaw in the refrigerator overnight before serving. Avoid thawing at room temperature directly as condensation can dull the coating and cause decoration to run.
Reheating / reviving texture
- If coating looks dull after refrigeration or freezing, let pops sit at room temperature for 20–30 minutes; avoid rapid warming.
- Never microwave assembled pops — heat will melt decorations and ruin shape.
Transport
- Use an insulated cooler with a thin layer of ice packs (not touching pops) in warm weather. Keep them upright and avoid stacking.
Nutrition insights and allergen notes
Snowman Cake Pops are an indulgent treat. Exact nutrition varies by cake type, frosting, and coatings, but here are general estimates and allergen considerations.
Estimated nutrition per snowman pop (average 45–60 g):
- Calories: 150–230 kcal
- Carbohydrates: 18–30 g (sugar major component)
- Fat: 7–12 g (butter, chocolate, candy melts)
- Protein: 1–3 g
- Fiber: <1–2 g
To reduce calories or sugar:
- Use lower-sugar cake recipes, or substitute part of the frosting with mashed banana or Greek yogurt (note this alters texture and shelf-life).
- Use dark chocolate with higher cacao and less sugar for coating (but color will not be white):
- White coating alternatives: white chocolate made with lower sugar content can slightly reduce sugar but may not taste as sweet.
Allergen notes
- Common allergens include wheat (gluten), dairy, soy (in some candy melts), and nuts (if using nut-based cake or decorations). Always read labels for candy melts and decorative items.
- For nut-free: avoid using almond flour or nut-based decorations and check all packaged ingredients.
- Gluten-free: use certified gluten-free cake and check candy melt labels.
- Dairy-free/vegan: use plant-based frostings and vegan candy melts.
If you’re serving a group with dietary restrictions, label the platter clearly and consider making a few labeled pops for gluten-free or vegan guests.
Tools, quantities, and scaling
Scaling this recipe up or down is straightforward:
- Yield scaling: The recipe scales linearly. For a crowd of 50, multiply ingredients by 2.5.
- Equipment scaling: You’ll need more styrofoam stands or long trays to stand pops upright while drying.
- Labor: Two people speed things up: one to roll and chill, another to dip and decorate.
Recommended tools to invest in if you make cake pops regularly:
- Cake pop stand or styrofoam block (keeps hands free and decorations intact)
- Cookie scoop set for uniform spheres
- Disposable piping bags and fine tips for detail work
- Silicone dipping bowls (wide and shallow)
- Digital thermometer (for tempering chocolate if using real chocolate)
FAQs (Schema-ready style)
Q: How long do Snowman Cake Pops last?
A: At room temperature (no cream-cheese binder), they last 2–3 days in an airtight container. Refrigerated with cream-cheese binder: up to 5 days. Frozen: up to 1 month.
Q: Can I use store-bought cake or cookie crumbs?
A: Yes. Boxed cake, day-old cake, or cookies (like Oreos) make excellent bases. Adjust binder amounts as required.
Q: How do I prevent the chocolate from cracking on cold pops?
A: Avoid putting very cold pops directly into very hot coating. Chill pops briefly to firm but not freeze; temper coating correctly and dip at a stable warm temperature. Rapid temperature shifts cause cracking.
Q: What if my cake pops are greasy or too sweet?
A: Reduce the amount of frosting, or mix in plain crumbs to dilute sweetness. Use a less sweet frosting like light buttercream.
Q: Can I make snowmen without lollipop sticks?
A: Yes — assemble spheres and glue with melted coating. You’ll lose the “stick” presentation but can still place them on skewers or on a platter.
Q: How do I store cake pops to ship them?
A: Individually wrap in cellophane and use a box with partitions. Pack upright and cushion with tissue. Use an insulated container if shipping in warm temperatures.
Q: Can I make mini snowman bites for a kid’s party?
A: Absolutely — use smaller scoops and shorter sticks. Smaller pops set faster and are great for portion control.

Printable checklist before you start
- Cake baked and completely cooled (or boxed cake ready)
- Frosting measured and at room temperature
- Candy melts or white chocolate on hand
- Lollipop sticks and styrofoam stand ready
- Parchment-lined trays chilled in fridge
- Decorations organized (mini chips, sprinkles, edible pens)
Final presentation ideas
- Serve in individual cellophane bags tied with ribbon for party favors.
- Arrange pops around a small gingerbread house as a tabletop centerpiece.
- Place in small ceramic mugs filled with white sugar to mimic snow, and insert a mini tag with each guest’s name.
Conclusion
Snowman Cake Pops are a delightful, bite-sized winter treat that balance playful presentation with reliable technique. Follow the binder-to-crumb tips, chill properly, and control your coating viscosity — these are the three things that determine success. For more inspiration and step-by-step variations, check out this beautiful example of Snowman Cake Pops from Girl and the Kitchen: Snowman Cake Pops – Girl and the Kitchen. If you’d like a straight-to-the-point, photo-heavy guide with adorable small details, this easy how-to is also helpful: Easy Snowman Cake Pops (Adorable Christmas Recipe) – Basics ….
If you made these Snowman Cake Pops, save this recipe, take a photo, and share it — friends and family love seeing homemade holiday treats. Happy baking!


