The smell of browned butter and warm caramel used to pull me out of the noisy days and into the small quiet of our kitchen. I remember pressing a child-sized hand into a cool patch of flour while the bars baked, the way my husband would peek in and say, "That smells like a hug," and the gentle clink of the knife as I practiced my first careful swirls. If you love those small, cozy moments too, you might also like my notes on salted caramel fudge, which sits in the same warm corner of our dessert table.
Why Salted Caramel Butter Bars Still Feels Like Home
There is a kind of comfort that comes from a simple pan of bars. These Salted Caramel Butter Bars became ours because the whole family could help in small ways. My son loved to drizzle the caramel; my daughter took it upon herself to spritz the tiny sea salt crystals. Those little tasks made the baking feel like a shared ritual.
The first time I made them, I was chasing a slow Sunday. I wanted something sticky, sweet, and honest. I wanted a treat that could be sliced and handed around at the end of a meal when plates were still warm and conversation flowed. These bars do that. They ask for nothing fancy and give back a moment of softness.
I test recipes the way I raise my kids: patiently, with small corrections and lots of praise. Over time I learned how much butter to trust, how long to let the caramel sit before it sets, and how a tiny pinch of sea salt can wake the whole pan. The bars became part of our small celebrations, and they hold those soft memories whenever we make them again.
Bringing Salted Caramel Butter Bars Together
“Every time I stir this pot, it smells just like Sunday at home.”
Making these bars has a rhythm. I start by feeling the butter as it softens, then I listen to the batter get lighter under the whisk. The caramel sings in a pot, glossy and deep in color. When I spoon it out and watch it trail across the dough, there is a little thrill every time.
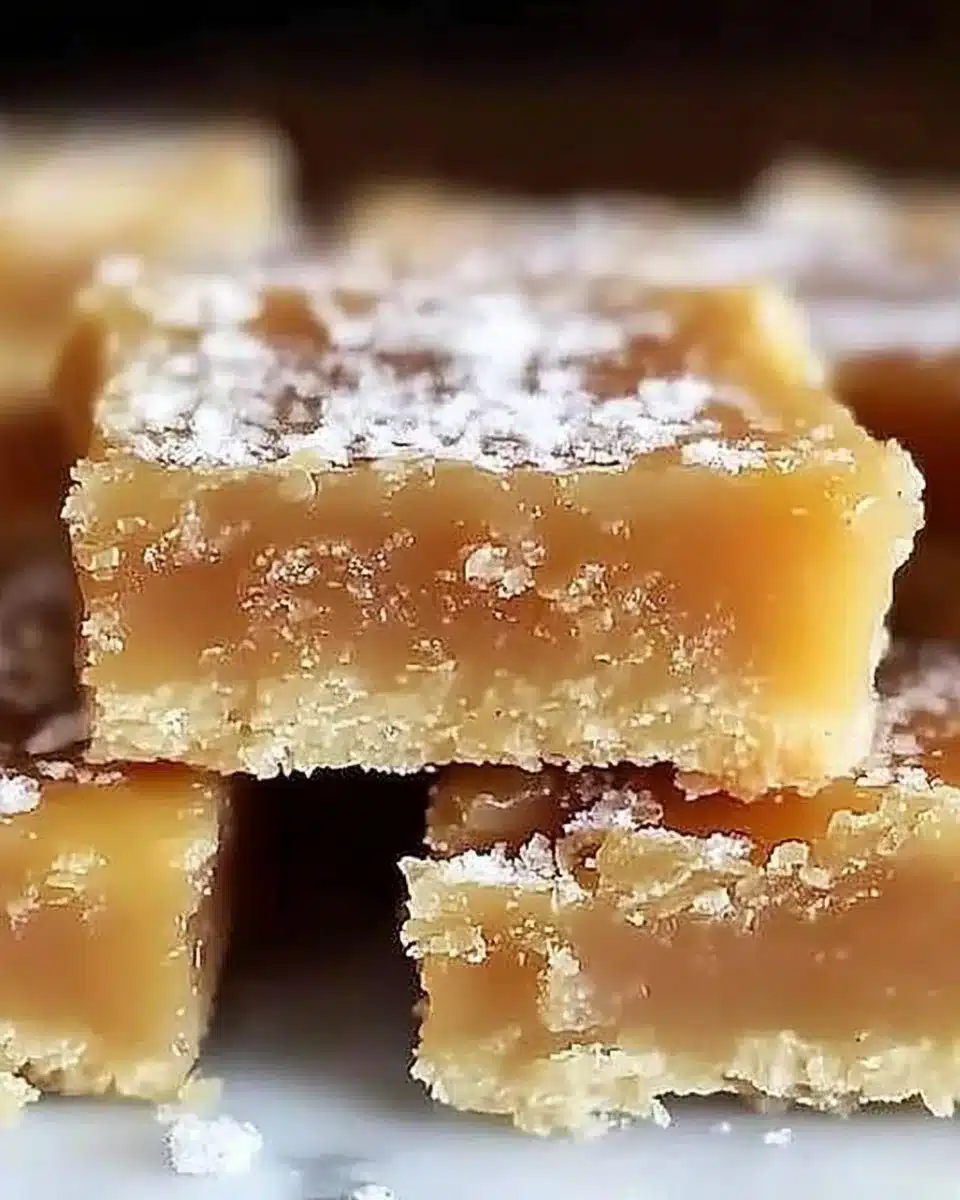
The color palette is simple and honest. Pale dough, browned edges, and a ribbon of caramel the shade of honey. The sound is gentle: the thud of a spoon, the soft scrape as batter spreads, and the kitchen timer’s hopeful ring. Texture is where the joy lives. A tender crumb gives way to a chewy caramel top, and the sea salt adds a bright spark.
You do not need a fancy pan or perfect piping skills. Bring warm equipment, open windows if it helps, and let the kitchen feel like home. If you like trying different things that play on butter and sauce, you might enjoy how buttery notes show up in unexpected dishes like anchovy garlic butter salmon, where the same rich idea moves into savory.
Ingredients You’ll Need
1 cup unsalted butter, softened (fresh butter gives this its richness)
1 cup brown sugar, packed (a little extra if you love a deeper caramel note)
1/2 cup granulated sugar (keeps the crumb light)
2 large eggs (room temperature for a smoother batter)
1 teaspoon vanilla extract (a little extra vanilla if you love a cozy aroma)
2 cups all-purpose flour (spoon and level for best texture)
1/2 teaspoon baking powder (for a gentle lift)
1/2 teaspoon salt (balances the sweetness)
1 cup salted caramel sauce (homemade or store-bought, choose a sauce you love)
Sea salt for sprinkling (a few flakes at the end brightens every bite)
These are simple things. The list reads like a pantry hug. Use real butter and a caramel sauce you trust. Each ingredient plays a clear part. The flour builds structure. The sugars make chew and color. The eggs bind, and the caramel brings shine and pull. The sea salt is the small, loud note that ties the whole pan together.
Step-by-Step Directions
Preheat your oven to 350°F (175°C) and grease a 9×13 inch baking dish.
I use a light coat of butter and a sheet of parchment to lift the bars out easily. Make sure the pan is even and the oven racks are centered. The warm oven should feel steady when you close the door.In a mixing bowl, cream together the softened butter, brown sugar, and granulated sugar until light and fluffy.
Beat this for several minutes so the mix becomes pale and glossy. You will notice the scent of butter and sugar coming together. Stop when the bowl looks airy and the beaters pull up soft ribbons.Beat in the eggs one at a time, and then add the vanilla extract.
Each egg should be fully mixed before you add the next. The batter will smooth and grow silkier as you work. Keep the motion steady and confident, not frantic.In another bowl, whisk together the flour, baking powder, and salt. Gradually add the dry ingredients to the wet ingredients, mixing until combined.
Fold gently until you no longer see streaks of flour. The batter should be thick but spreadable. If it feels claggy, a brief extra stir will do; you want a tender crumb later.Spread half of the batter into the prepared baking dish.
Use an offset spatula or the back of a spoon to make an even layer that reaches the corners. The layer does not have to be perfect; little valleys will fill with caramel and make good texture.Drizzle half of the salted caramel sauce over the batter, then spread the remaining batter on top.
The caramel should be warm and pourable. Drop spoonfuls across the first layer and gently spread them, leaving some caramel visible. Top with the remaining batter and smooth lightly.Drizzle the rest of the caramel sauce on top and swirl it gently with a knife.
Make loops or figure eights until you like the look. The swirl should be pretty but not overworked. Breathe in the aroma as the caramel spreads and the batter settles.Bake for 25-30 minutes or until the edges are golden brown.
Watch the edges more than the center. The middle may still hold a slight wobble when it is done and will set as it cools. Wait for the edges to turn golden and for the top to feel set to touch.Allow to cool, sprinkle with sea salt before cutting into bars, and enjoy!
Let the pan rest long enough that the caramel does not run everywhere when you slice it. A gentle sprinkle of sea salt on top brings a bright finish. Cut into bars, serve warm or room temperature, and watch the smiles.

Serving Salted Caramel Butter Bars With Family Warmth
I slice these into squares that feel like a friendly handshake. If we have a potluck, I stack them on a white plate and set napkins nearby. At home, I like to serve one bar with a small spoon for the caramel pool and a glass of cold milk for anyone who wants to dip.
Plating can be very simple. A warm bar on a little saucer, a fork, and a tiny napkin feel like enough. For a weekend brunch, I will set a bowl of whipped cream or a scoop of vanilla ice cream on the side and let people help themselves. The contrast of warm caramel and cool cream is honest and very good.
We have a small ritual in our house. Whoever gets the last piece has to fetch tea for the group. It is a silly little rule, but it makes passing the plate feel like a shared game. Little traditions like that turn baking into family memory. If you prefer savory togetherness between sweet rounds, try pairing across courses with something like butter chicken linguine for a bold dinner and a sweet finish.
Storing Salted Caramel Butter Bars for Tomorrow
Wrap bars tightly to keep them soft. I store them in a single layer in an airtight container at room temperature for up to three days. If the kitchen is warm, a cool place keeps the caramel from getting too runny.
For longer storage, place them in the fridge for up to five days. Bring them back to room temperature before serving so the caramel softens and the butter warms to tender. You can also freeze the bars in a single layer with parchment between pieces for up to two months. Thaw in the fridge overnight, then warm gently in the oven.
The flavors shift in a kind way as they rest. The caramel becomes more melded with the dough. The richness deepens. Sometimes I find the second day is when the bars taste best, like the recipe had time to get to know itself.
H3 Tips for Perfect Salted Caramel Butter Bars
Room temperature ingredients make mixing smooth. Take the eggs and butter out ahead of time. When they are warm, the batter comes together easily and you do not overwork the flour.
Use a caramel sauce you trust. If you make your own, cook until the color is deep amber but not burnt. A deep color brings toffee notes that pair with the buttery base.
Watch the bake time. Ovens vary, and the edge browning is your friend. The center should be set but still soft. It will firm as it cools. If you prefer more chew, err on the side of a slightly shorter bake.
Finish with sea salt. I use flakes for the crunch. A light hand is best. Too much salt will pull away from the cozy sweetness. Just a little brings the whole bar into balance.
H3 Variations That Make These Bars Sing
Play with nuts. A sprinkling of chopped pecans or toasted almonds on top adds crunch and depth. Toast them first to bring out their oil and sweet fragrance.
Try browned butter. Brown the butter until it smells nutty and amber, then cool slightly before creaming. Browned butter adds a deep, toasted note that makes these bars feel extra grown up.
Add citrus zest. A little orange or lemon zest folded into the batter gives a fresh lift to the caramel. It wakes the sugar and makes each bite feel light and bright.
Mix in chocolate. Swirl melted dark chocolate with the caramel for a bittersweet counterpoint. The chocolate sets and creates a slight snap as you bite through the soft top.
If you try savory pairings, think small and balanced so the bars remain the sweet encore. These ideas let you make the recipe your own without moving away from the heart of the dish.
H3 Troubleshooting Common Moments
If the caramel runs through the bars, it probably was too hot when you added it. Let it cool a touch so it holds shape but stays pourable. Thick caramel tucks into the crumb like a ribbon.
If the bars are dry, you may have overbaked them. Check them a few minutes earlier next time and look for a soft set in the center. A moist crumb is a tender crumb.
If the top cracks a lot, the oven might be too hot. Lower the temperature slightly and bake until the edges just color. The center will set as they cool.
If the bars stick to the pan, use parchment next time. It lifts the whole sheet out cleanly and keeps those edges pretty.
H3 A Note About Caramel Choices
You can make the caramel from scratch or use a good store-bought sauce. If you cook your own, start with quality sugar and keep an eye on color. If the sauce tastes burnt, it will carry through. If you buy one, taste it first. Some store sauces are very sweet and thin; choose one with a thick mouthfeel and a deep, buttery flavor.
A thicker caramel holds its shape and gives a pleasing chew. A thinner sauce soaks in and makes the bars more like candy. I love both versions and find each one suits a different mood.
H3 Baking With Kids and Small Helpers
Invite small hands to drip caramel or press a sprinkle of sea salt. Let them spread dollops of batter and giggle as they try to swirl the caramel. Keep tasks short and give praise for every try.
Use a small step stool so kids can reach the counter comfortably. Keep sharp tools away and handle the hot caramel yourself. The memory of doing something together matters more than perfect edges.
We make a game of who gets to lick the spoon. It becomes a family moment and fills the kitchen with the sound of joy.
H3 Scaling and Serving for a Crowd
To scale the recipe, use the same ratios and a larger pan. A crowd of twenty might want two pans, ready to pass around. Keep a little extra caramel on hand in a jar for topping warm slices.
If you present the bars at a party, slice them into smaller squares and arrange them in a neat grid. Small bites make it easy for guests to taste and keep the table tidy. Stack extras on a second plate with a note about the sea salt so friends know the little finishing touch.
H3 Gifting and Sharing These Bars
Wrap bars in parchment and tie with twine for a simple, heartfelt gift. Add a handwritten note about when you baked them and who helped. People love the personal touch.
For holiday packages, include a small jar of extra caramel and a tiny spoon. Tell them to warm the jar in a pan of hot water for a minute before drizzling. The extra caramel makes the gift feel indulgent and thoughtful.
H3 Why the Texture Works
These bars live between cake and candy. The flour gives structure and the eggs build a tender crumb. The two sugars work together; brown sugar keeps the center moist while granulated sugar helps the edges crisp.
Caramel on top brings chew and gloss. It sleeps into the batter a little, making ribbons as it bakes. That mix of soft crumb and sticky top is what keeps people coming back to the pan.
H3 The Little Science of Salted Caramel
Salt brightens flavors by enhancing contrast. It does not make the bar salty in a bad way. Instead, it makes the sweet notes taste sweeter and the butter richer. Use flakes or a coarse sprinkle so you get a small crunch with each bite.
Caramelization brings deep flavor. When sugar turns color it also changes taste, moving from sweet and simple to nutty and complex. That color and flavor blend with the butter to make these bars feel like a warm, full bite.
H3 Making These Bars Ahead
You can make the bars a day ahead and keep them at room temperature. They are easier to cut after a chill, but they taste best when gently warmed for a minute or two. If you plan to make them several days ahead, freeze and thaw as needed, then warm slightly before serving.
I often bake these on a Friday and bring them to life again on Saturday. The rest lets the flavors round into a comfortable, homey place.
Questions I Hear Most
What if my caramel is too thick? Warm it gently to soften. A short dip in hot water loosens store-bought sauce. Stir until smooth.
Can I swap gluten free flour? Yes, but expect a different crumb. Try a 1-to-1 mix and be gentle when mixing. You may need a touch more moisture.
Can I make them without eggs? The texture will change. You can try a flax egg or a commercial binder, but keep expectations flexible. They will still taste sweet and lovely, but the crumb will be a bit denser.
Conclusion
If you want to explore another take on buttery sweets, I find recipes that celebrate butter in different ways are inspiring and helpful. For a fresh look at a beloved butter bar, see this take on Salted Caramel Butter Bars | The BEST Cookie Bar recipe ever!!.
Print
Salted Caramel Butter Bars
- Total Time: 45 minutes
- Yield: 16 servings 1x
- Diet: Vegetarian
Description
Delicious and comforting salted caramel butter bars, perfect for family gatherings or a cozy night at home.
Ingredients
- 1 cup unsalted butter, softened
- 1 cup brown sugar, packed
- 1/2 cup granulated sugar
- 2 large eggs, room temperature
- 1 teaspoon vanilla extract
- 2 cups all-purpose flour
- 1/2 teaspoon baking powder
- 1/2 teaspoon salt
- 1 cup salted caramel sauce
- Sea salt for sprinkling
Instructions
- Preheat your oven to 350°F (175°C) and grease a 9×13 inch baking dish.
- Cream together the softened butter, brown sugar, and granulated sugar until light and fluffy.
- Beat in the eggs one at a time, then add the vanilla extract.
- In another bowl, whisk together the flour, baking powder, and salt. Gradually add to the wet ingredients, mixing until combined.
- Spread half of the batter into the prepared baking dish.
- Drizzle half of the salted caramel sauce over the batter, then spread the remaining batter on top.
- Drizzle the rest of the caramel sauce on top and swirl it gently with a knife.
- Bake for 25-30 minutes or until the edges are golden brown.
- Allow to cool, sprinkle with sea salt before cutting into bars, and enjoy!
Notes
Wrap bars tightly to keep them soft and store them in an airtight container at room temperature for up to three days.
- Prep Time: 15 minutes
- Cook Time: 30 minutes
- Category: Dessert
- Method: Baking
- Cuisine: American
Nutrition
- Serving Size: 1 bar
- Calories: 280
- Sugar: 18g
- Sodium: 150mg
- Fat: 12g
- Saturated Fat: 7g
- Unsaturated Fat: 4g
- Trans Fat: 0g
- Carbohydrates: 36g
- Fiber: 1g
- Protein: 3g
- Cholesterol: 40mg
Keywords: caramel, dessert, family recipe, baking, easy bars