When I lift the lid on a jar of Simple Fermented Vegetables and the first bright scent of brine and fresh cabbage rises, I feel like I have opened a small window into my grandmother’s kitchen. The sound of bubbling, the tang on my fingers, and the quick snap when I taste a carrot piece take me back to warm family tables and slow Sunday afternoons. I often share this feeling with friends who come by, and when they ask how to begin, I point them to the gentle routines in my simple healthy recipes page and invite them to try it with what they already have.
Why Simple Fermented Vegetables Means So Much
There is a calm that comes with making Simple Fermented Vegetables that feels like a small ritual. I remember the first time I tried fermenting, standing at the counter with my little boy at my hip, both of us fascinated as the bright vegetables packed into a jar changed over days into something savory and alive. That cup of patience turned into jars that sat on our shelf like tiny winter suns, ready to cut through a heavy stew or brighten a sandwich.
This recipe has a way of holding memory. My husband often says the tang reminds him of meals his mother made when he was a child, and I see my children learn to love the sharpness the way they learned to love warm bread. For me, Simple Fermented Vegetables are more than a condiment. They are a way to keep the kitchen lively, full of small experiments that teach the whole family about time, taste, and care.
I like that fermenting asks for tiny acts repeated with love. It does not need special equipment or a long list of ingredients. A clean jar, good vegetables, and a little salt are enough to start a humble, flavorful tradition. If you are someone who keeps a shelf of staples and loves to turn them into new things, you will find joy in this gentle process and in the stories each jar will hold.
The Story Behind Our Favorite Simple Fermented Vegetables
Food connects us to the people we love. My jars of Simple Fermented Vegetables live on our Sunday table, beside a pot of soup and a loaf of bread, and they get nudged around as conversations travel from one end of the table to the other. I think of them as a bridge between seasons: crisp summer produce tamed into tangy preserves that last through the quieter months.
The first jar I made felt like an experiment, but the outcome was a surprise that became a habit. I started to notice how different spices and herbs sang with various vegetables, how dill softened the edge of cabbage and garlic made cucumbers feel more alive. The kitchen turned into a small lab of comfort, and every jar told a tiny story of the day it was made.
If you love to learn by doing, this recipe will hold your hand without fuss. It will teach patience, the slow reward of waiting, and the delight of tasting something homemade that puts a smile on your family’s faces. When you bring a jar to the table, you bring a piece of your story too.
How to Make Simple Fermented Vegetables
“Every time I stir this pot, it smells just like Sunday at home.”
Making Simple Fermented Vegetables is a gentle and steady rhythm. I begin by arranging my work in a tidy way: a clean jar, a cutting board, a sharp knife, and a small bowl for salt water if I want to dissolve it first. There is a comforting repetition in the chopping, in the pressing of vegetables into the jar, and in the small pat of the lid that tells the vegetables to go to work.
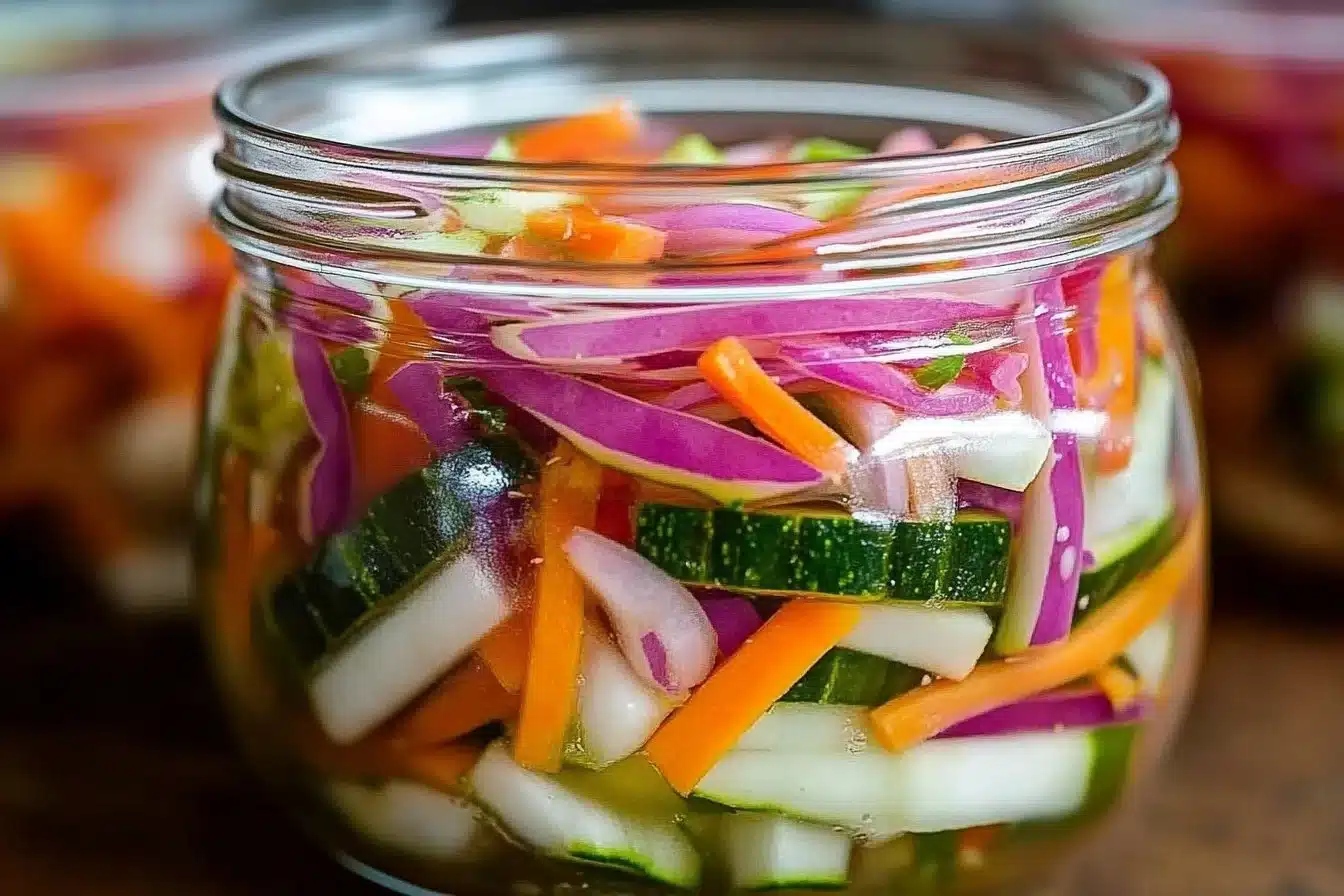
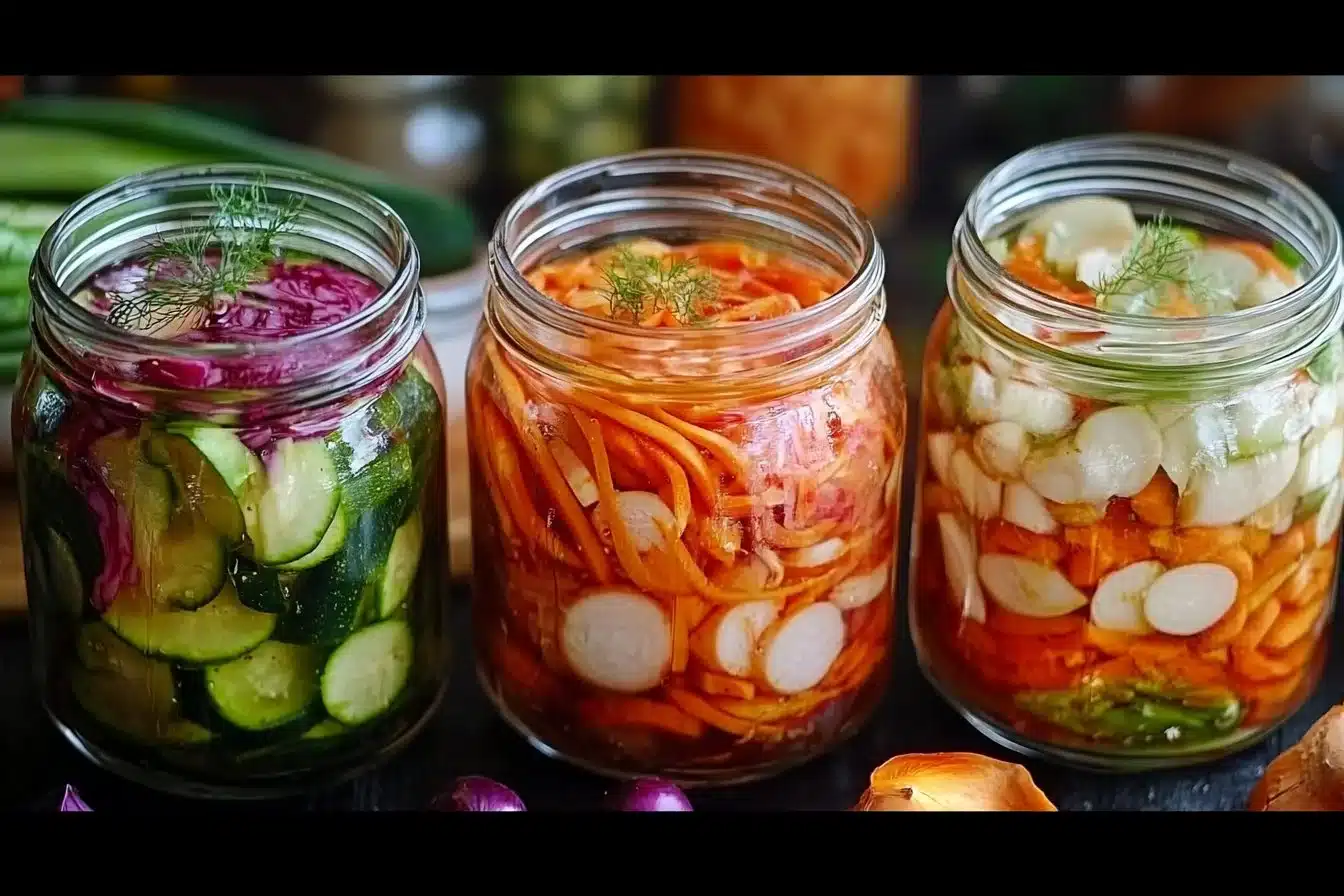
Watch the colors as you layer them. Carrots bring orange brightness, cabbage gives soft pale greens and purples, and cucumbers add a cool sheen when they go under the brine. Press each layer until the vegetables sit snug and glossy in the liquid. You will hear little pops as air is pushed out and feel the jar warm slightly as fermentation begins.
Once your jar is set, the waiting begins. You will check the jar each day like checking on a pot in the oven, noticing tiny bubbles, a change in aroma, and a softening of texture. The smell will move from sharp and salty to rounder and richer. The first taste is an adventure, a bright and tangy note that becomes deeper with each passing day.
Ingredients You’ll Need
2 cups of chopped vegetables (carrots, cucumbers, cabbage, etc.)
1 tablespoon of sea salt
Water (filtered or distilled)
Optional: spices and herbs (garlic, dill, etc.)
A little note on taste: a gentle clove of garlic adds warmth if you like a savory lift, and a sprig of dill will bring an herbaceous curl that makes sandwiches sing. If you prefer a milder tang, use smaller pieces and check the jar early. These small choices make each jar distinct, and they are the little details that turn a routine into something personal.
If you are gathering ingredients from your fridge, pick vegetables that feel firm and fresh. Soft or bruised pieces will not hold up in the brine the way crisp ones will. I keep a small basket of odds and ends to make sure nothing goes to waste, and those mismatched pieces often make the most interesting jars.
Step-by-Step Directions
Prepare your vegetables by washing and chopping them into desired sizes.
Take time to clean each piece well. Chop into sticks, rounds, or ribbons depending on how you like them and how you plan to serve them.In a clean jar, combine the chopped vegetables with sea salt.
Layer the vegetables neatly and sprinkle the salt between layers. Press down until the vegetables begin to release their juices and sit snugly in the jar.Add enough water to cover the vegetables.
Pour slowly so you do not wash away the early brine. Leave a little headspace at the top so bubbles can rise as fermentation starts.If desired, add spices or herbs for flavor.
Tuck in a garlic clove, a bay leaf, or a sprig of dill. They will perfume the brine gently and change as the vegetables ferment.Seal the jar loosely to allow gases to escape.
Use a loose lid, a cloth with a rubber band, or an airlock if you have one. This lets the CO2 leave while keeping contaminants out.Leave at room temperature for several days to ferment, checking daily.
Watch for small bubbles and a pleasant, tangy smell. Taste a bit each day until it reaches the flavor you like.Once the desired flavor is reached, refrigerate to slow the fermentation process.
Move the jar to the fridge and enjoy over the next weeks. The flavor will continue to mellow and deepen in a kind, patient way.

Bringing Simple Fermented Vegetables Together
Once a jar is ready, I love how it lifts a meal. A spoonful next to a bowl of lentil soup brightens the whole spoonful, and a pile on the side of roast meat brings welcome contrast to rich sauces. At breakfast, a small plate of fermented vegetables brings sharpness that makes eggs feel new.
We serve Simple Fermented Vegetables on a wooden board for casual dinners. The colors catch the light and invite people to reach. I like to arrange a little spread of pita, cheese, and pickles, and watch as everyone mixes and matches little bites, telling stories as they eat.
When guests come, I offer the jar with a gentle explanation of the flavors and how long I fermented it. People enjoy the chance to taste the difference that a day or two can make. The jar becomes a small conversation starter, a humble way to show care without fuss.
Serving Simple Fermented Vegetables With Family Warmth
I set the table with a few small bowls and a small spoon so everyone can take as much as they like. I encourage my children to try a tiny piece first, to notice the snap and the tang before they take more. This small ritual helps them appreciate bold flavors and makes trying new things feel safe.
Simple Fermented Vegetables also love company. They pair well with grilled fish, roasted root vegetables, and simple bowls of rice. We often add them to a sandwich for crunch and brightness, and sometimes they find their way into a salad for a lively, tangy note.
If you are hosting, put a jar on the table and tell its little story. Say when you made it and what you added. People like to know the details, and sharing the small choices you made turns a simple jar into part of your hospitality.
I keep a small notebook where I jot down what went into each jar so I can remember the ones I liked best. This makes each batch part of our family’s growing collection of flavors, and it gives me a little map of what pairs well with what.
How I Teach My Kids to Love Ferments
My children learned by watching and tasting, a small piece at a time. I show them how to press the vegetables into the jar, how to smell the brine, and how to listen for the tiny bubbles. They love the hands-on part, and they take pride in jars they helped make.
We make a simple game of it. We check the jar each morning and make small notes on how it smells and looks. When it tastes right, we celebrate with a small plate and a toast to patience. These tiny moments become part of our family rhythm and help the children understand cooking as something alive.
If you have little ones, invite them to choose an herb or a spice to add. They will feel ownership and will be more likely to try the jar at the table. These small steps build confidence and a real sense of connection to the food you make together.
Storing Simple Fermented Vegetables for Tomorrow
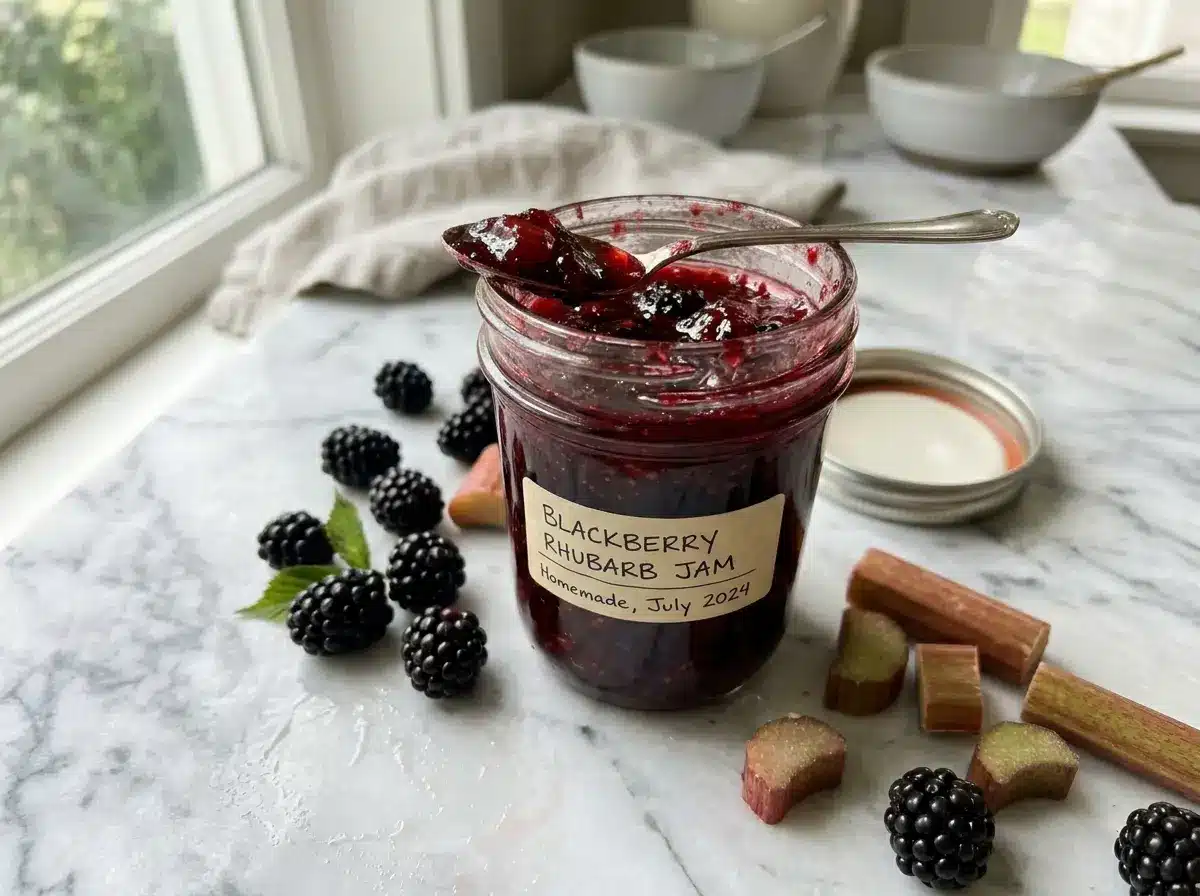
After a jar reaches the taste you love, the fridge becomes its new home. Cold slows down the fermentation and keeps the flavor from growing too sharp. I label the jar with the date and a brief note on what I added so I can track how it evolves over time.
Flavors change over weeks in the fridge. The sharpness softens and the vegetables keep a pleasant snap. I find that letting a jar rest for a week in the fridge can deepen the flavors in a quiet, satisfying way.
If you ever see something that worries you, like an off smell or odd colors, trust your senses and discard it. Fermenting is forgiving, but safety is kinder than curiosity when something seems wrong. Most of the time, the jar will be perfectly fine and ready to brighten many meals.
Simple Tips to Keep Your Ferments Happy
Keep your tools and jars clean. A clean workspace is the best way to start each jar with confidence. Wash jars and lids with hot soapy water and let them dry in a warm place before you use them.
Use fresh vegetables that feel crisp. Softer vegetables can become mushy during fermentation. If you have very soft pieces, use them quickly in a fresh salad instead of fermenting.
Taste early and taste often. The joy of fermenting is in the small discoveries. Try a thin slice after two days and note how it changes day by day. This gentle attention will teach you how the environment in your kitchen plays a role.
If your home is warm, your jars will ferment faster. If it is cool, they will take longer. Make small adjustments and learn what a given temperature does to your jars. I keep a little sticky note on the shelf with the room temperature and how long each batch took.
The Small Things That Make a Big Difference
I often tell friends that the smallest details matter. Salt quality affects the brine; using sea salt or pickling salt will give a cleaner taste than iodized table salt. Water quality matters too. If your tap water has a heavy taste, use filtered or distilled water so the vegetables shine.
A little garlic makes a jar sing, and a bay leaf gives a deep warmth that unfolds over days. Fresh herbs add brightness that changes with each bite. Think of these extras as gentle nudges that turn a simple jar into something you will want to share.
If you are nervous about experimenting, start small. Make one jar with a simple mix of cabbage and carrot and another with cucumber and dill. Compare them. Keep notes. You will soon know what your family prefers.
Bringing Simple Fermented Vegetables to the Table
Every time I carry a jar to the table, I feel like I am bringing a small gift. Family members take little tastes, comment on the bite, and sometimes argue trivial points about who likes it spicier. The jar becomes part of the conversation, a humble, shared pleasure.
I place the jar on a cloth napkin and set a small fork nearby. When we have guests, I add a label with the date and the main flavor notes. People enjoy knowing when it was made and what to expect. It makes the jar feel thoughtful and homegrown.
For casual meals, I like to set out a few small bowls with different jars. Let people try and compare. You will be surprised how a small difference in time or herb choice becomes a lively topic for the table.
How to Save the Leftovers
Leftover jars keep well in the fridge for weeks, and they often deepen in flavor. Use a clean spoon each time to avoid introducing anything into the jar. If you scoop from the jar with a fork that has been in your mouth, transfer a small portion to a bowl first.
If a jar is nearly empty, you can use what is left as a flavoring in soups or stews. The brine itself is fabulous in dressings and sauces. I often pour a spoonful into a vinaigrette to brighten a salad.
When a jar looks tired or the vegetables become too soft, compost the solids and keep the brine for cooking. It will add a salty, tangy note to beans and grains. Nothing needs to waste; fermenting is a good friend to a thrifty kitchen.
A Few Variations to Try
Try a spicy jar with sliced peppers, garlic, and a touch of crushed pepper flakes. The heat will mellow with time and give you a lively condiment for tacos and grilled meat. If you prefer aromatic jars, add coriander seeds and a slice of lemon rind for a citrus note that pairs well with fish.
If you have root vegetables, mix them for a hearty jar. Beet and carrot together make a lovely color and a sweet edge. With a touch of cumin, they become a companion to simple roasted poultry.
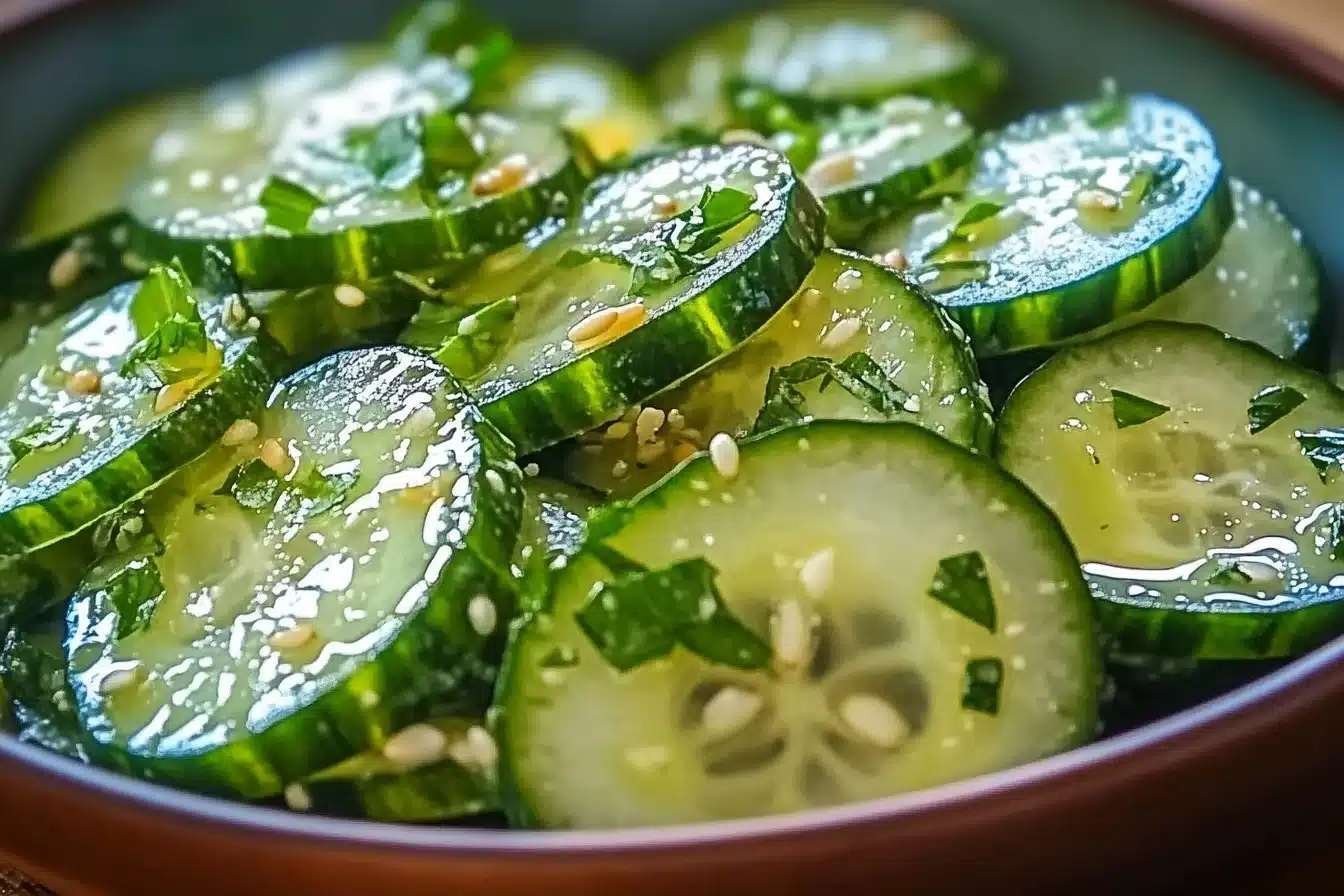
For a lighter jar, thinly slice cucumbers and onions and add fresh dill. This version eats well with cold salads and sandwiches and will be ready in a shorter window if you prefer a milder tang.
How to Trust Your Senses
Fermenting asks you to pay attention. Rely on what you can see, smell, and taste. Bubbles and a bright, tangy scent are good signs. Mold that is fuzzy and colored is a clear sign to discard.
When in doubt, taste a bit. If it smells right and tastes bright and fresh, it is likely fine. If the smell is unpleasant or the taste is off, toss it and try again. Each jar is a lesson and a chance to learn what works in your kitchen.
Remember that every home is different. What ferments quickly in one house may move slowly in another. Keep notes, be patient, and celebrate small successes.
How We Enjoy Simple Fermented Vegetables at Home
We make a habit of keeping a jar in the fridge at all times. It has become a same-day pick-me-up for weekday dinners and a small treat on busy mornings. I like tearing off a small piece of bread, adding a smear of butter, and a few pickled vegetables on top for a simple, satisfying bite.
My husband likes them with grilled meats and robust stews, and my children prefer them chopped and mixed into their lunch bowls. I enjoy them with cheese and a cup of tea on a quiet afternoon. Each of these small rituals reminds me why this simple recipe has found a place in our family life.
I share the jars often. Friends leave with a small container and a recipe card, and I enjoy hearing how they use their jars at home. This sharing is a way to carry forward the small acts of daily care that make a kitchen feel loving and alive.
Keeping It Fresh and Comforting
To keep your jars bright, always use clean utensils. Close the lid snugly after each use and work from the top down so the jar stays full of flavorful brine. If you notice the surface drying, top the jar with a bit of salted water to keep the vegetables submerged.
Labeling jars with the date and main flavor is a small habit that pays off. It helps you rotate your jars and pick the ones at their best. Keep the jars in a consistent spot in your fridge so you can find them easily when you want to add a burst of flavor to a meal.
As jars age, their flavor changes in good ways. Some become softer and more savory, while others keep their snap and bright tang. Learn to love these changes as part of the story each jar tells.
Final Notes on Making Ferments Your Own
Fermenting is forgiving and creative. Use what you have, taste as you go, and make small changes. The first few jars might surprise you, but each one will teach you something new about salt, timing, and how your family likes to eat.
If you are tempted to try new flavors, keep notes and make small batches so you can compare. Invite a friend to make a jar with you. The process becomes richer when shared, and the jars become little bundles of memory to pass along.
Keep your heart open to mistakes. Not every jar will be perfect, and that is okay. The act of making is the point. Over time, you will find the jars that feel like home and that become part of your family’s table.
Conclusion
If you want a clear guide to the basics and steps for making homemade ferments, I recommend this practical article for beginners with helpful photos and tips from a trusted source: Running to the Kitchen’s guide on how to ferment vegetables. For a tested recipe with detailed timing and a classic approach to lacto-fermented pickles, see this clear recipe and advice here: The Kitchn’s recipe for lacto-fermented pickled vegetables.
I hope this recipe brings you the same small comforts it has given my family. Keep the jars simple, taste often, and enjoy the way Simple Fermented Vegetables can make an ordinary meal feel like a celebration.
Print
Simple Fermented Vegetables
- Total Time: 5 days 15 minutes
- Yield: 4 servings 1x
- Diet: Vegan
Description
A delightful and easy recipe for making your own fermented vegetables at home. Enjoy the tangy flavor and the health benefits of fermentation.
Ingredients
- 2 cups of chopped vegetables (carrots, cucumbers, cabbage, etc.)
- 1 tablespoon of sea salt
- Water (filtered or distilled)
- Optional: spices and herbs (garlic, dill, etc.)
Instructions
- Prepare your vegetables by washing and chopping them into desired sizes.
- In a clean jar, combine the chopped vegetables with sea salt.
- Add enough water to cover the vegetables.
- If desired, add spices or herbs for flavor.
- Seal the jar loosely to allow gases to escape.
- Leave at room temperature for several days to ferment, checking daily.
- Once the desired flavor is reached, refrigerate to slow the fermentation process.
Notes
Use fresh, crisp vegetables for the best results. Taste daily to find your preferred flavor.
- Prep Time: 15 minutes
- Cook Time: 5 days
- Category: Condiment
- Method: Fermenting
- Cuisine: Various
Nutrition
- Serving Size: 1 serving
- Calories: 50
- Sugar: 2g
- Sodium: 400mg
- Fat: 0g
- Saturated Fat: 0g
- Unsaturated Fat: 0g
- Trans Fat: 0g
- Carbohydrates: 10g
- Fiber: 2g
- Protein: 1g
- Cholesterol: 0mg
Keywords: fermented vegetables, pickling, healthy recipes, vegan, probiotic, easy recipes